Last Updated: April 4, 2025
Applies to:
Shippers, Brokers, Carriers, and Partners
Common Scenario(s)/Challenge (s):
One of the more common challenges users face is the inability to effectively customize their default settings to meet their organization's operational requirements. Many users may find themselves navigating through a one-size-fits-all approach, which can lead to inefficiencies in workflow and communication. By addressing these challenges, users are empowered to create a more streamlined and effective environment. Default Settings enables users to align their standard account settings—such as required documents, text color/size, financial thresholds, and other user-specific options—with their company's operational standards and communication style.
Solution Overview:
The G2Mint TMS functions as a "tenant-based" system, enabling a hierarchical structure where a parent account can create multiple sub-accounts for Carriers and/or Clients. When defaults are established at the parent level, all newly created sub-accounts automatically inherit these default settings. This feature enhances consistency and efficiency across all accounts. Examples of the default setting capabilities include:
- Document requirements
- In order to pay a freight bill, the Carrier must have included the POD
- All quotes are set to expire within 24 hours
- Invoice Payment terms always set at Net 30
- Tolerance of $ or % for Freight bills with settings for each cost line (Linehaul, Fuel and Accessorial)
Note: Setting a "Client specific" mode will always override a Default setting
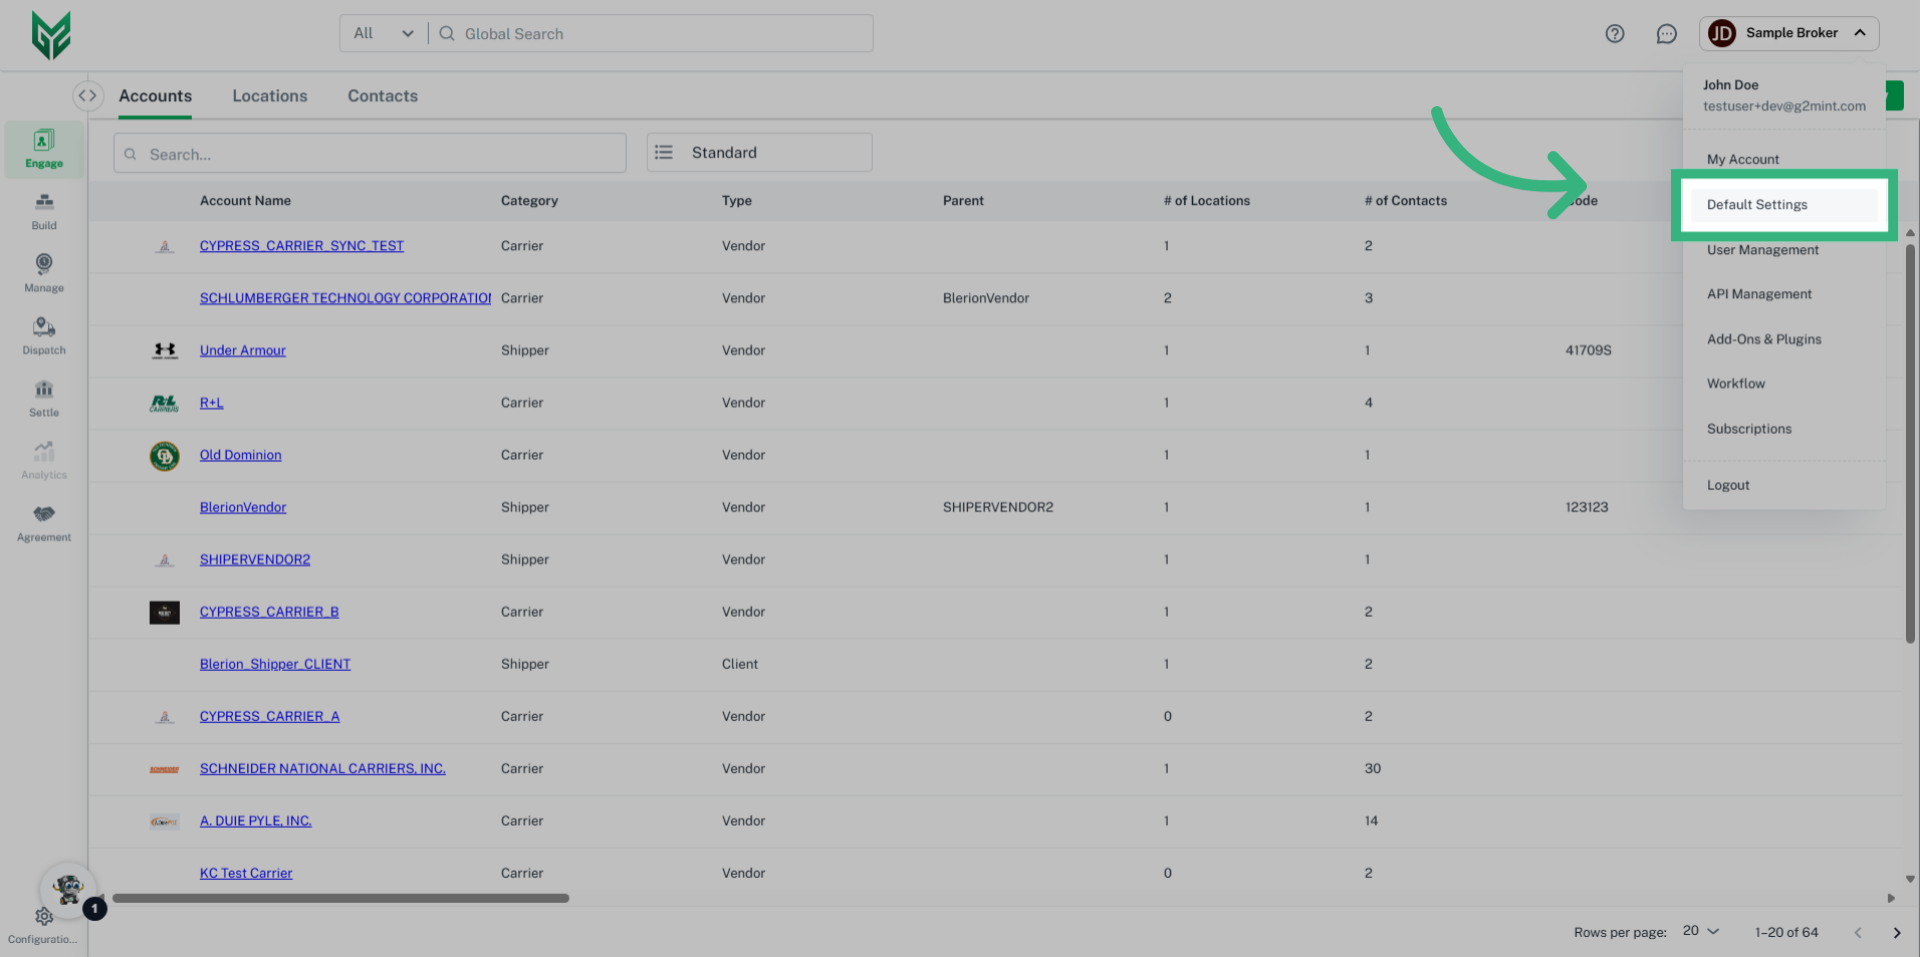
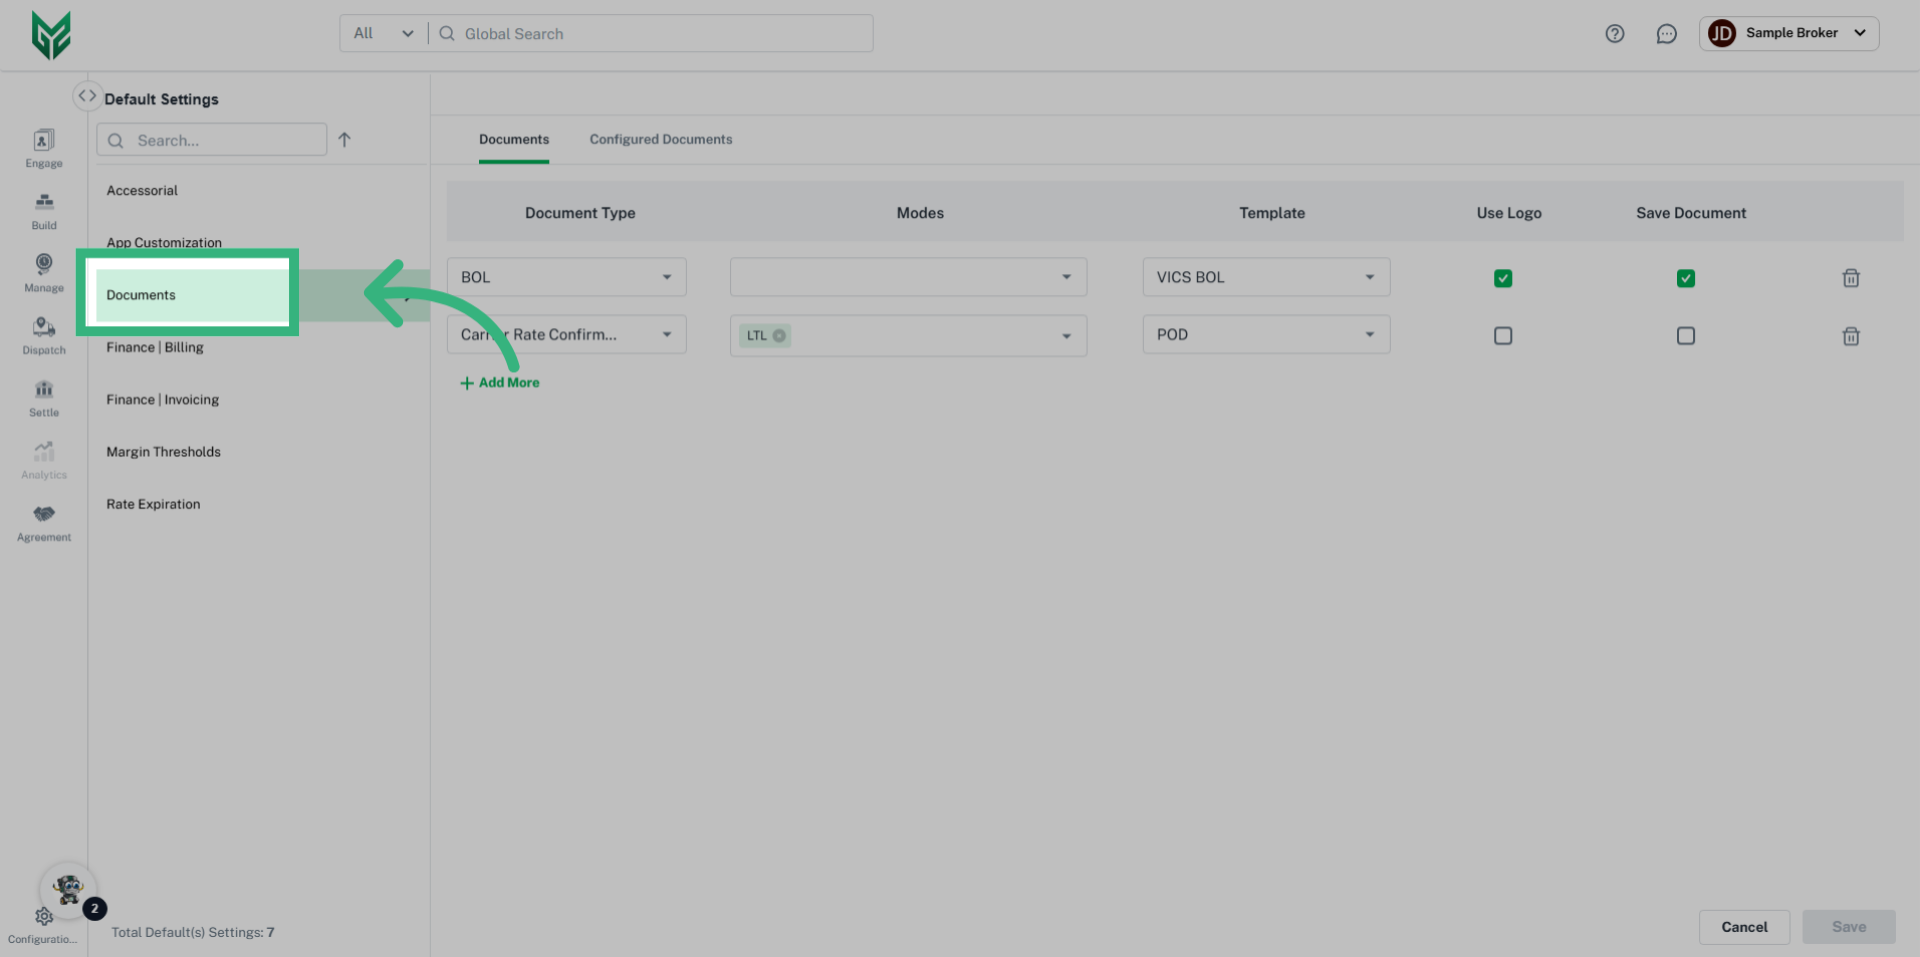
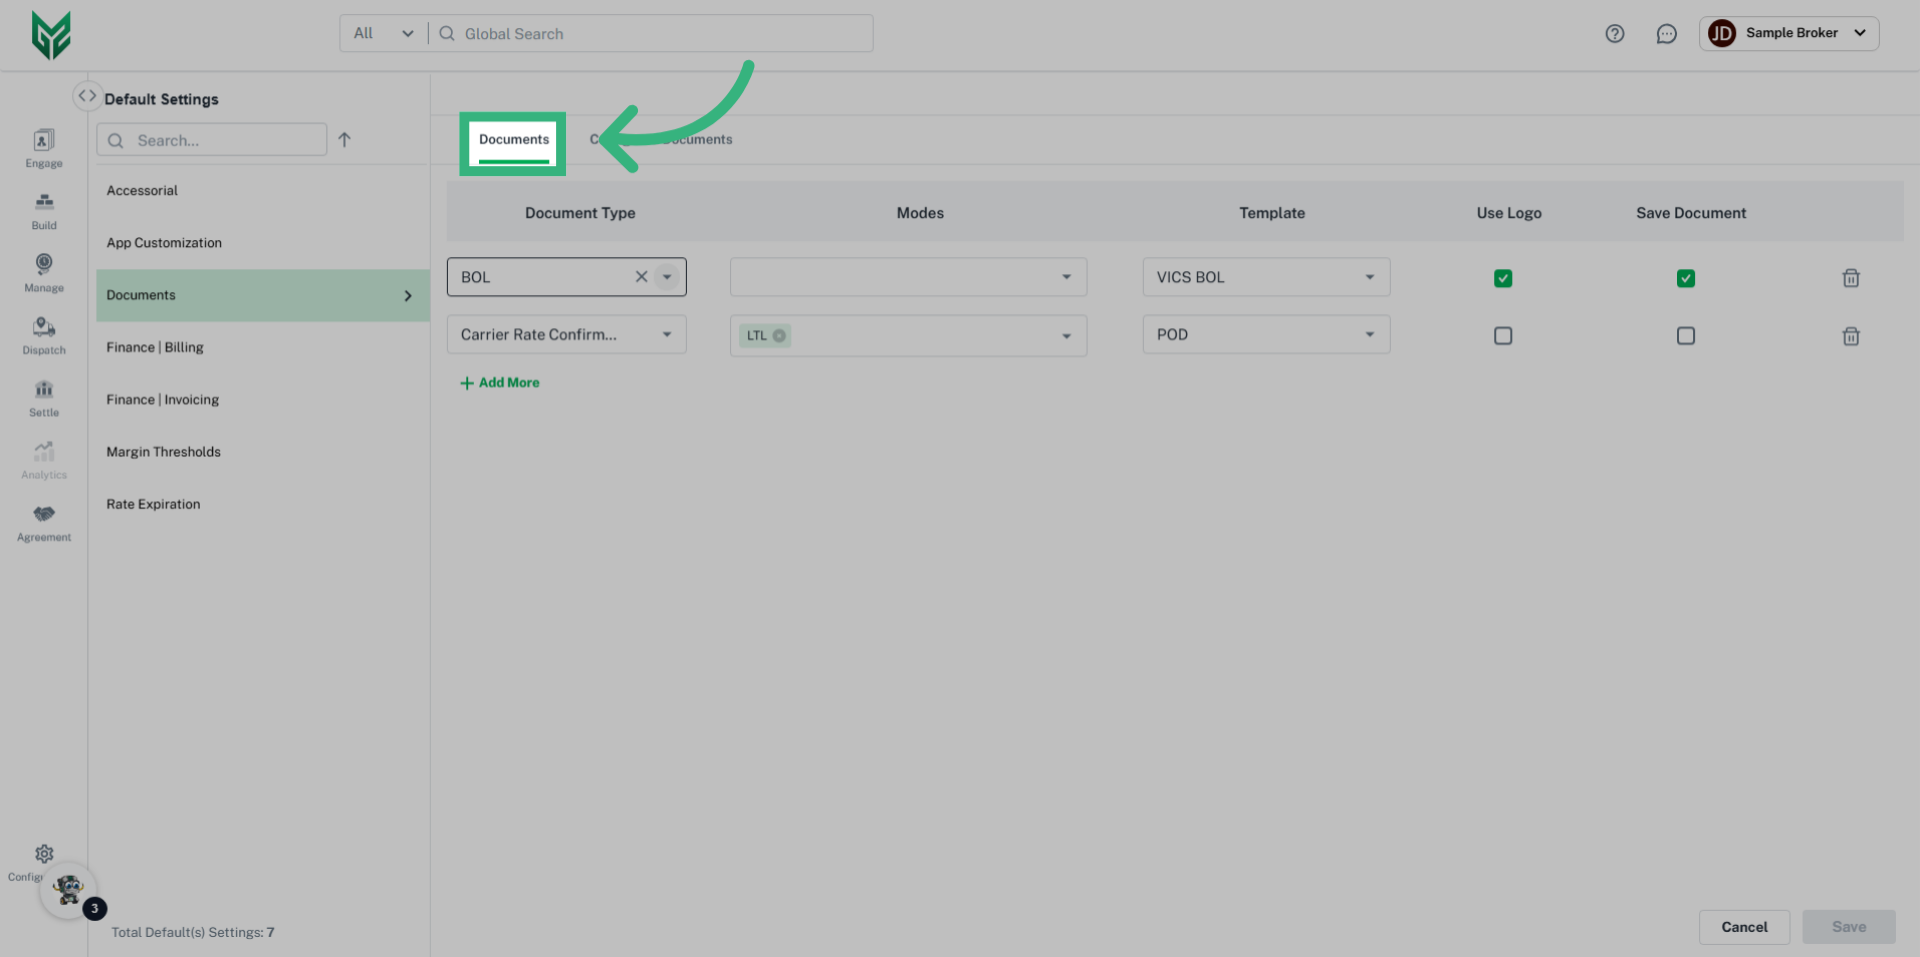
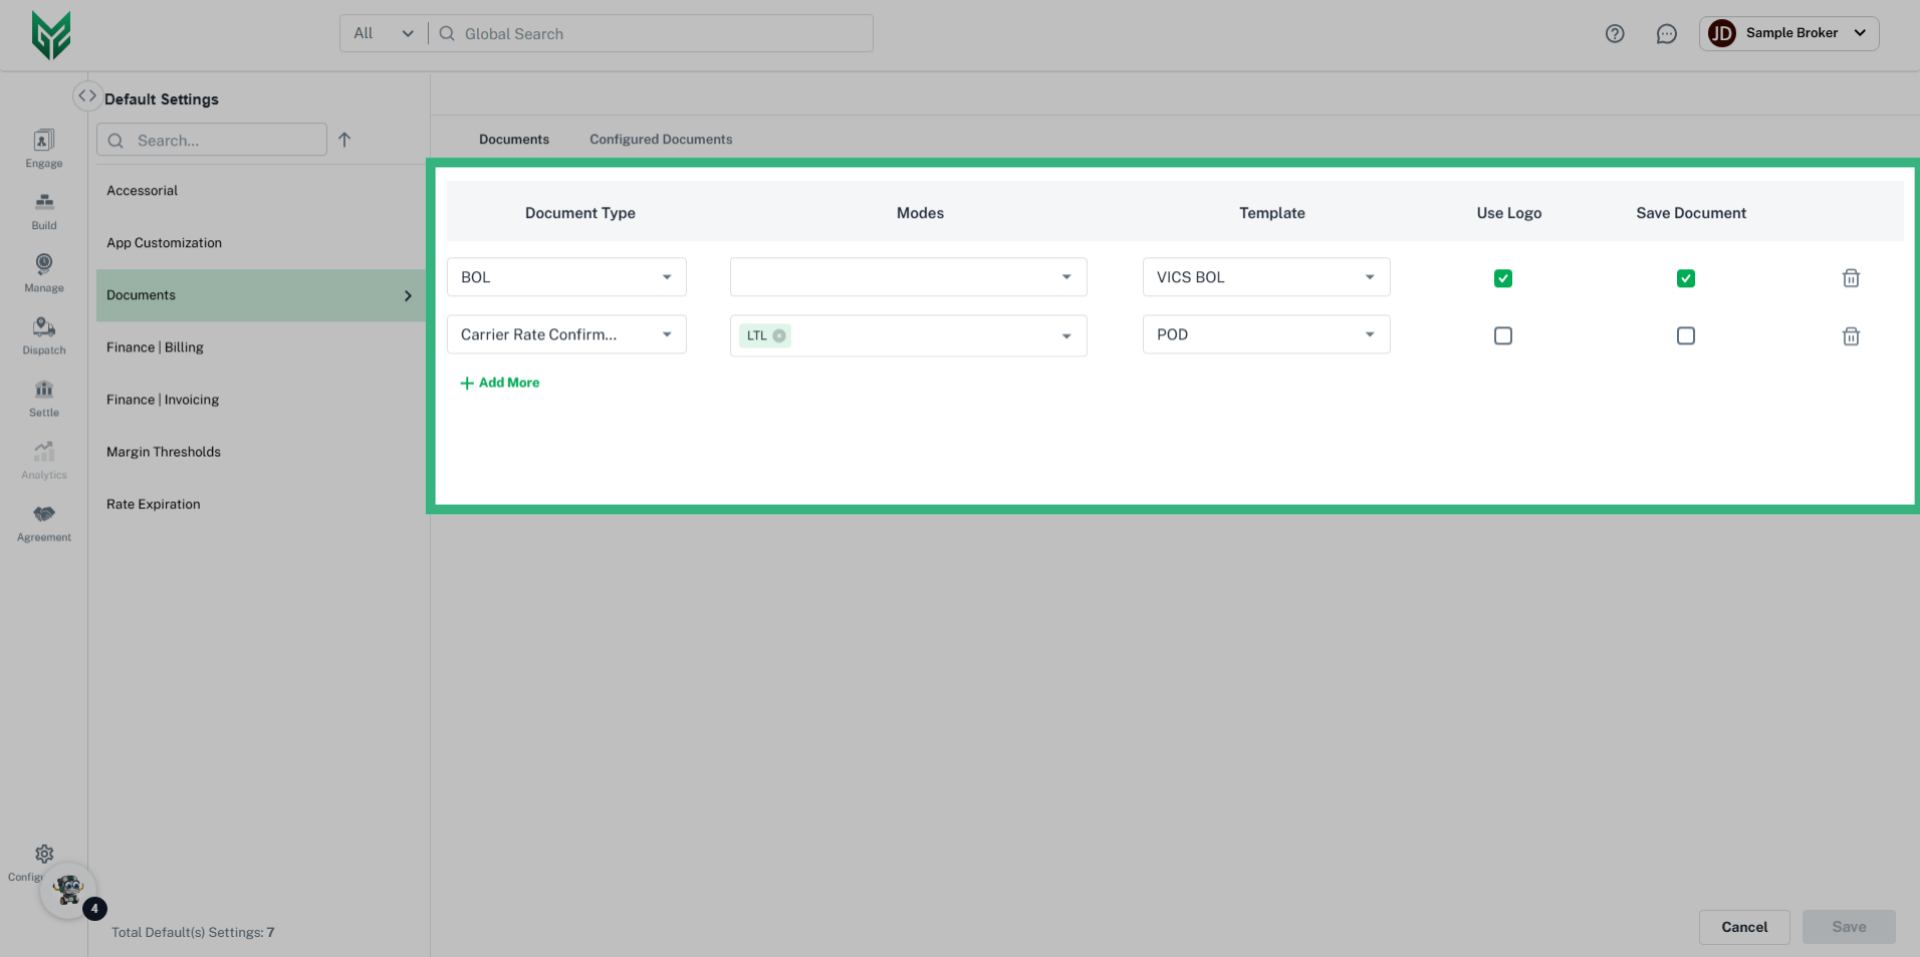
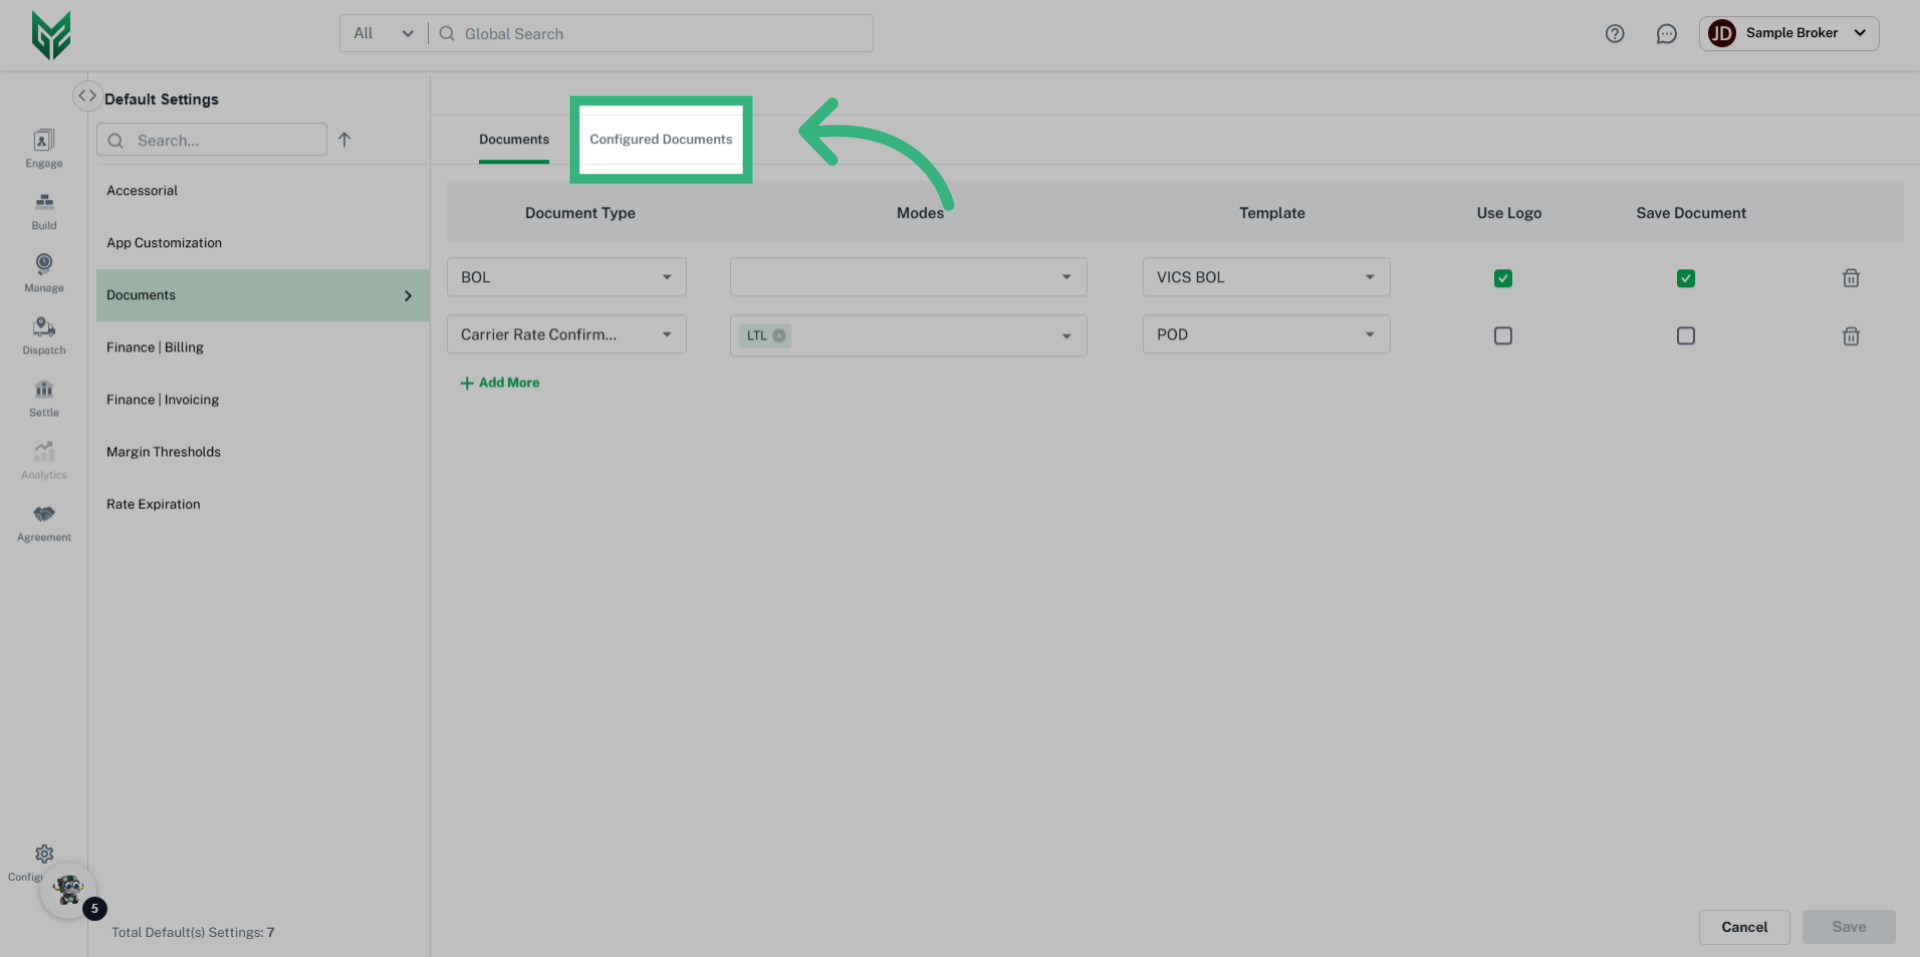
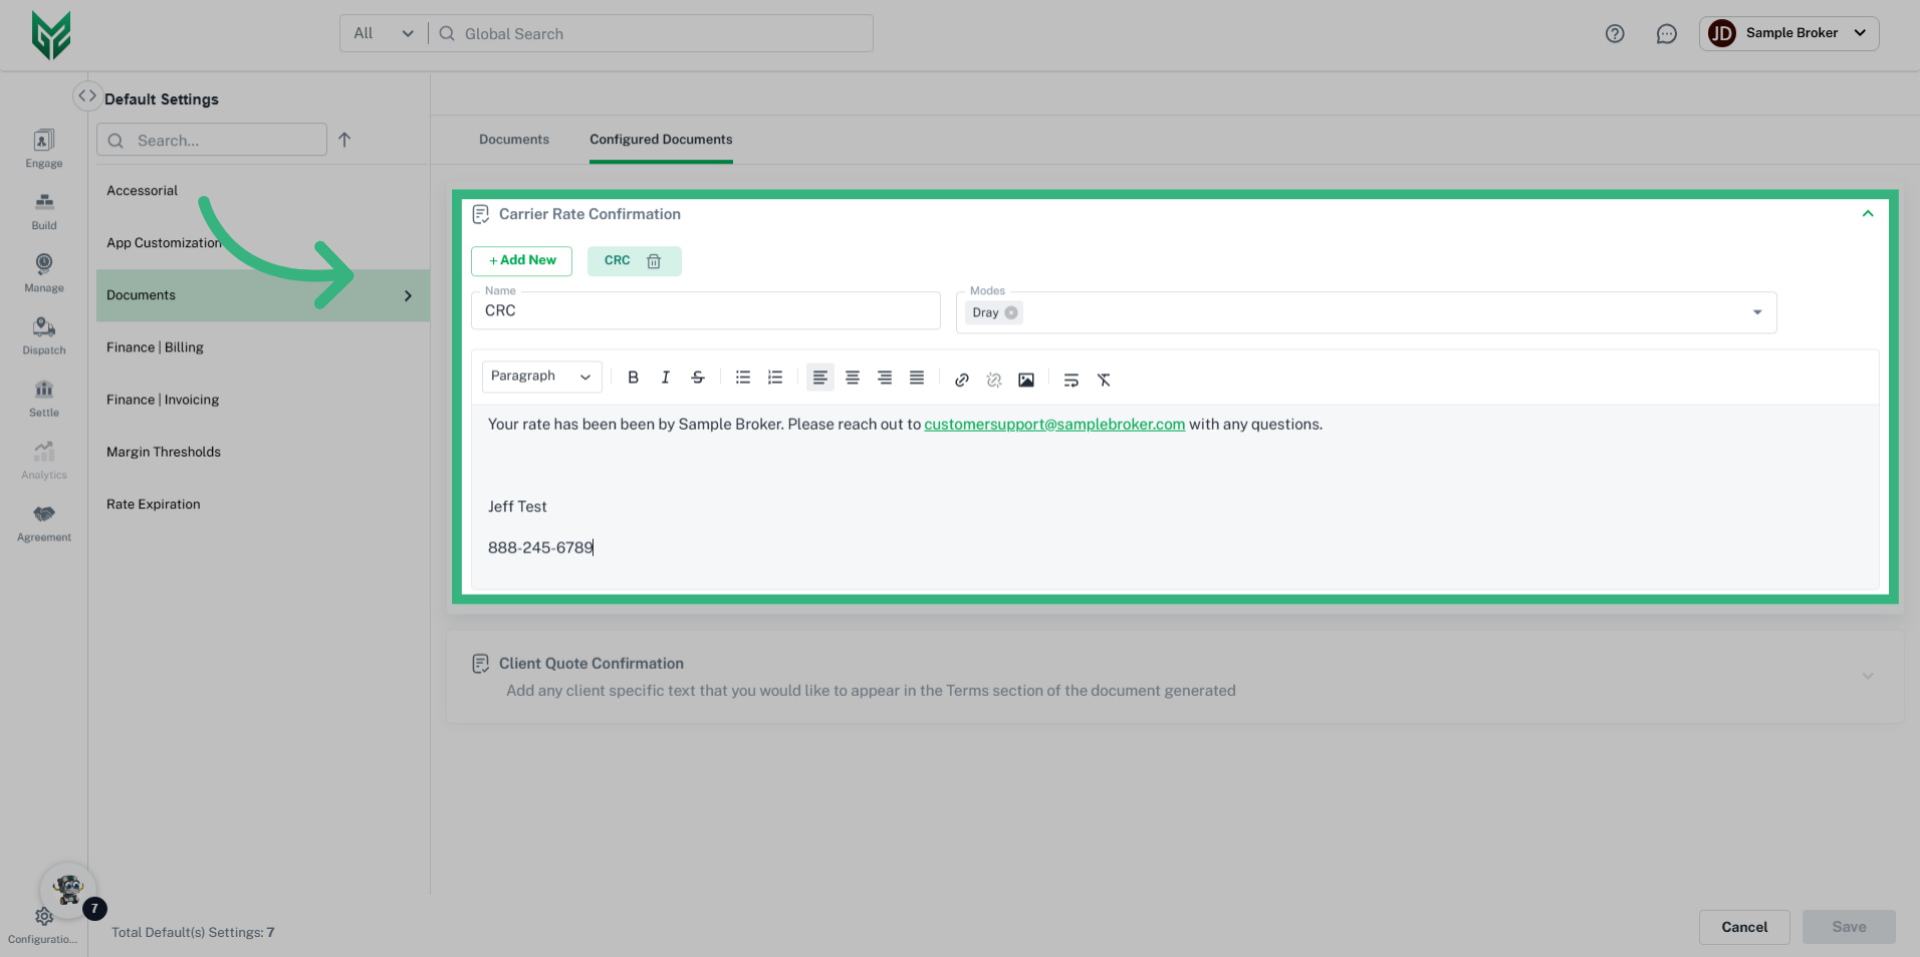
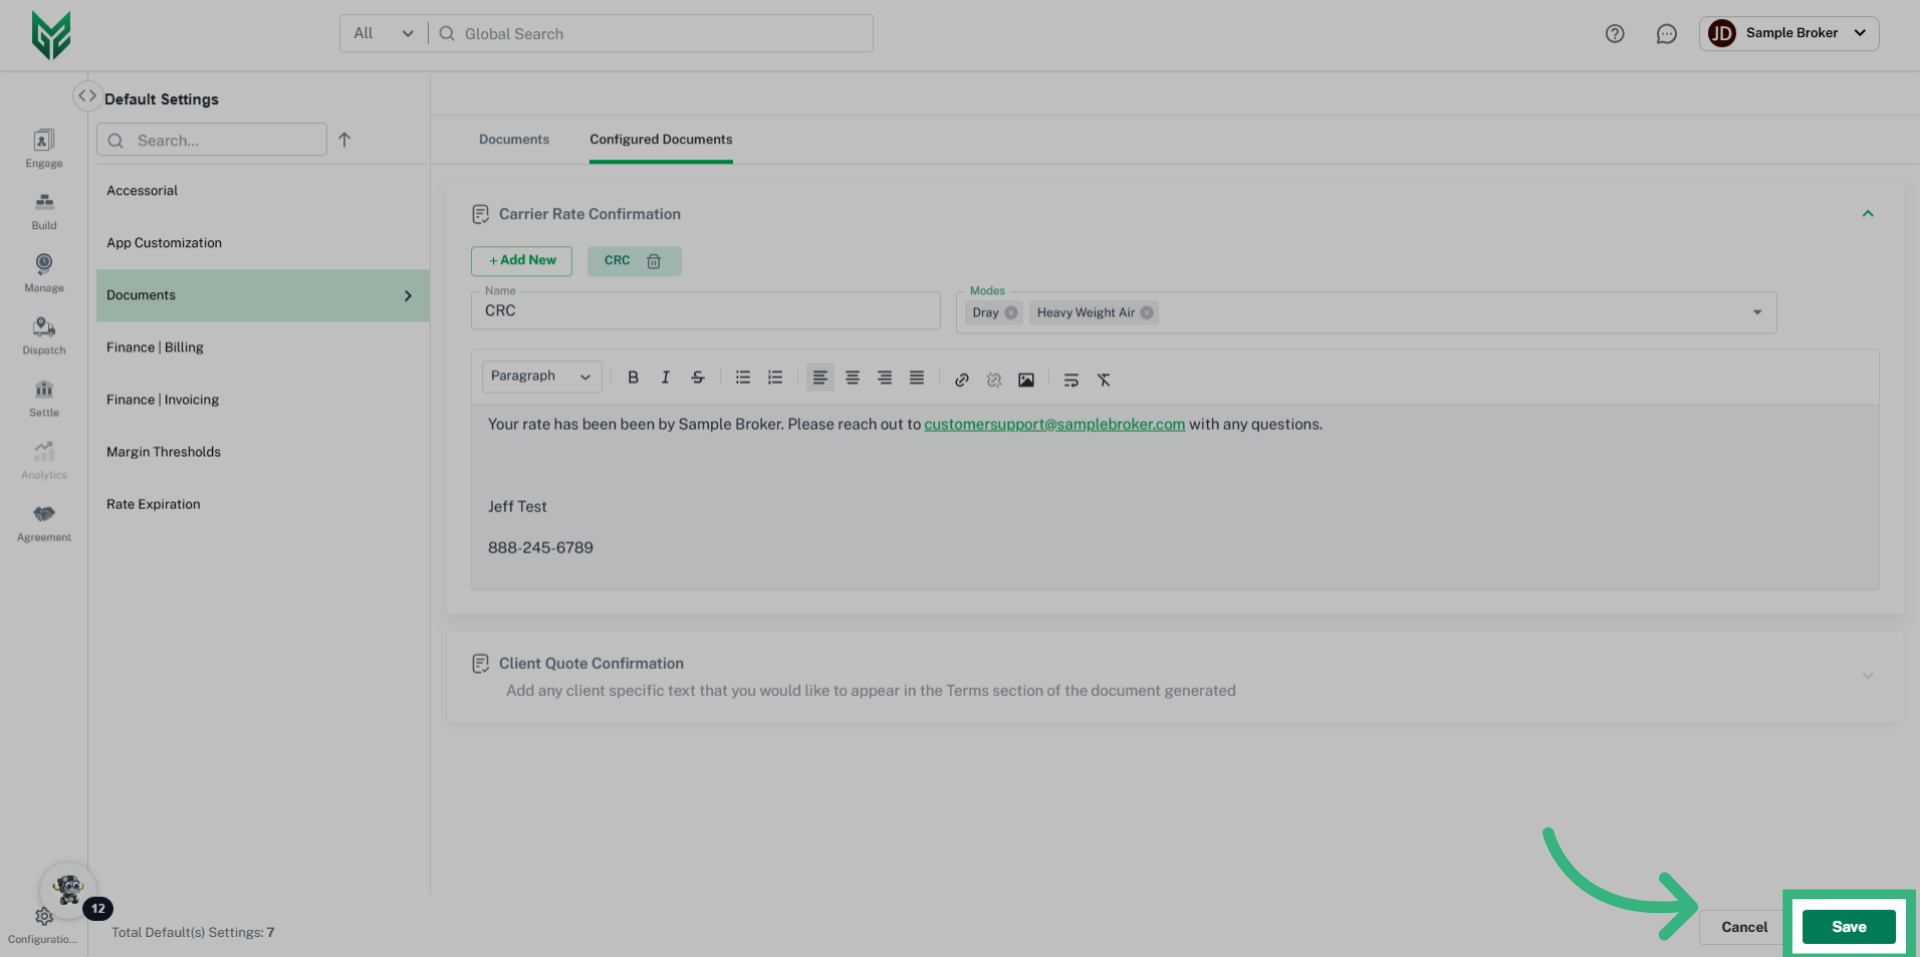
Documents allows the User to set a standard/default document type (BOL, Quote/ Rate Confirmation, Remittance, Statement) for each Mode, determine desired template (Proof of Delivery or VICs), as well as create a standard message for Quote and Rate Confirmation emails.
How to Customize Documents: