Last Updated: May 1, 2025
Applies to:
Shippers, Brokers, Carriers, and Partners
Common Scenarios/Challenges:
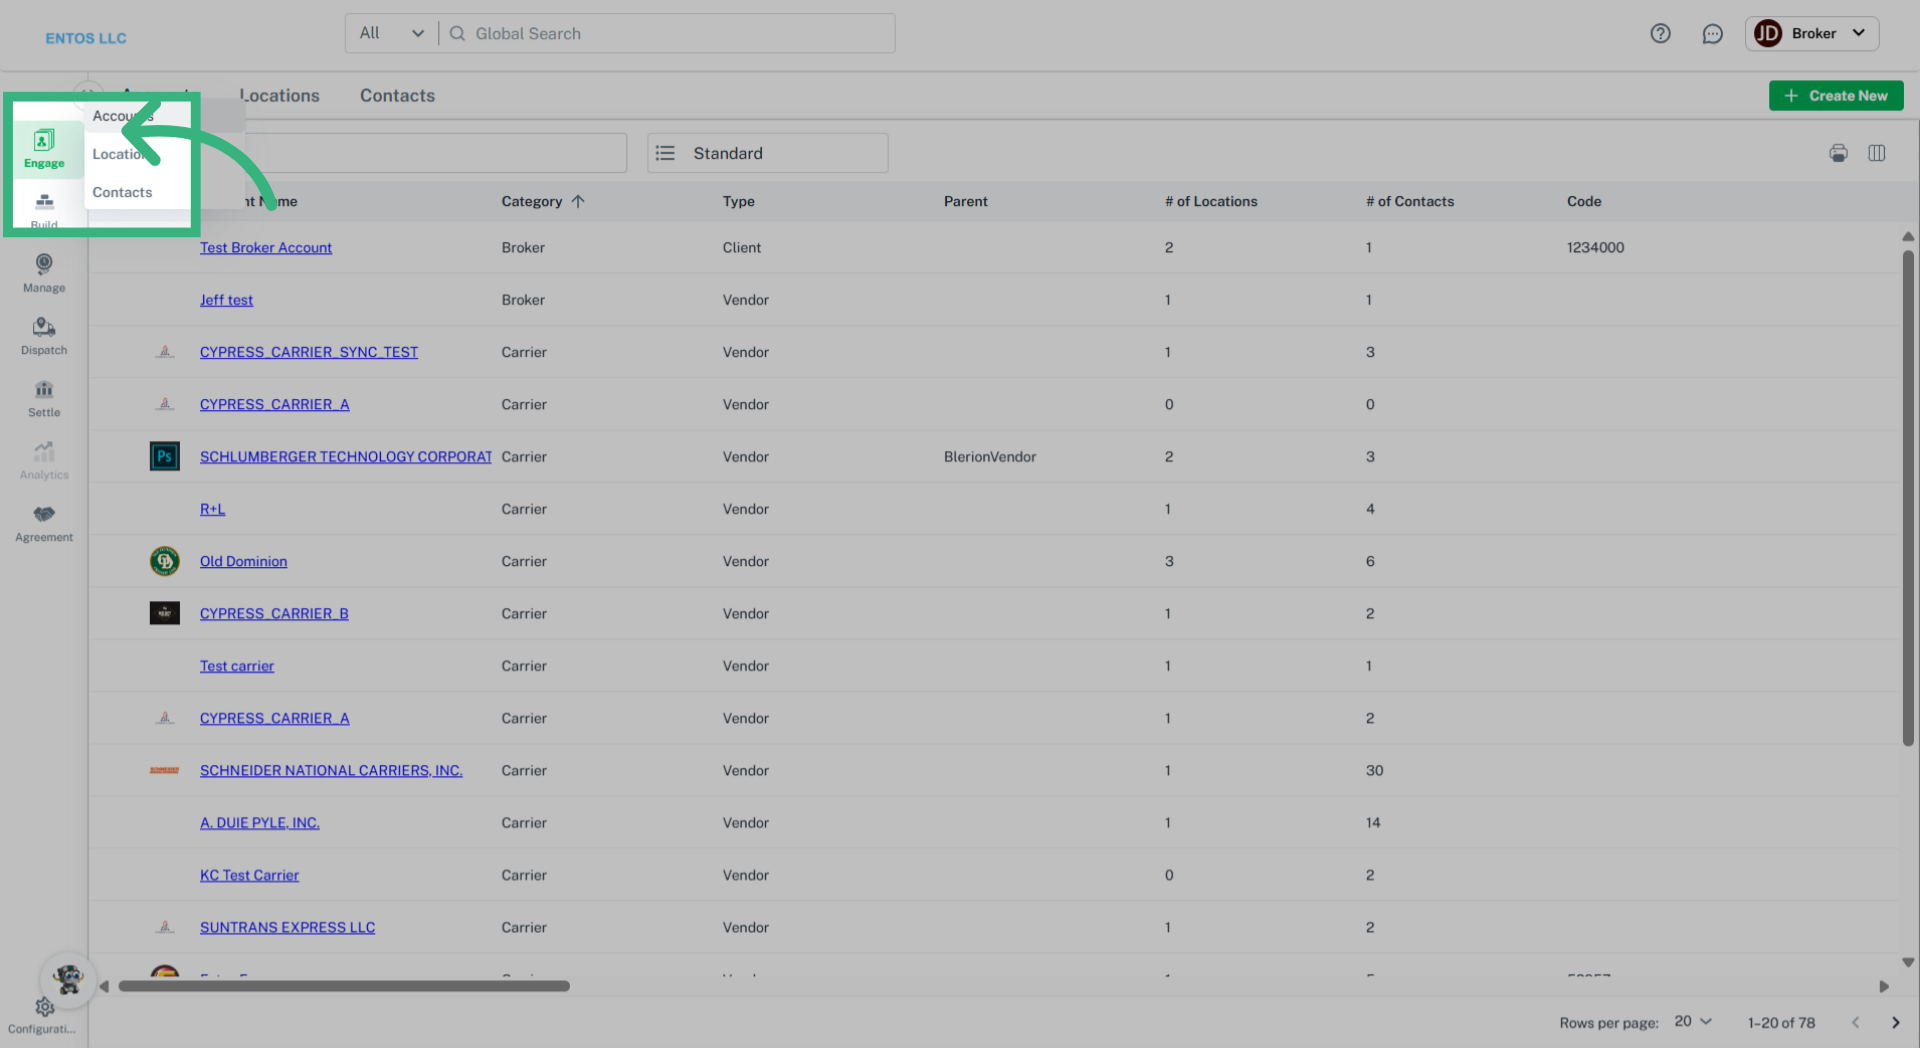
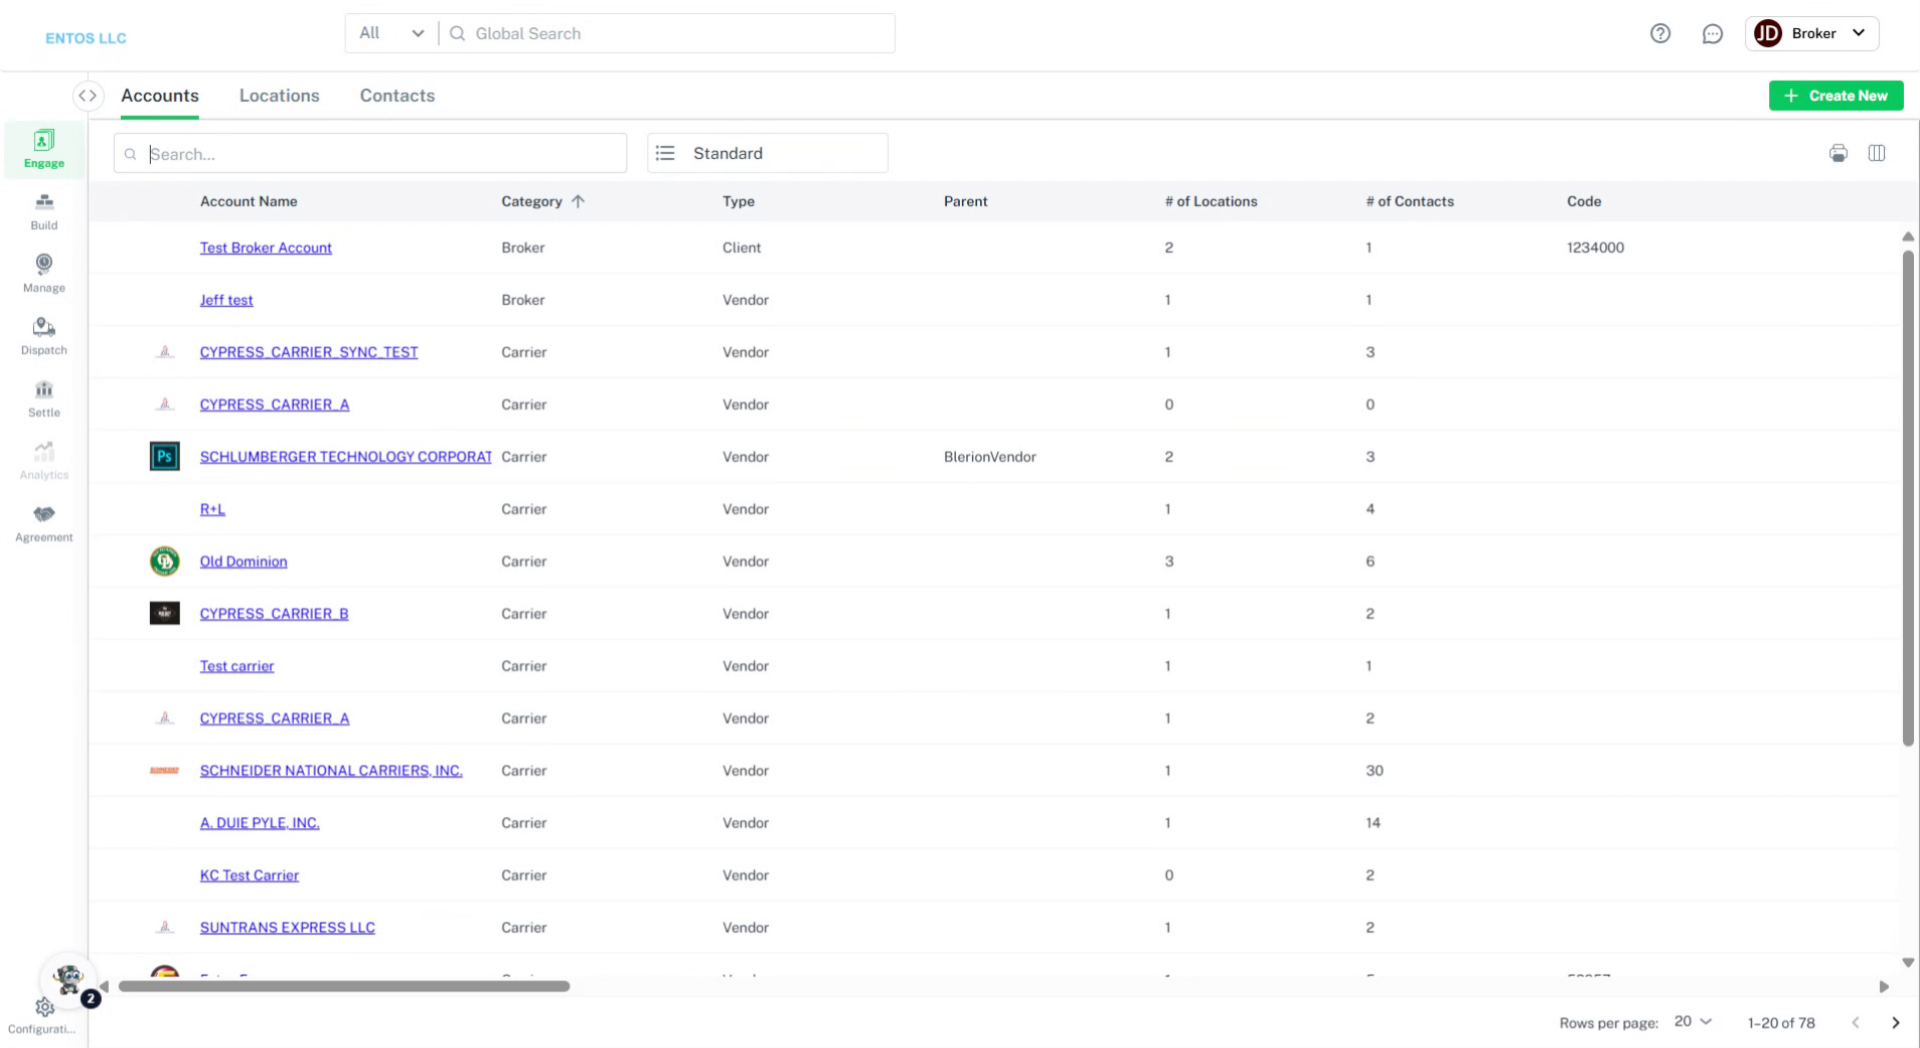
The Engage Account feature enables users to establish an entity within the Licensed Account of the TMS, representing an organization or company that will engage in various transactions within the system, such as shipments and settlements.
Engage Accounts can take on several personas, including:
- Broker
- Shipper
- Carrier
Each type of Engage Account is responsible for managing its specific attributes, including profiles, credit ratings, compliance, and capabilities. Furthermore, every Engage Account can have unique preferences and system settings tailored to its needs. In the G2M TMS, it is mandatory for each Engage Account to have at least one Location (typically designated as a Billing location) and one Contact (which includes a name and email address).
Solution Overview:
Once an Engage Account is created, all relevant information linked to that account will automatically populate in the application wherever applicable.
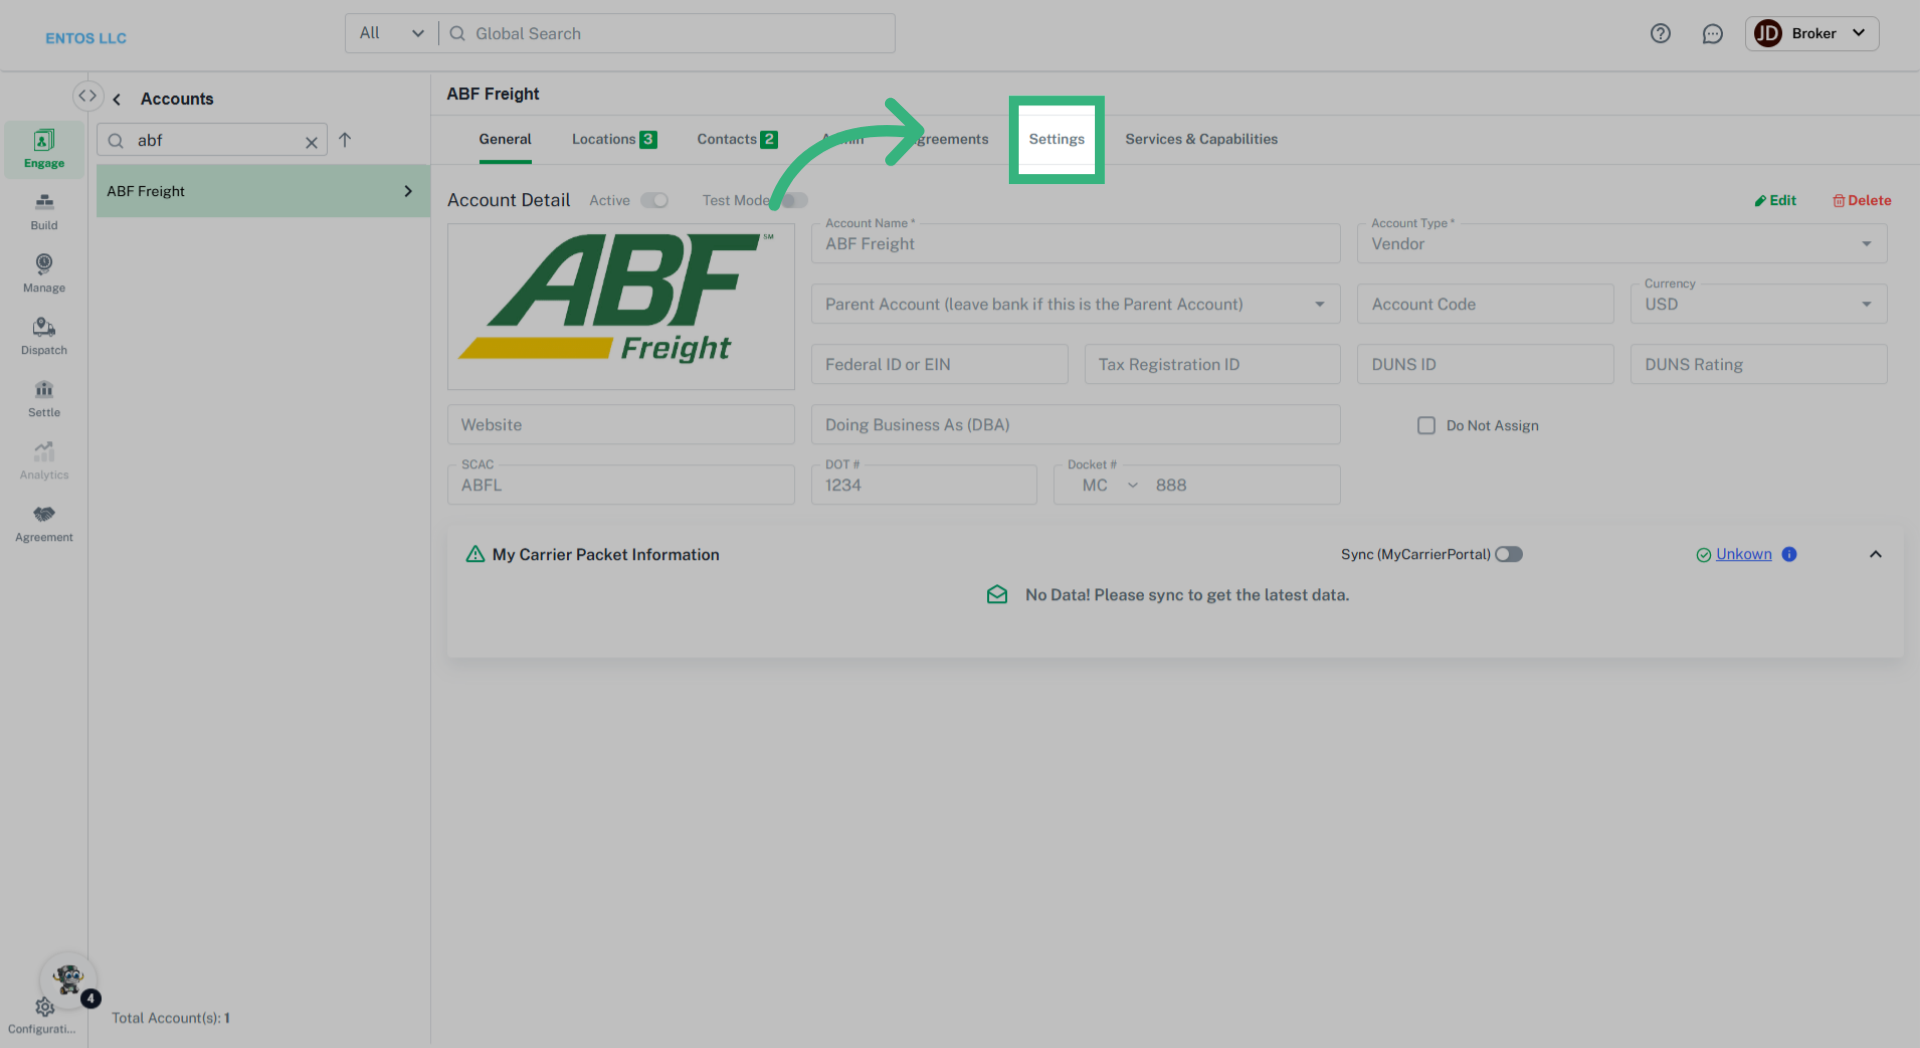
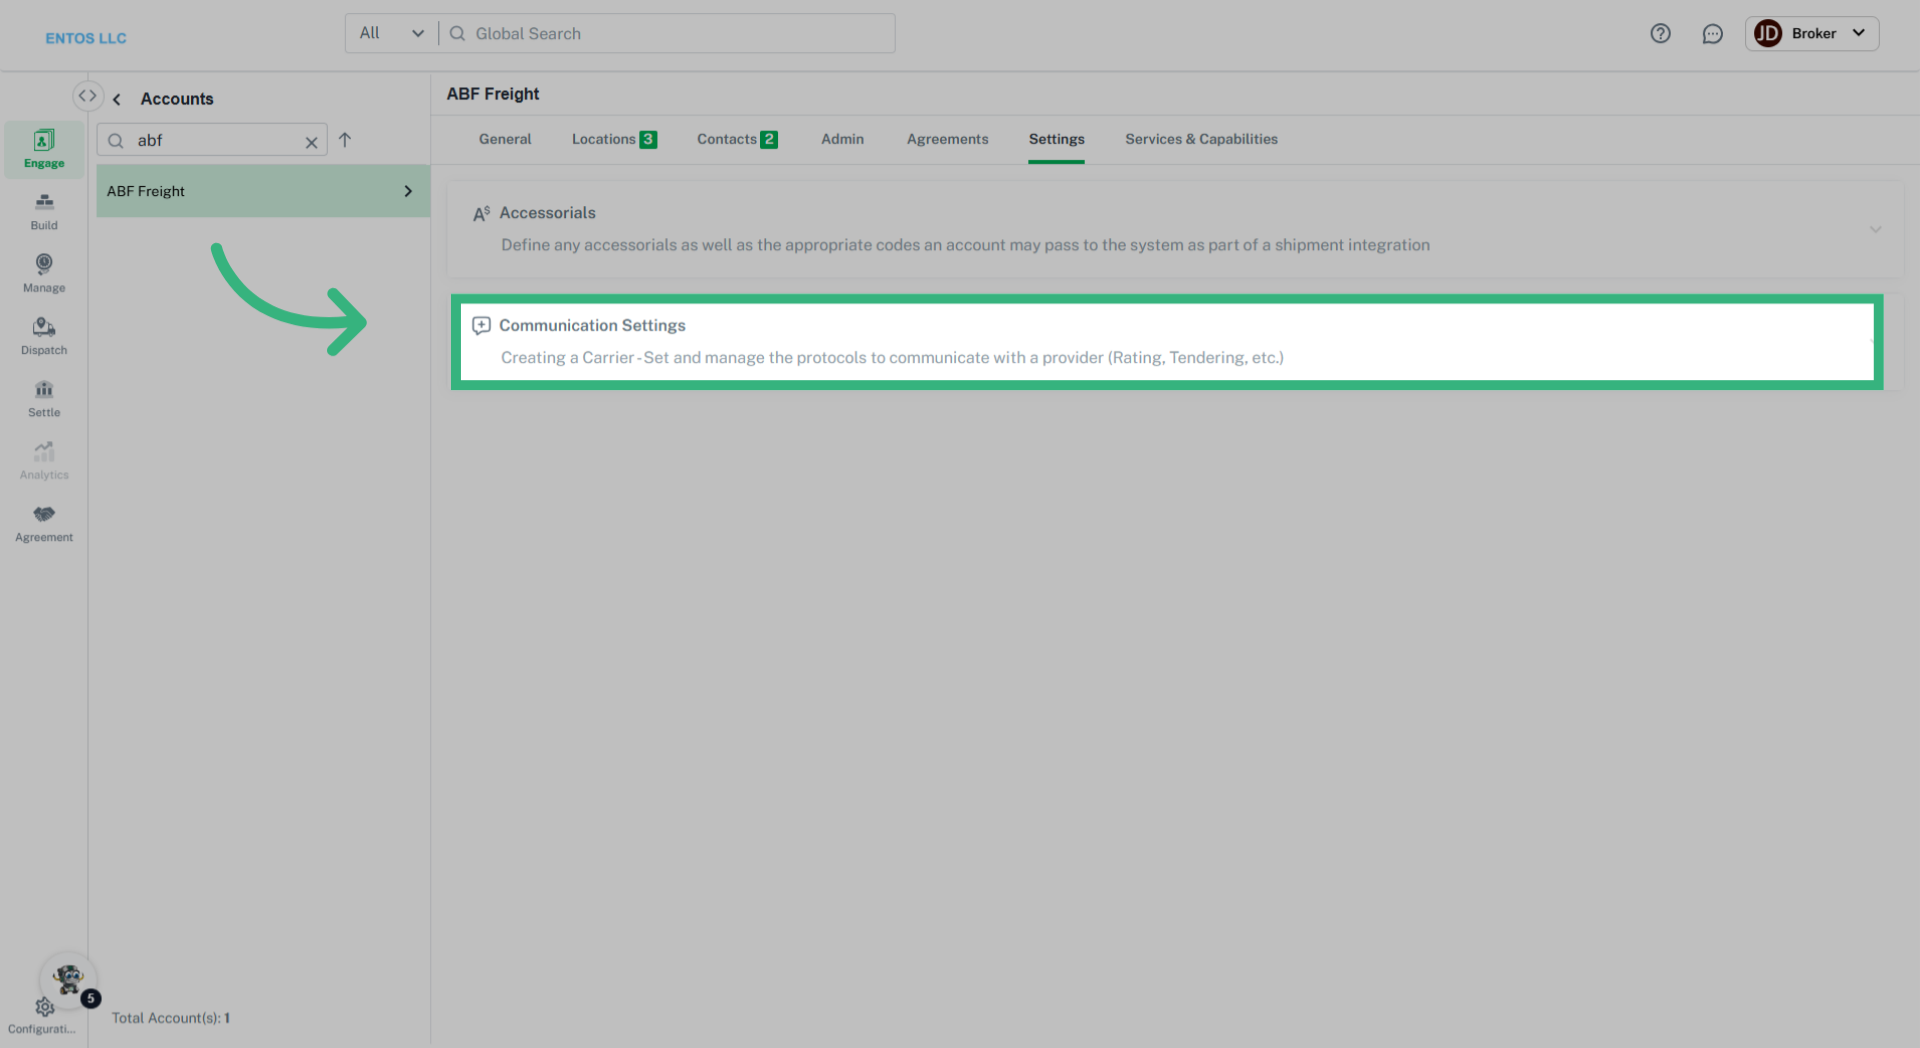
Settings in Engage allows the setup of key Account components, like:
- Documents : Select document templates that can be utilized with this account throughout the application, like Invoices, BOL and POD. Selecting Save Document allows the generated POD or BOL to be saved in a Documents tab when the Shipment is awarded. If the tab is not selected, Documents must be downloaded through the Print button, then uploaded.
- Accessorials (Carrier and Shipper Client Accounts only): Assign the appropriate accessorial codes that an account may pass to the system during shipment integration. Accessorial Agreements are tied to your customer’s (Shipper & Carrier) Freight Agreements and should be considered when calculating freight costs.
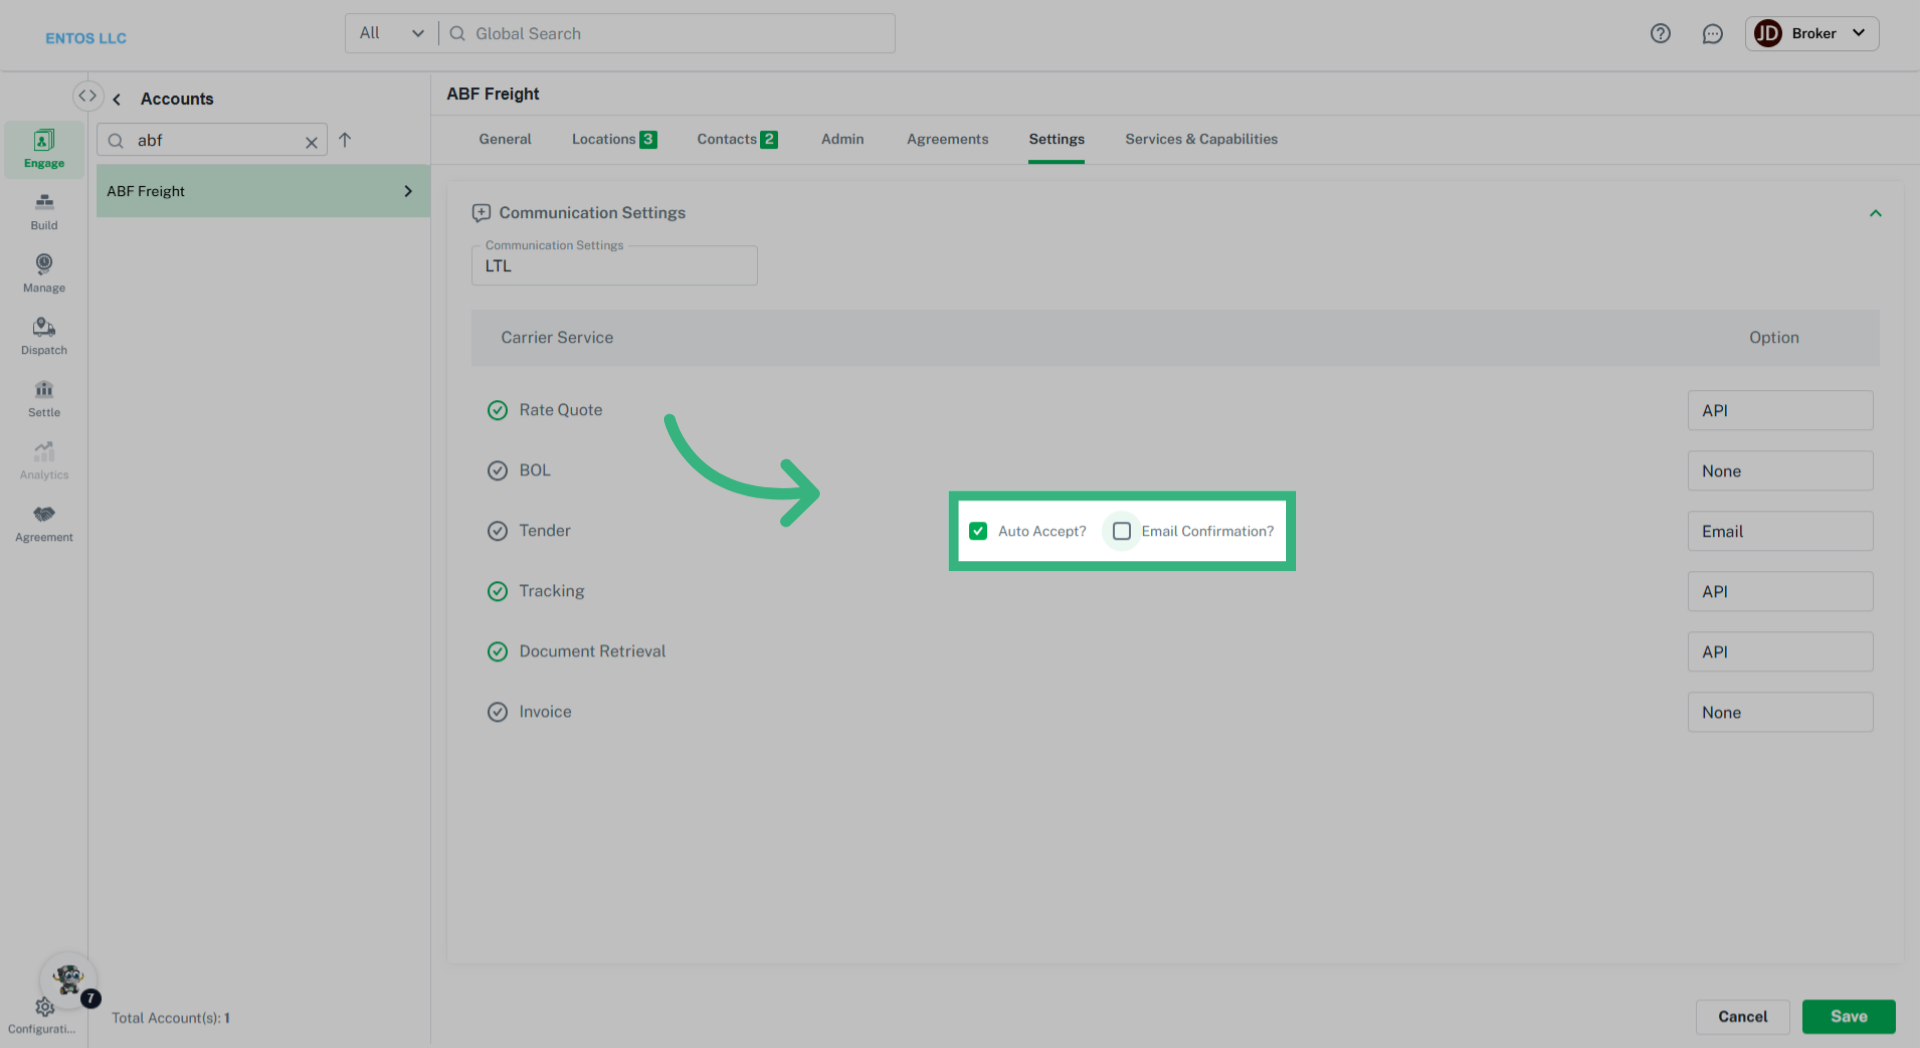
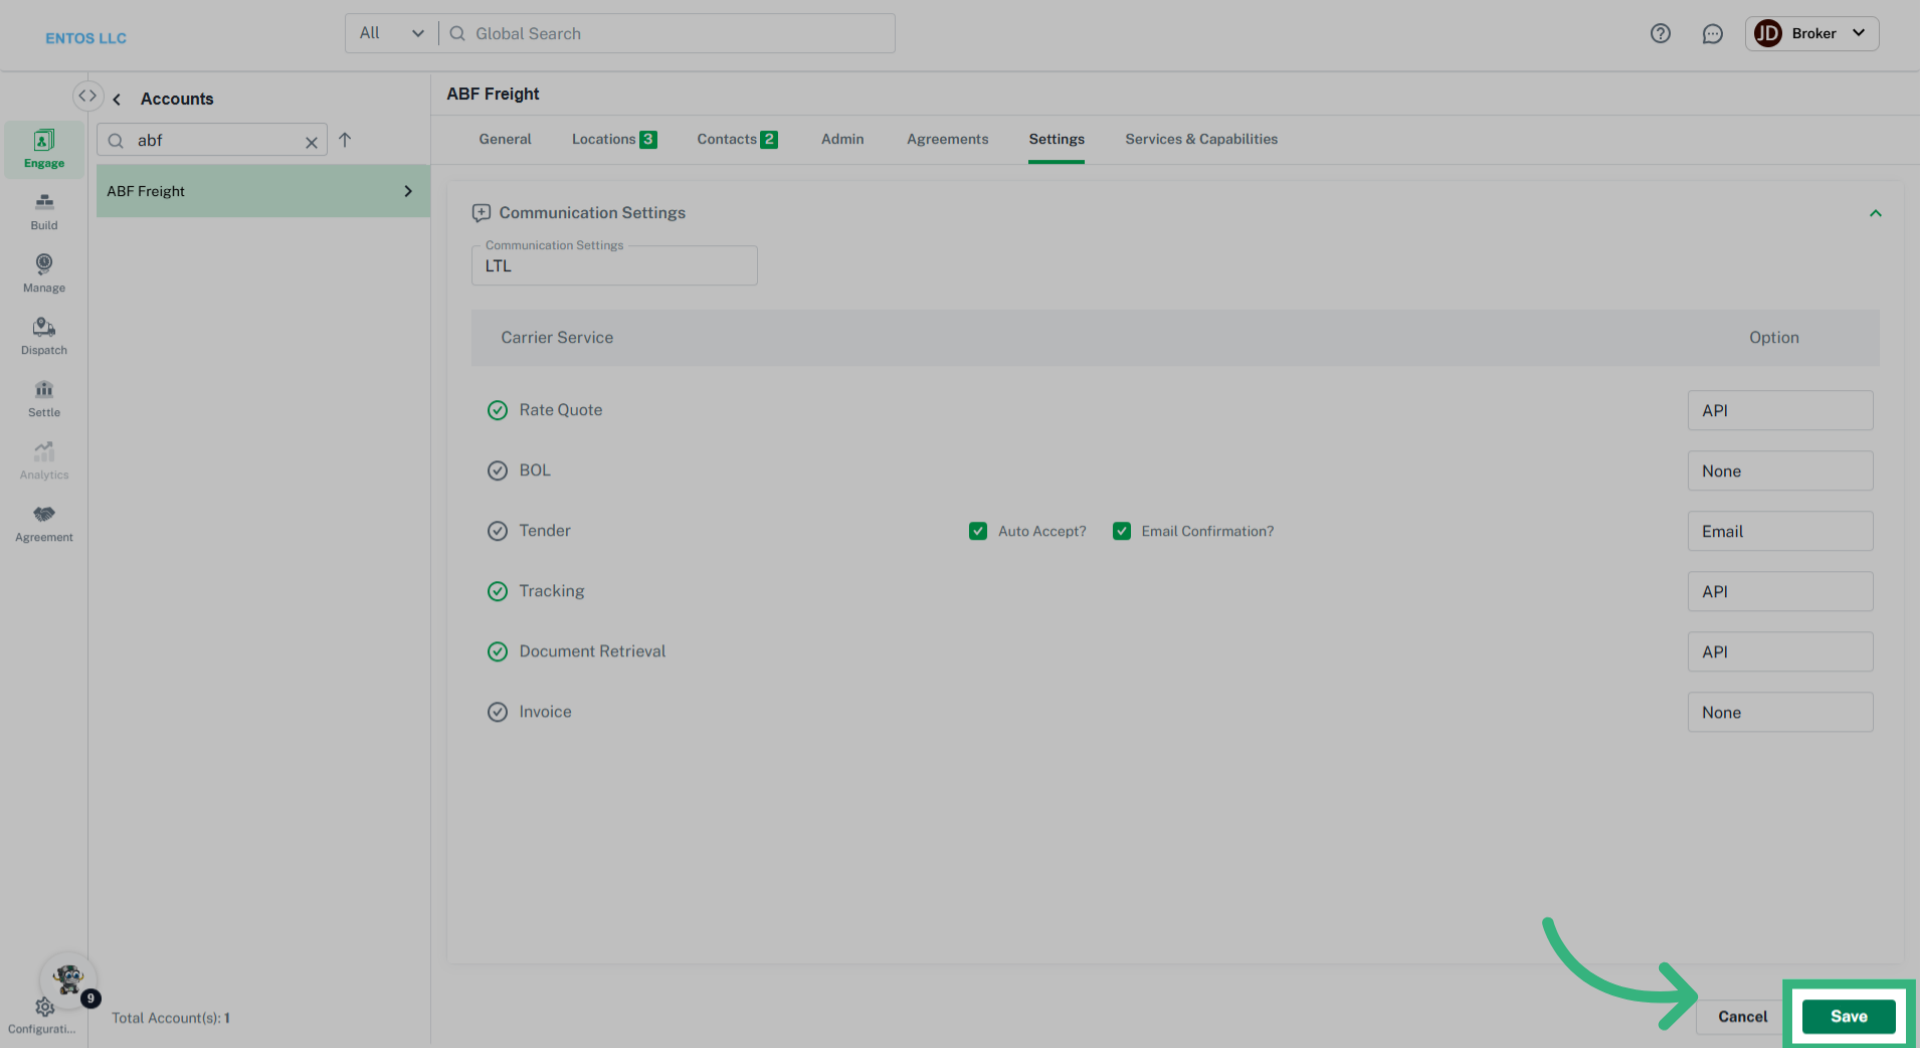
- Communication Settings (Carrier Accounts only): Set and manage your carrier account communication preferences for interacting with providers. These methods are essential as carriers interactions may vary, i.e., via API, email or scheduled pickups. Create mode specific Carrier settings (email, mail, auto accept) for services like:
-
- Rate Quote
- BOL
- Tender (Utilize checkboxes to Auto Accept an Tender Request, or receive an email confirmation when accepted)
- Tracking
- Document Retrieval
- Invoicing
