Last Updated: April 15, 2025
Applies to:
Shippers, Brokers, Carriers, and Partners
Common Scenarios/Challenges:
The Engage Account feature enables users to establish an entity within the Licensed Account of the TMS, representing an organization or company that will engage in various transactions within the system, such as shipments and settlements.
Engage Accounts can take on several personas, including:
- Broker
- Shipper
- Carrier
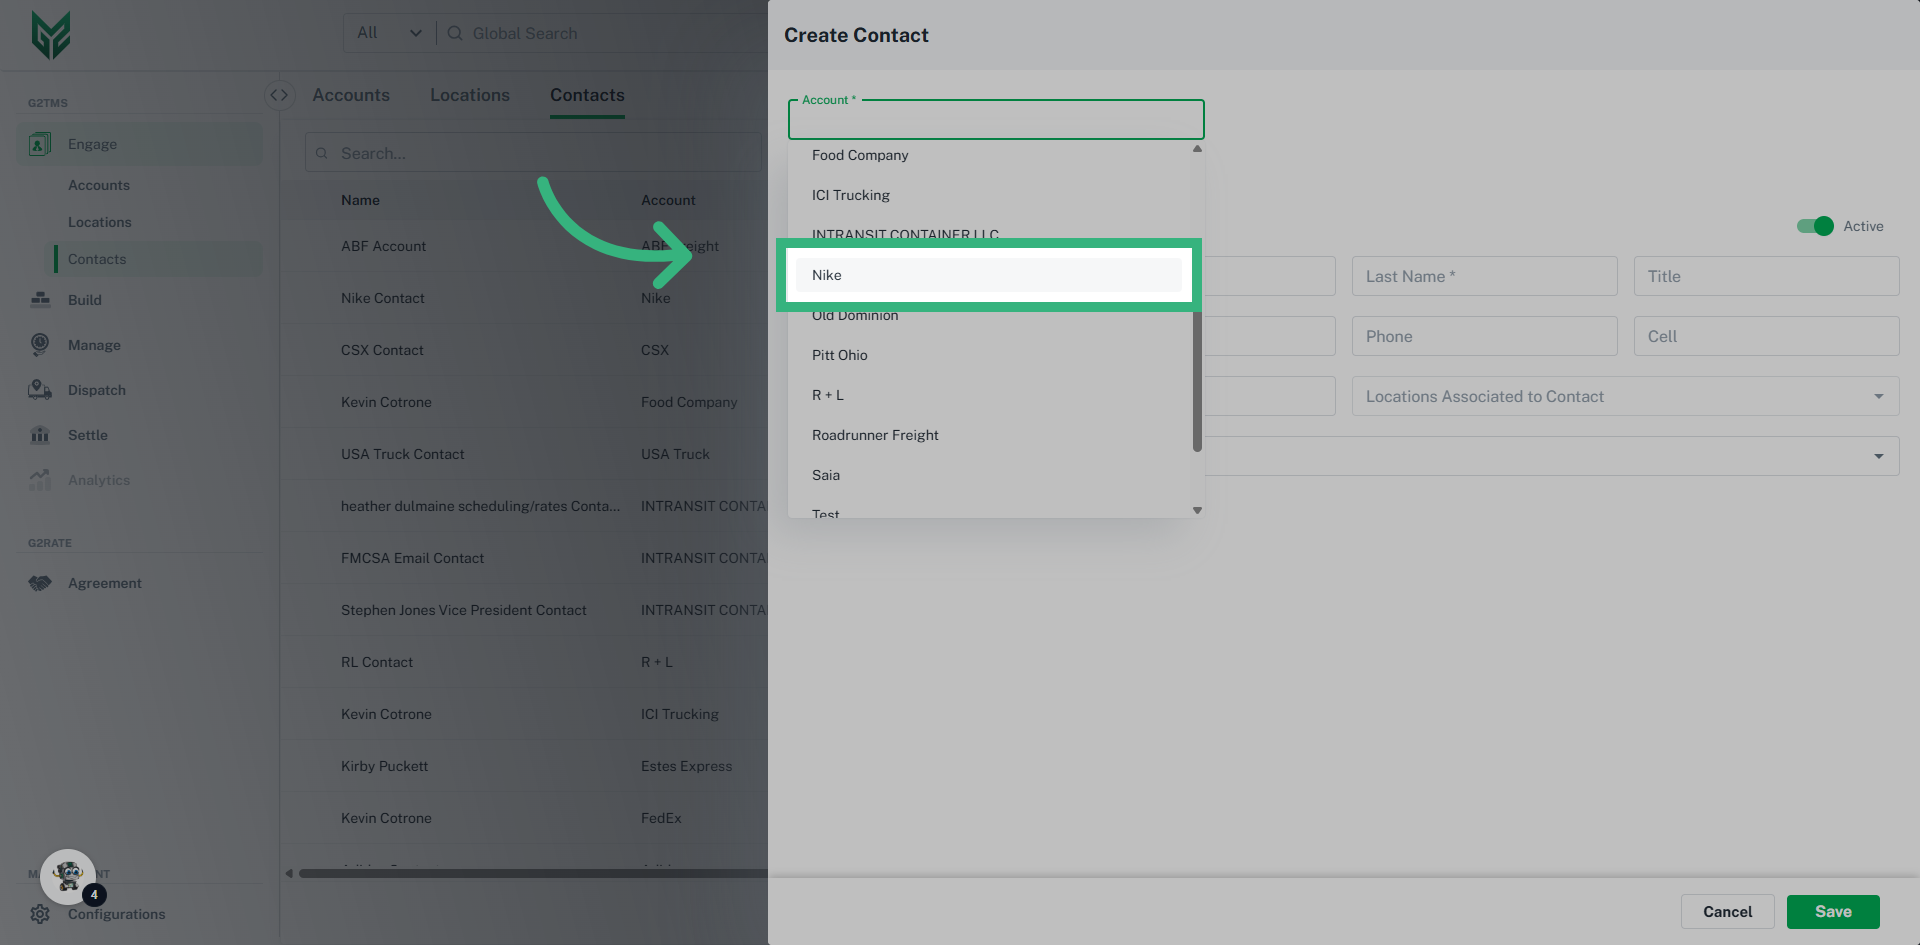
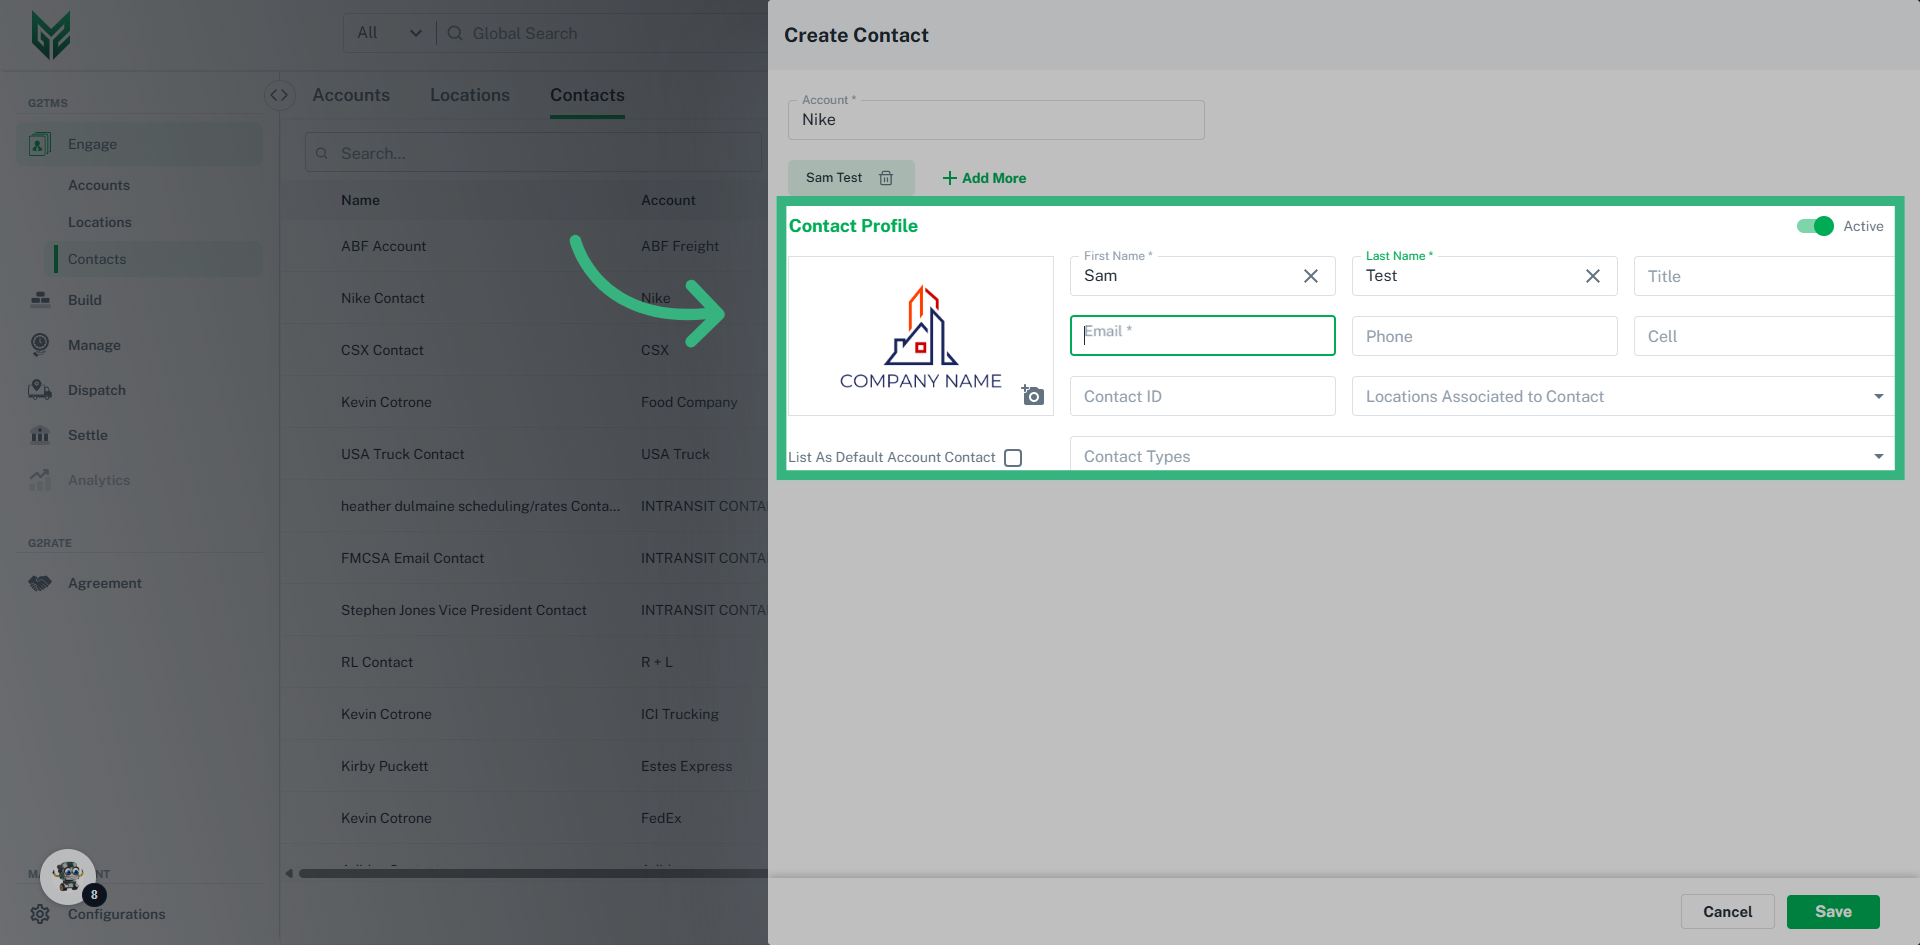
Each type of Engage Account is responsible for managing its specific attributes, including profiles, credit ratings, compliance, and capabilities. Furthermore, every Engage Account can have unique preferences and system settings tailored to its needs. In the G2M TMS, it is mandatory for each Engage Account to have at least one Location (typically designated as a Billing location) and one Contact (which includes a name and email address).
Solution Overview:
Once an Engage Account is created, all relevant information linked to that account will automatically populate in the application wherever applicable.
Contacts is a collection of people, or contacts, that are clients or vendors. They can be categorized by their associated location, by contact types (roles) and selected as the default account contact. Certain fields will auto-populate based on the selected action within the application. For example, if a contact is associated with a location, it will auto-populate when that location is selected for pick-up or delivery when creating a shipment.
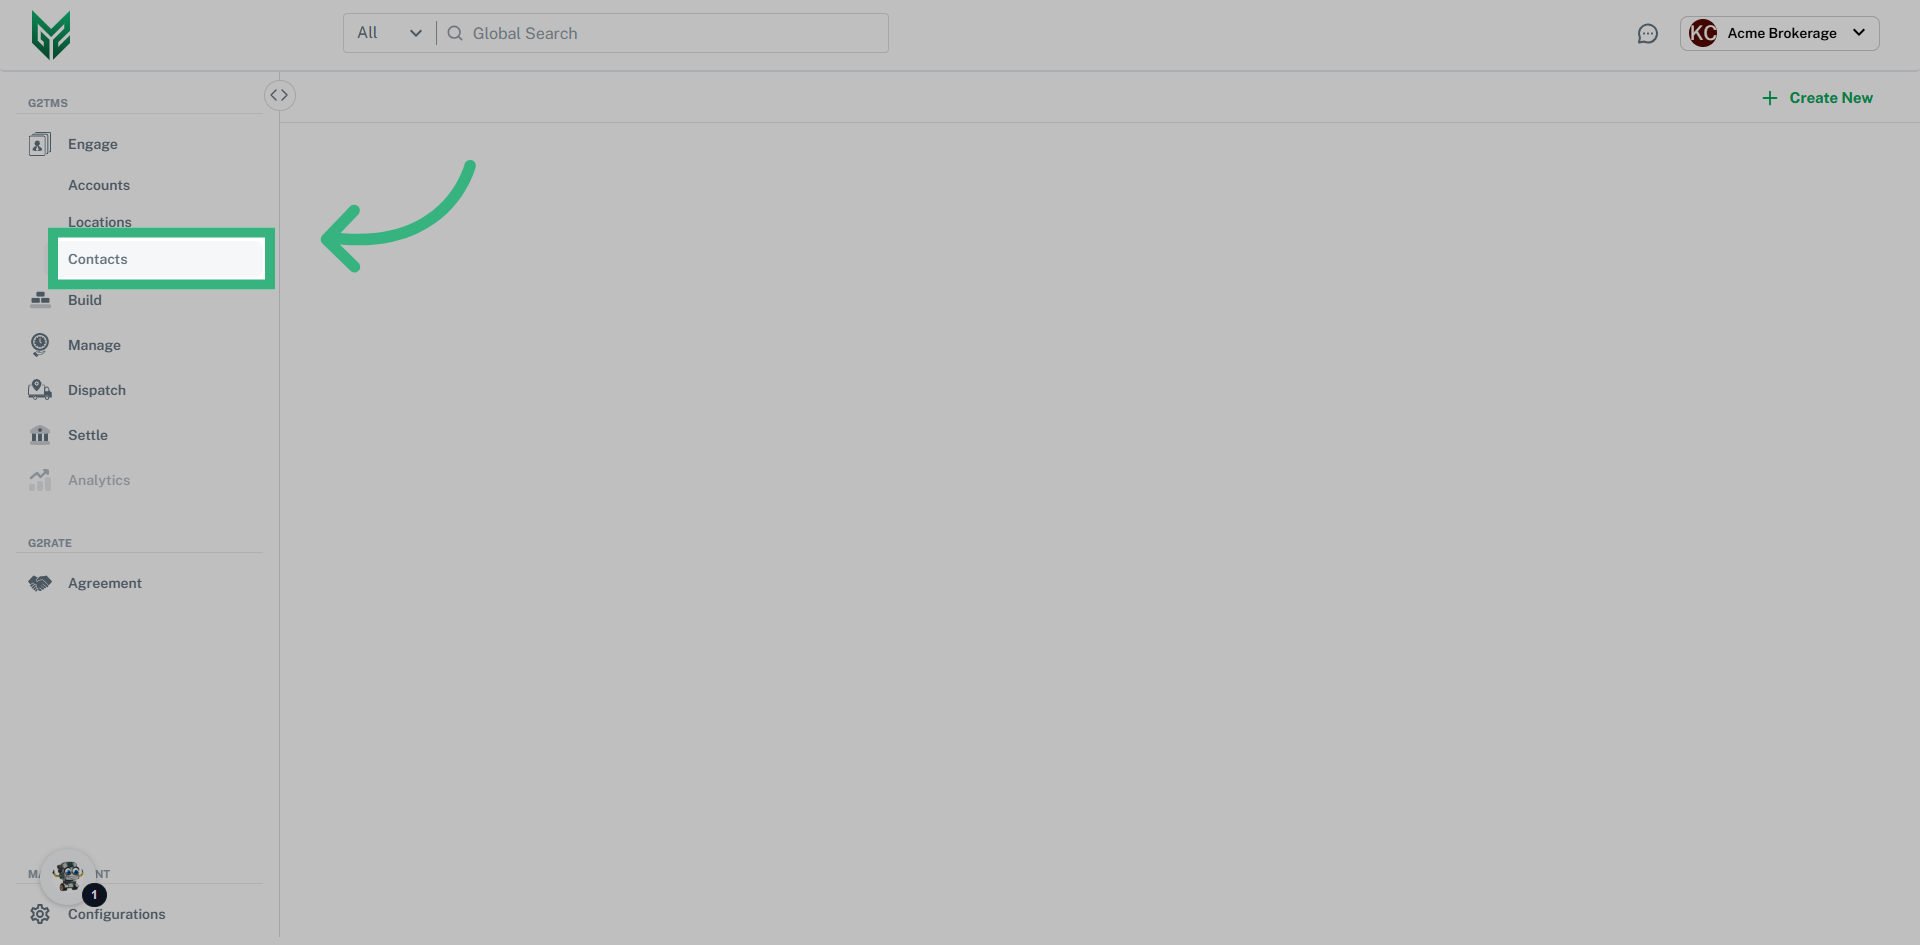
How to Create an Engage Contact:

Contacts Terms:
-
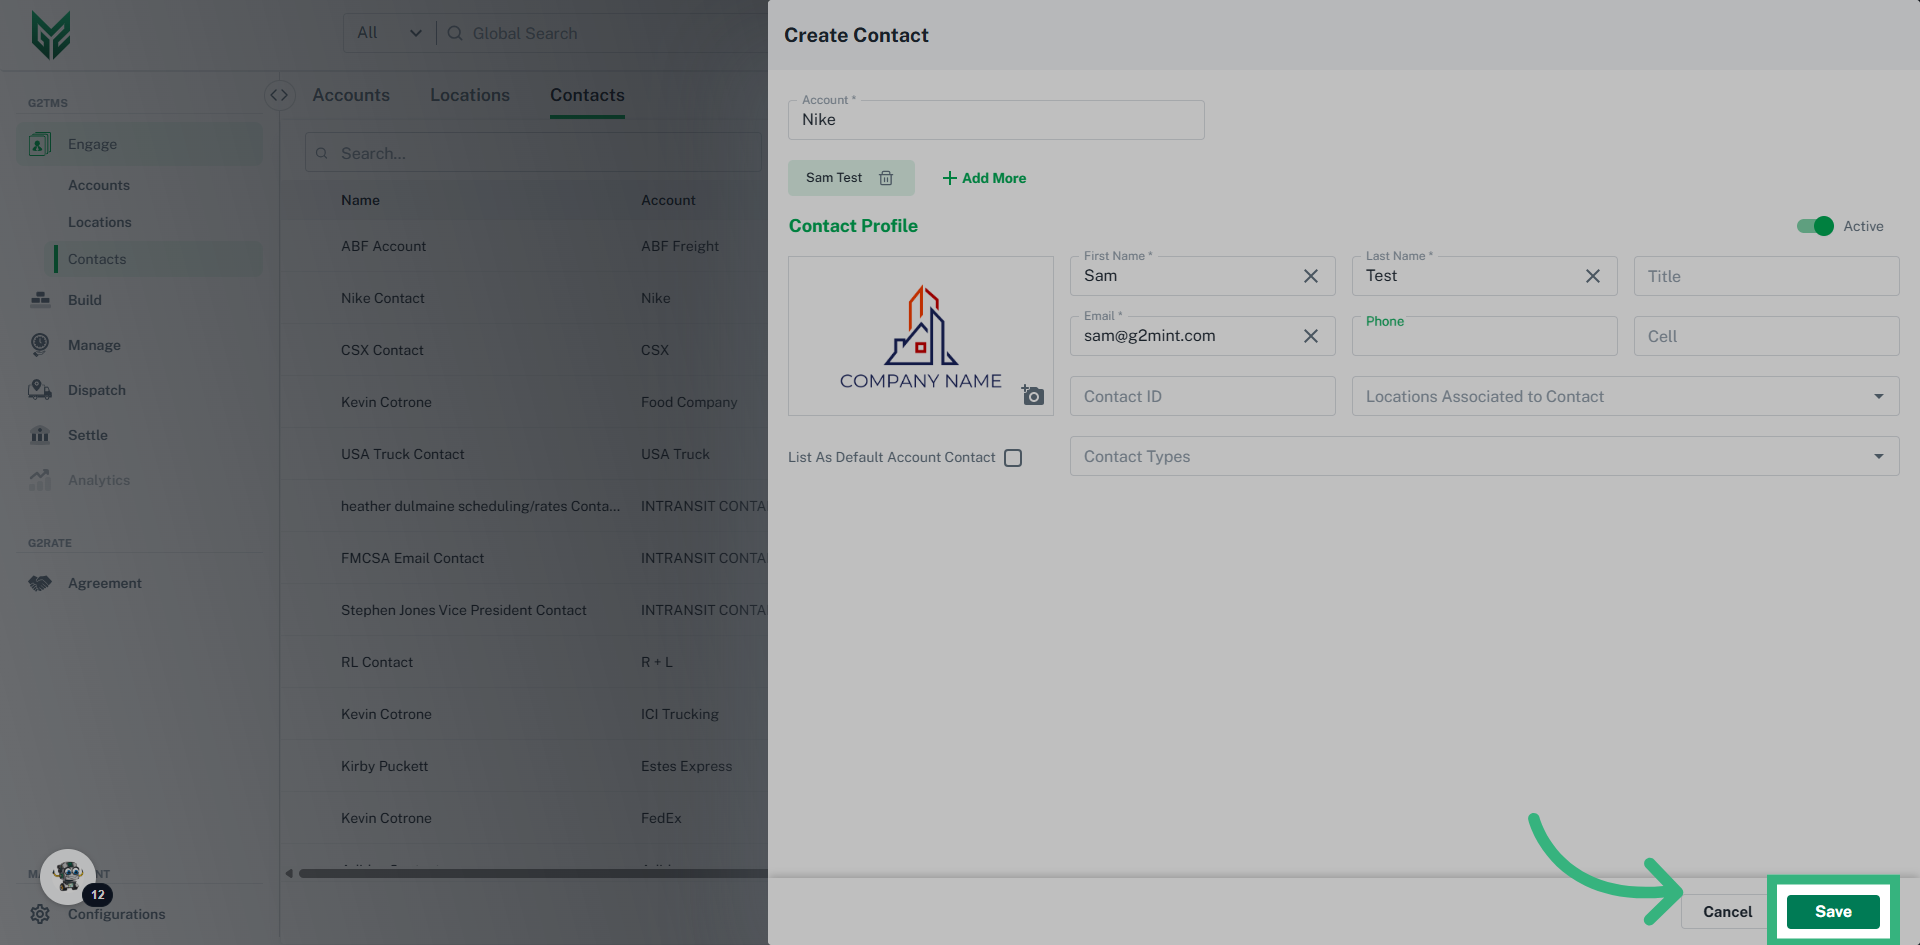
- Name, Email*: Required fields that will utilize this information for quick reference, as well as on documents and correspondences.
- Phone/ Cell: Provide best method of contact and will populate on documents utilizing this Contact
- Contact ID: Enter a unique internal Contact # associated to this Account (not a required field)
- Locations Associated to Contact: A contact can be assigned to a specific Location within your Account (or multiple). For example, if a Contact is an Admin for 1 Location, select the Location here, then select Admin in Contact Types
- Default Contact: The Default Account Contact is notified when no other Contact is assigned to that correspondence. For example, if there is no Tender/Dispatch Contact assigned, the Default Contact would be notified. The first created Contact for an account is automatically the Default Contact, unless otherwise edited.
- Contact Types: Contact Types determine workflows, not permissions. For example, if a Contact is assigned Spot Contact, they would receive all Spot notifications. If no Spot Contact is assigned, the Default Contact would receive the notification. Similarly, a Tender/Dispatch Contact for a Carrier account will need to be assigned here to receive all tenders sent to that Carrier.
- Active toggle: Toggle will always default to Active upon Contact creation. The manual action required is only to De-activate a Contact from an Account.
- Name, Email*: Required fields that will utilize this information for quick reference, as well as on documents and correspondences.