How to Generate a BOL
We will walk through B.O.L. creation through building a Shipment, as well as accessing a B.O.L. through the Grid in the Manage screen.
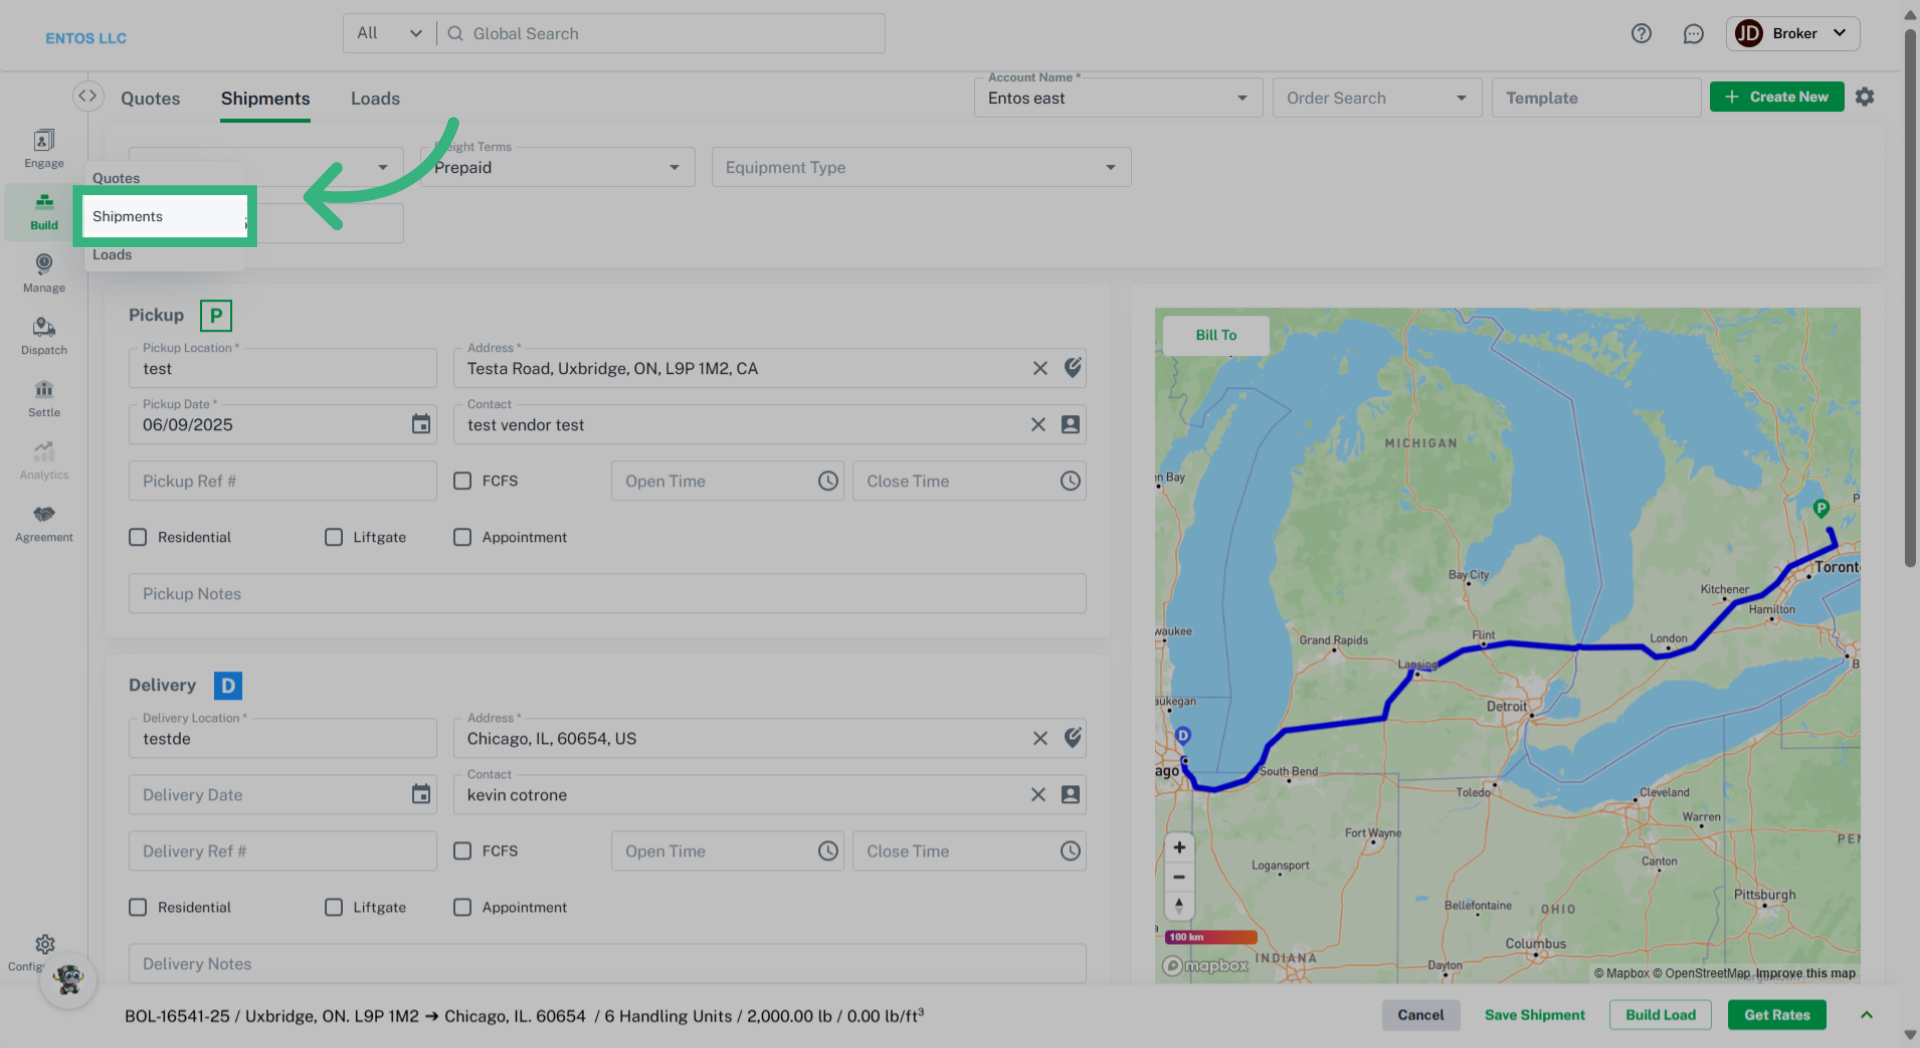
1. Click "Shipments"
Begin by navigating to the "Build" Tab and select "Shipments" from the dropdown to begin building a Shipment.
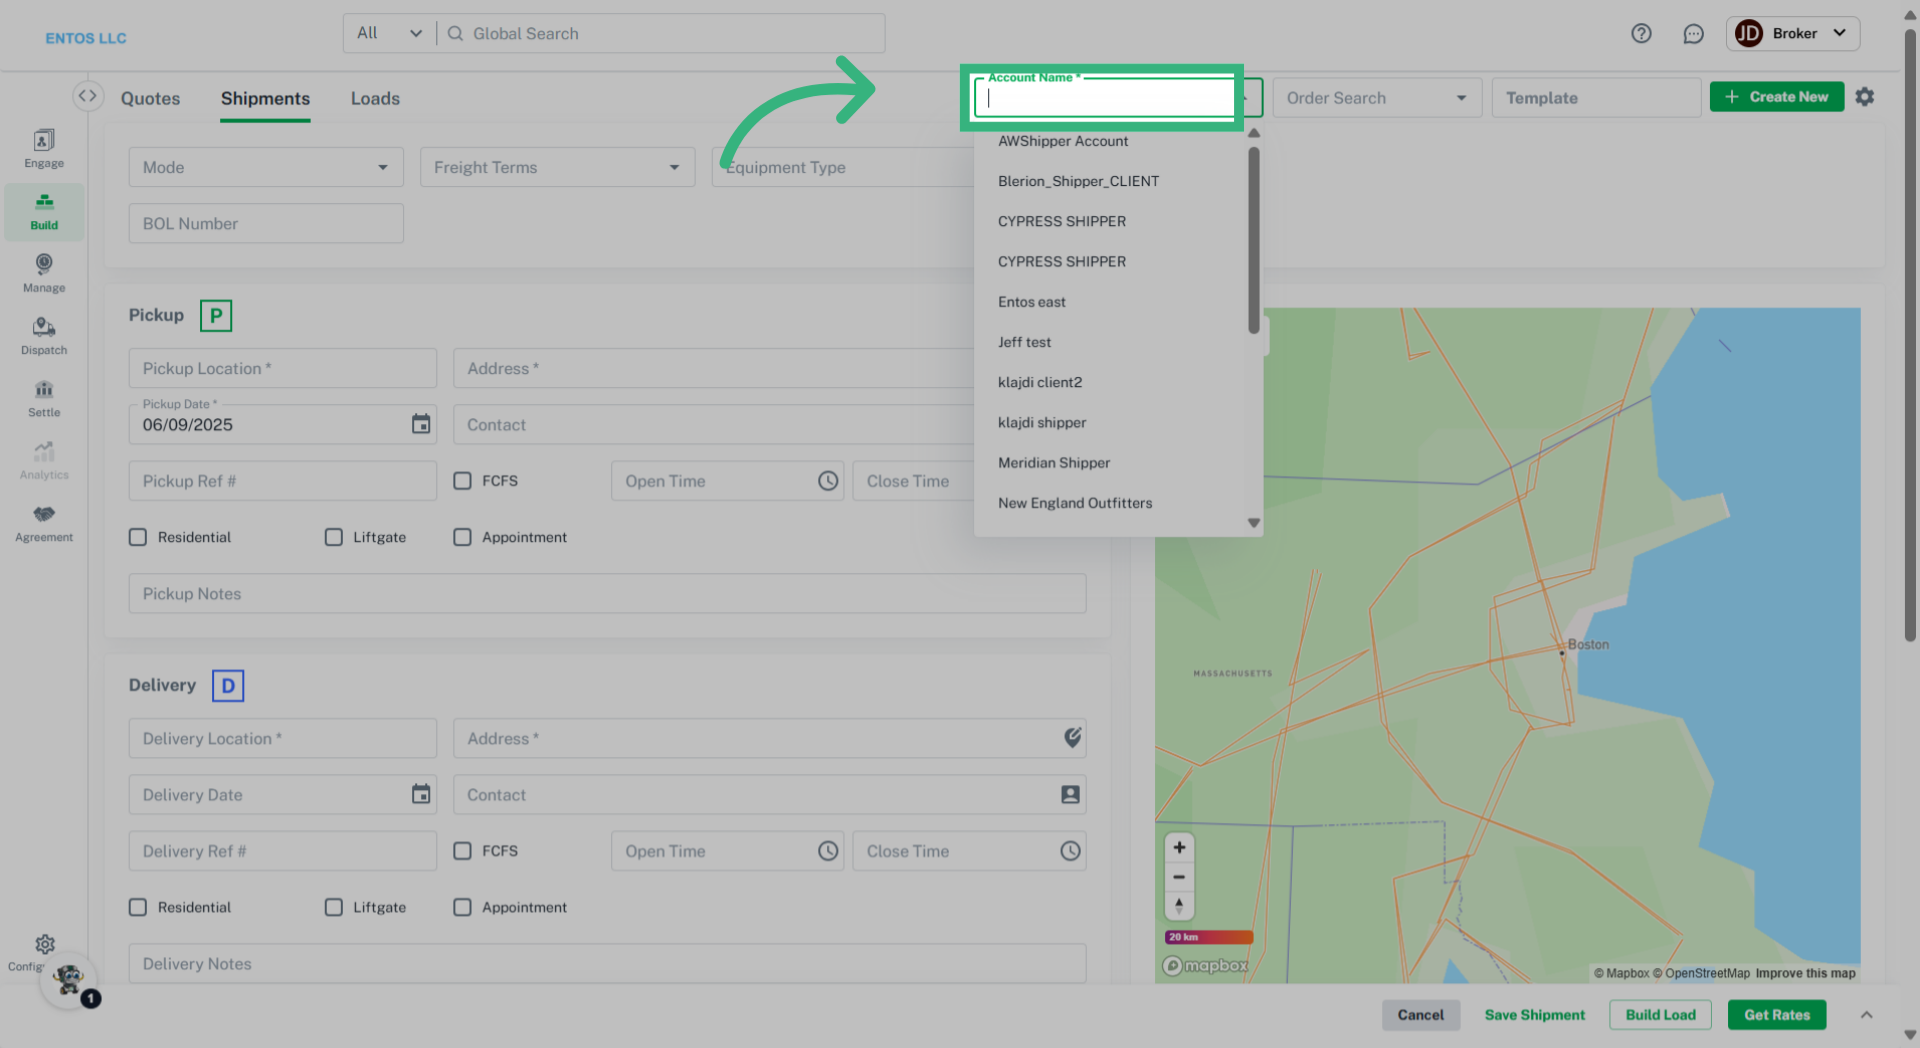
2. Enter "Account Name"
Select the appropriate account.
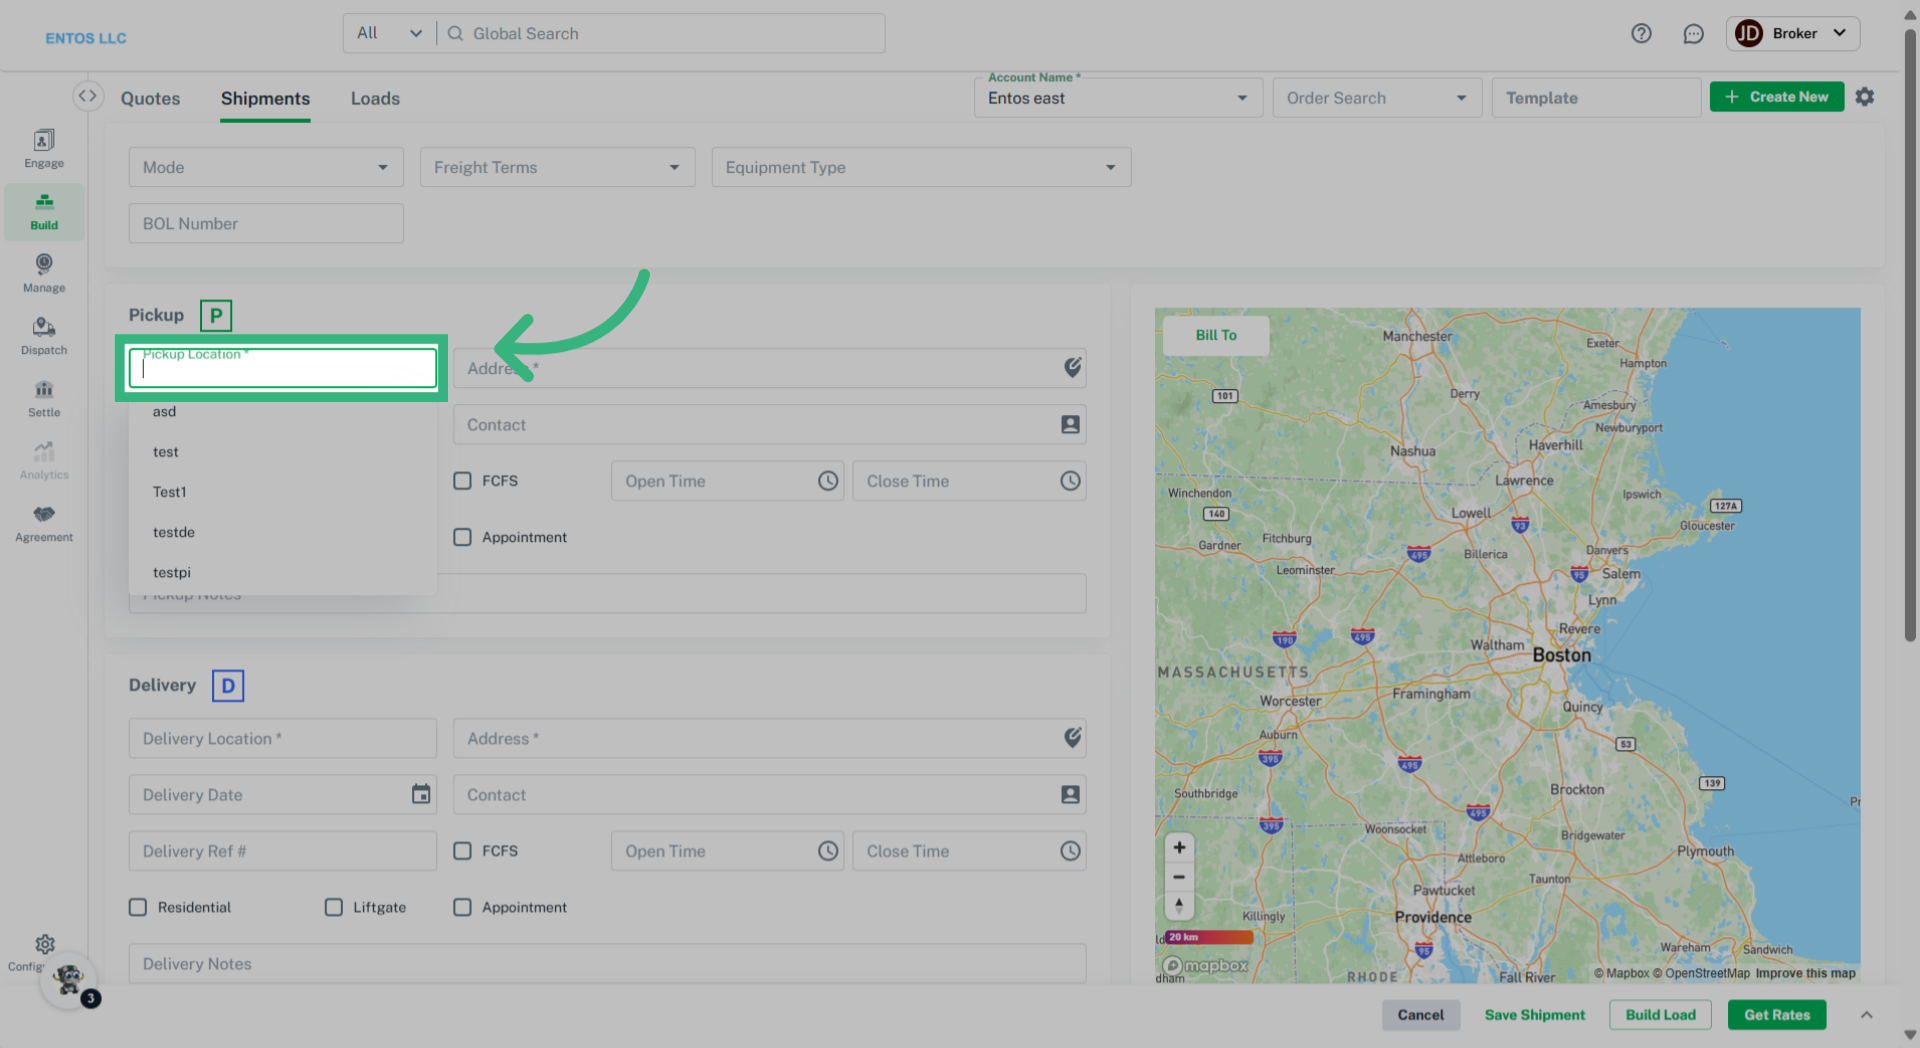
3. Enter "Pickup Location"
Designate the pickup location.
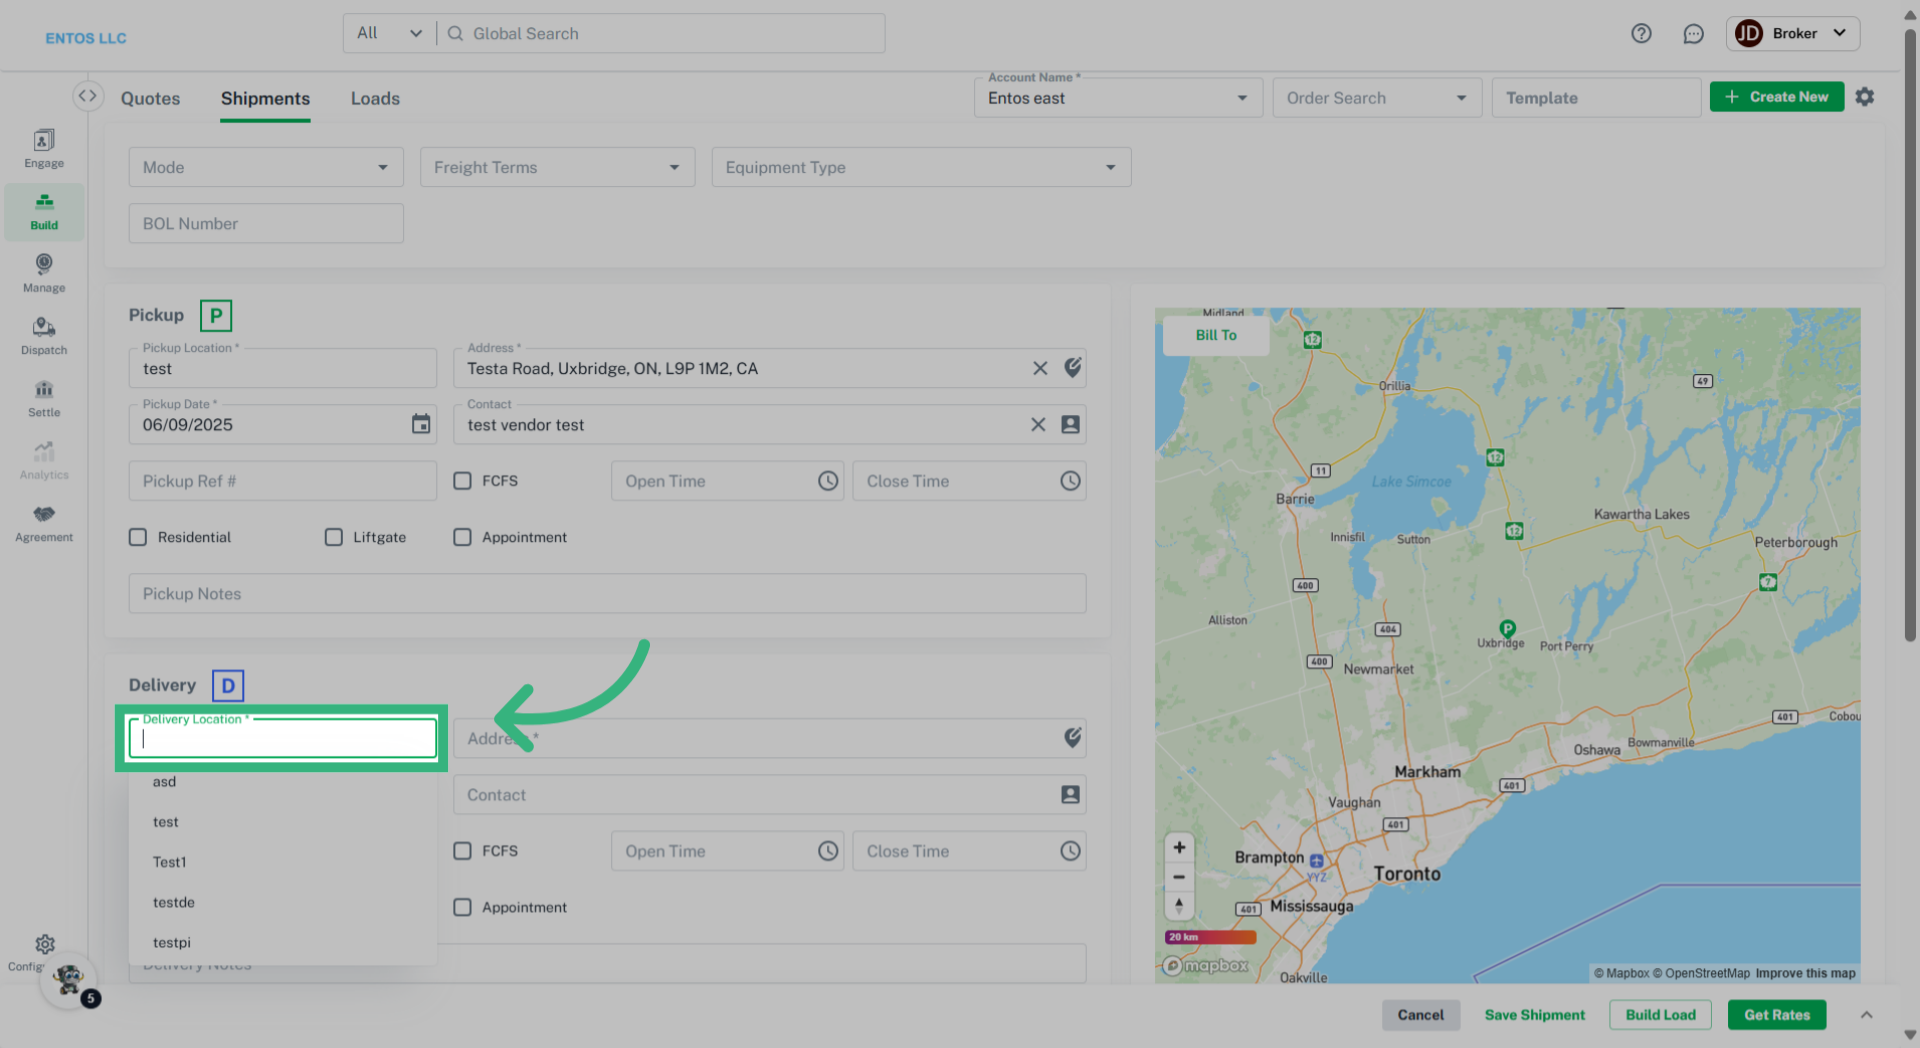
4. Enter "Delivery Location"
Specify where the shipment will be delivered, or Destination.
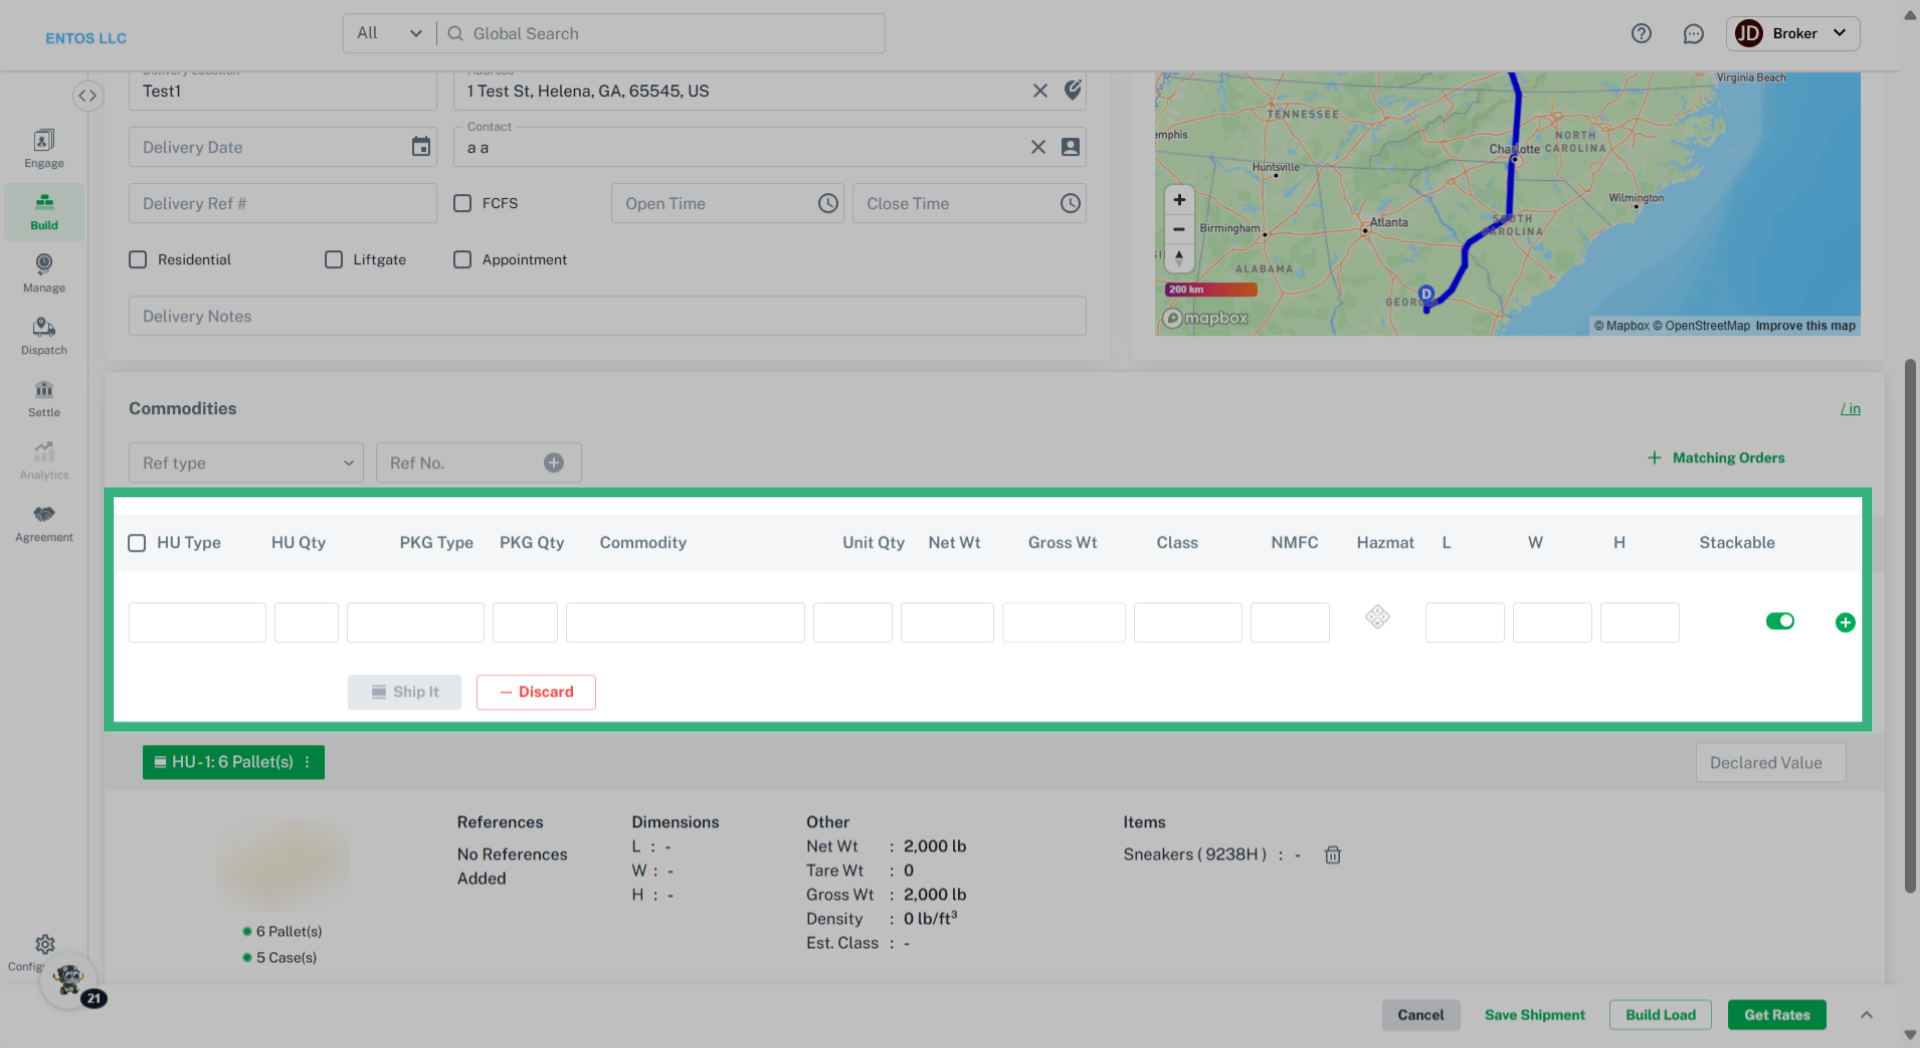
5. Enter Commodity information
Enter Shipment Commodity information and select "Ship It.".
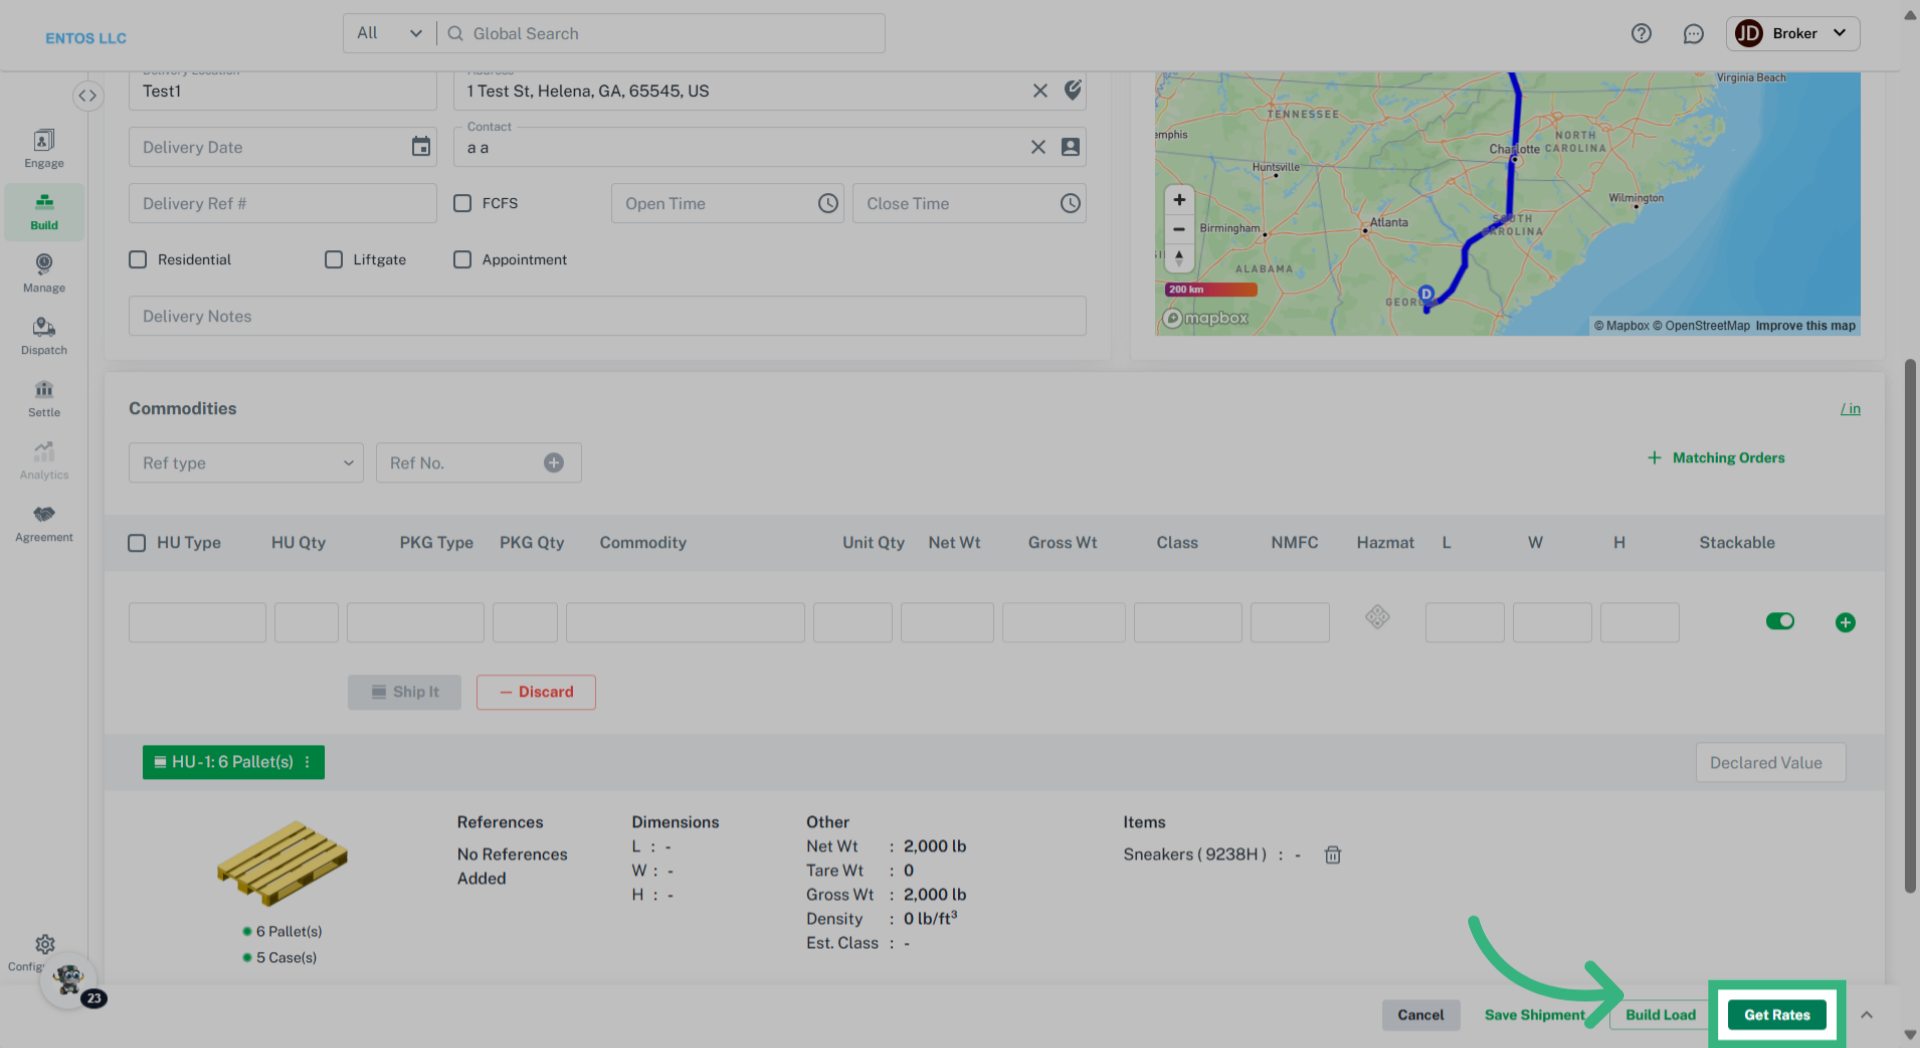
6. Click "Get Rates"
Select "Get Rates."
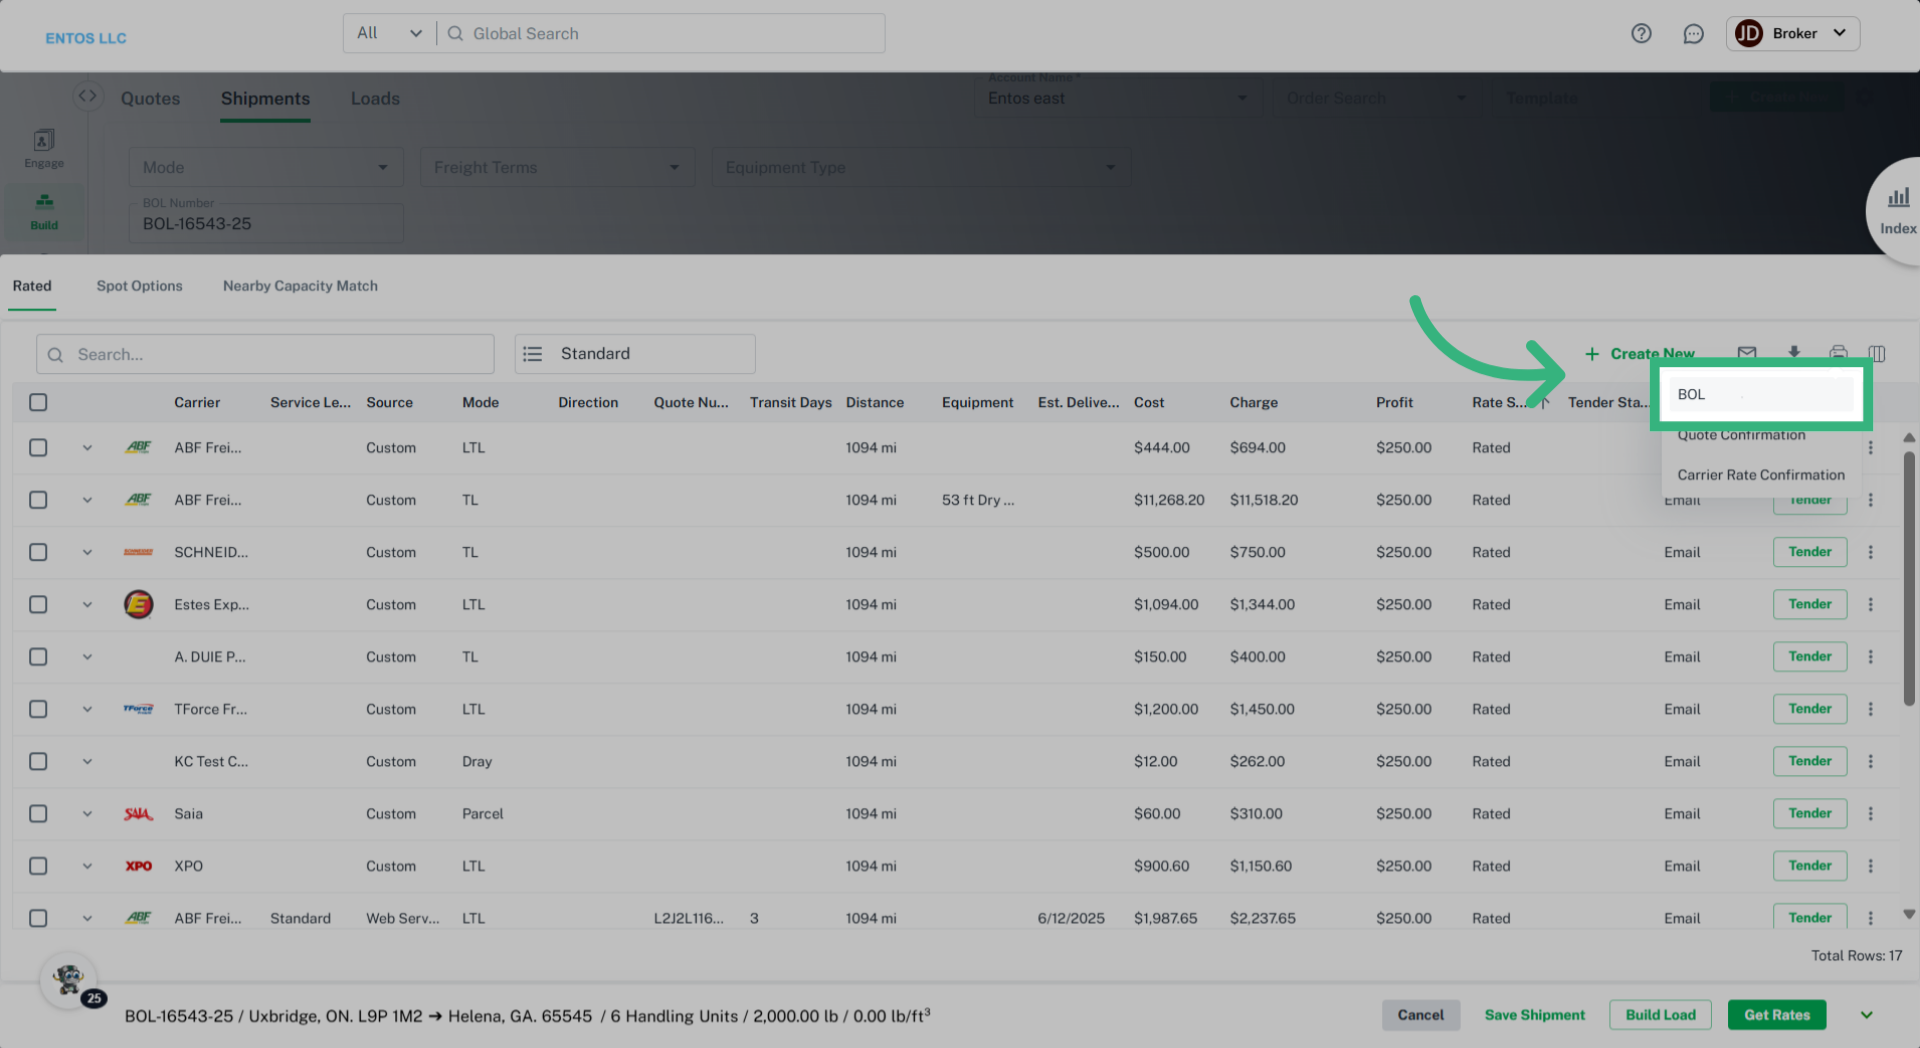
7. Select "Print"
Select the "Print" icon.

8. Click "BOL"
Generate the Bill of Lading by selecting from the provided dropdown.
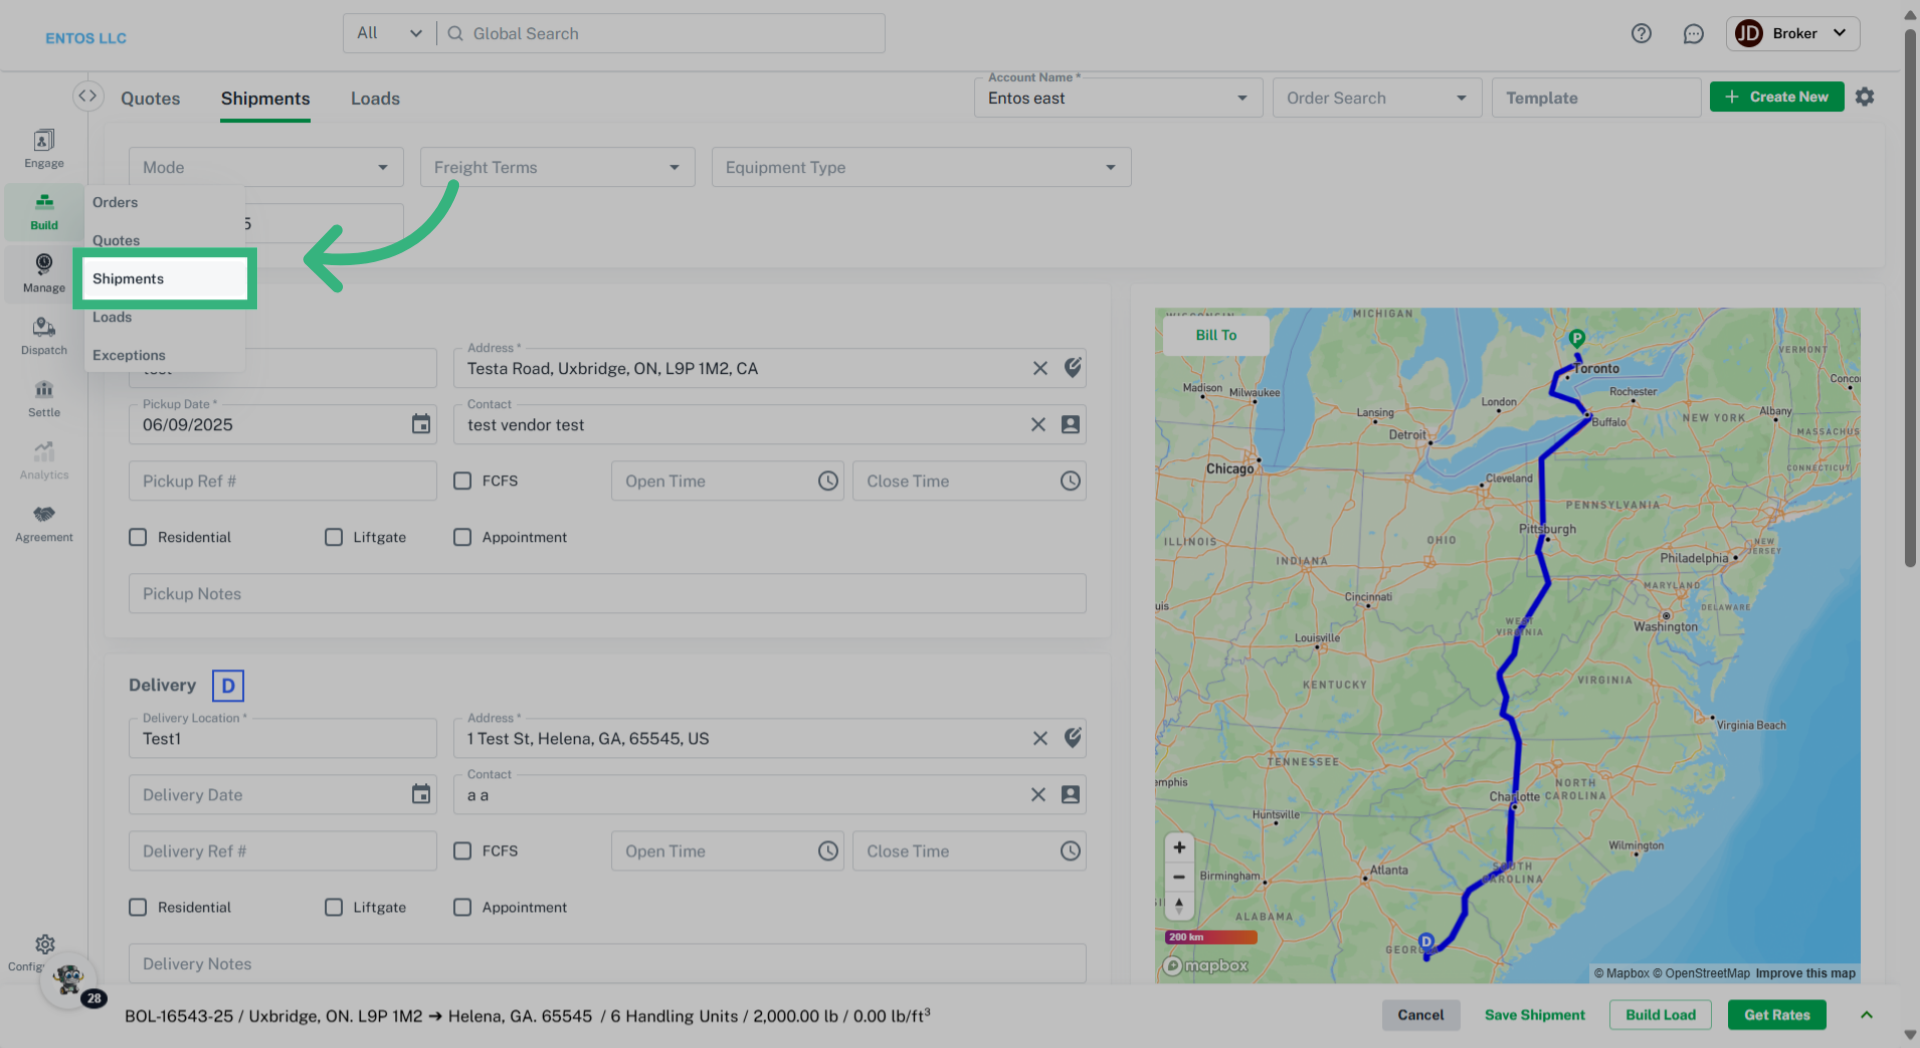
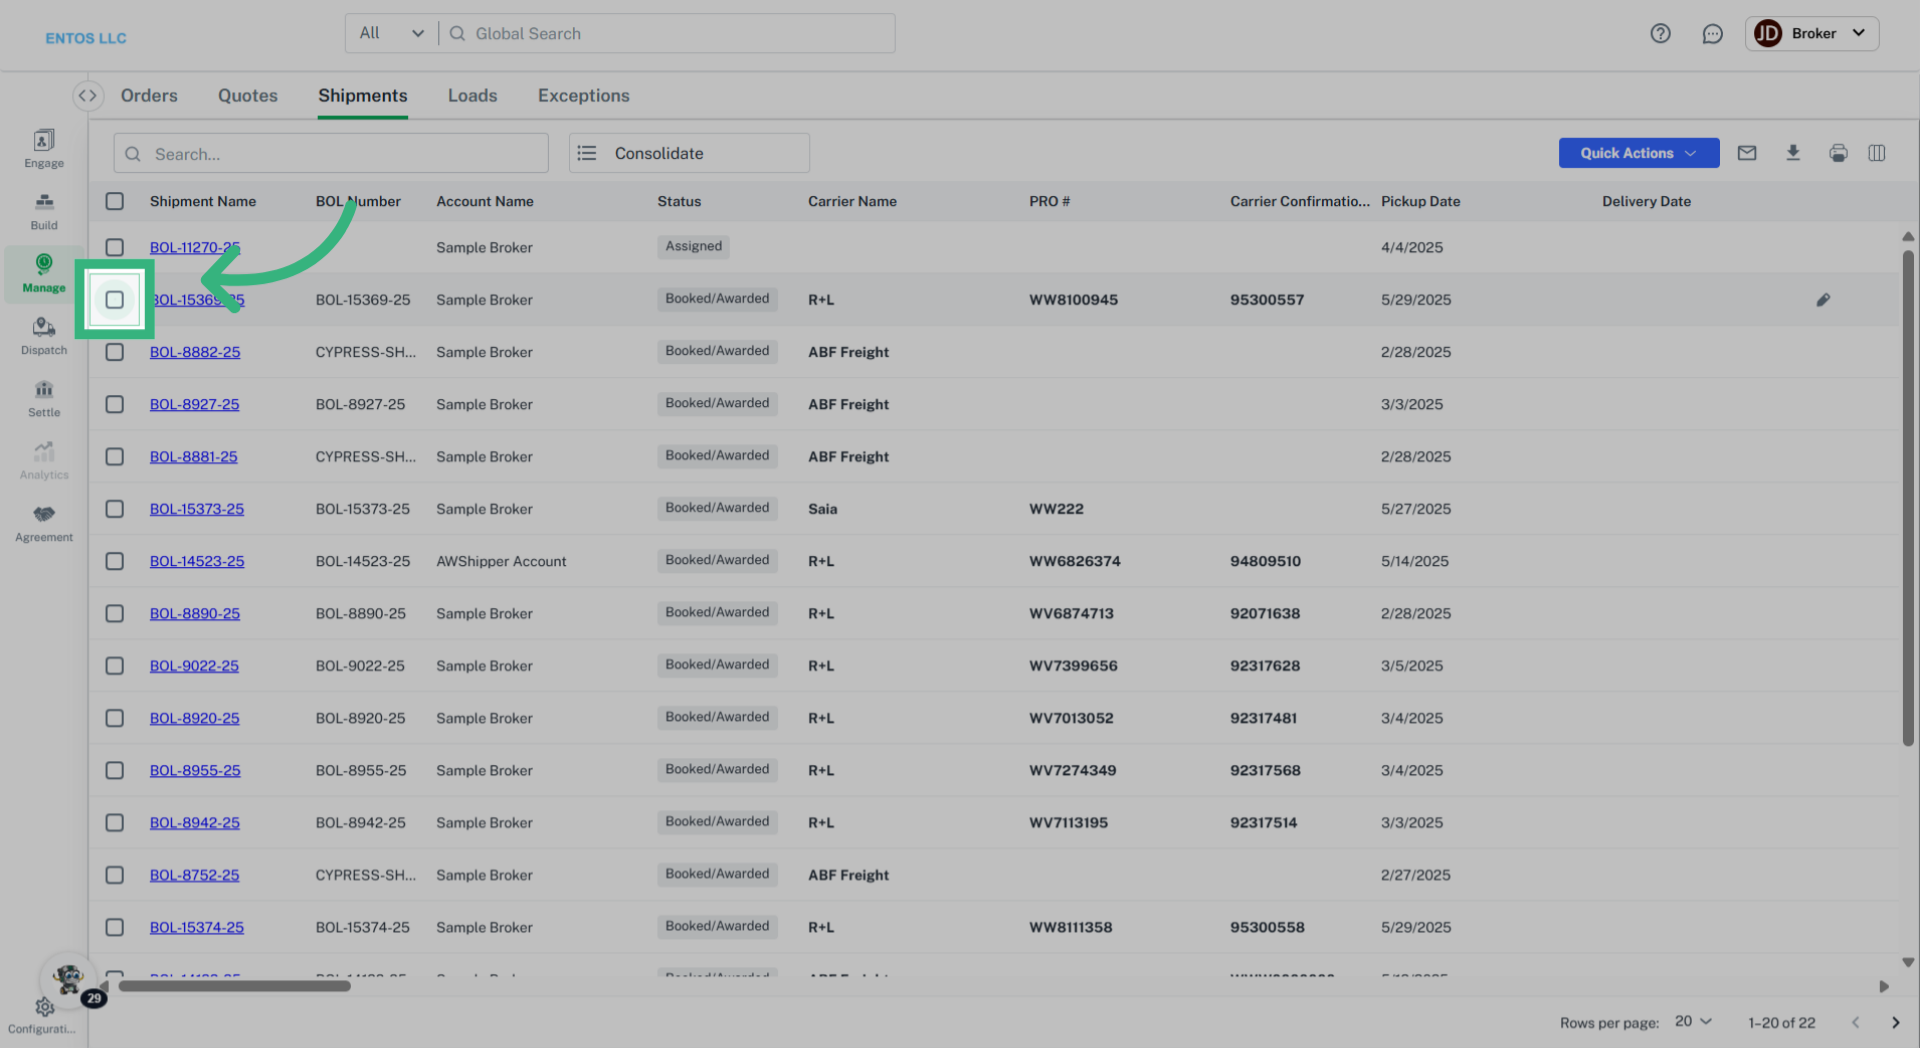
9. Click "Shipments"
To access a B.O.L. for an existing Shipment, access the Manage tab and select Shipments.
10. Click "checkbox"
Select the checkbox of the appropriate Shipment.
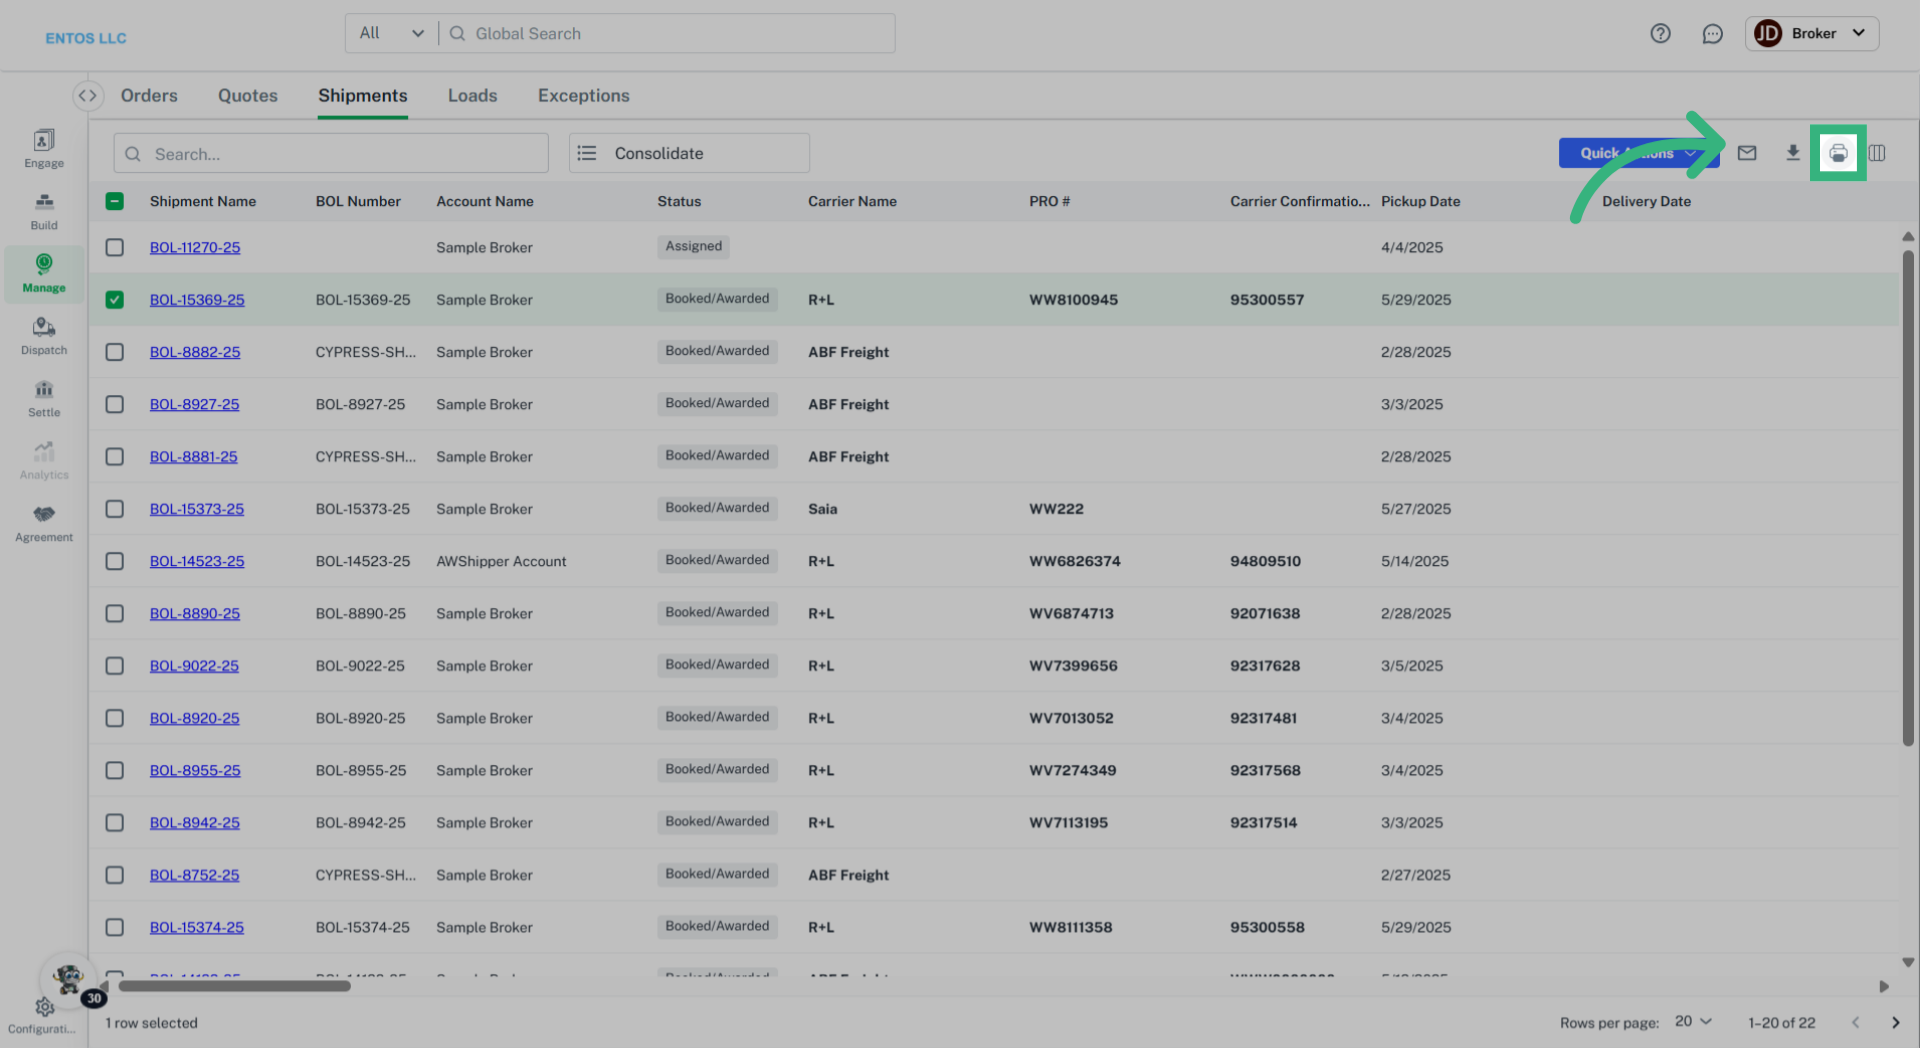
11. Click "Print"
Select the "Print" icon and select B.O.L..
Once generated, a B.O.L. can be Saved, Printed, or emailed as necessary.