Last Updated: April 16, 2025
Applies to:
Shippers, Brokers, Carriers, and Partners
Common Scenarios/Challenges:
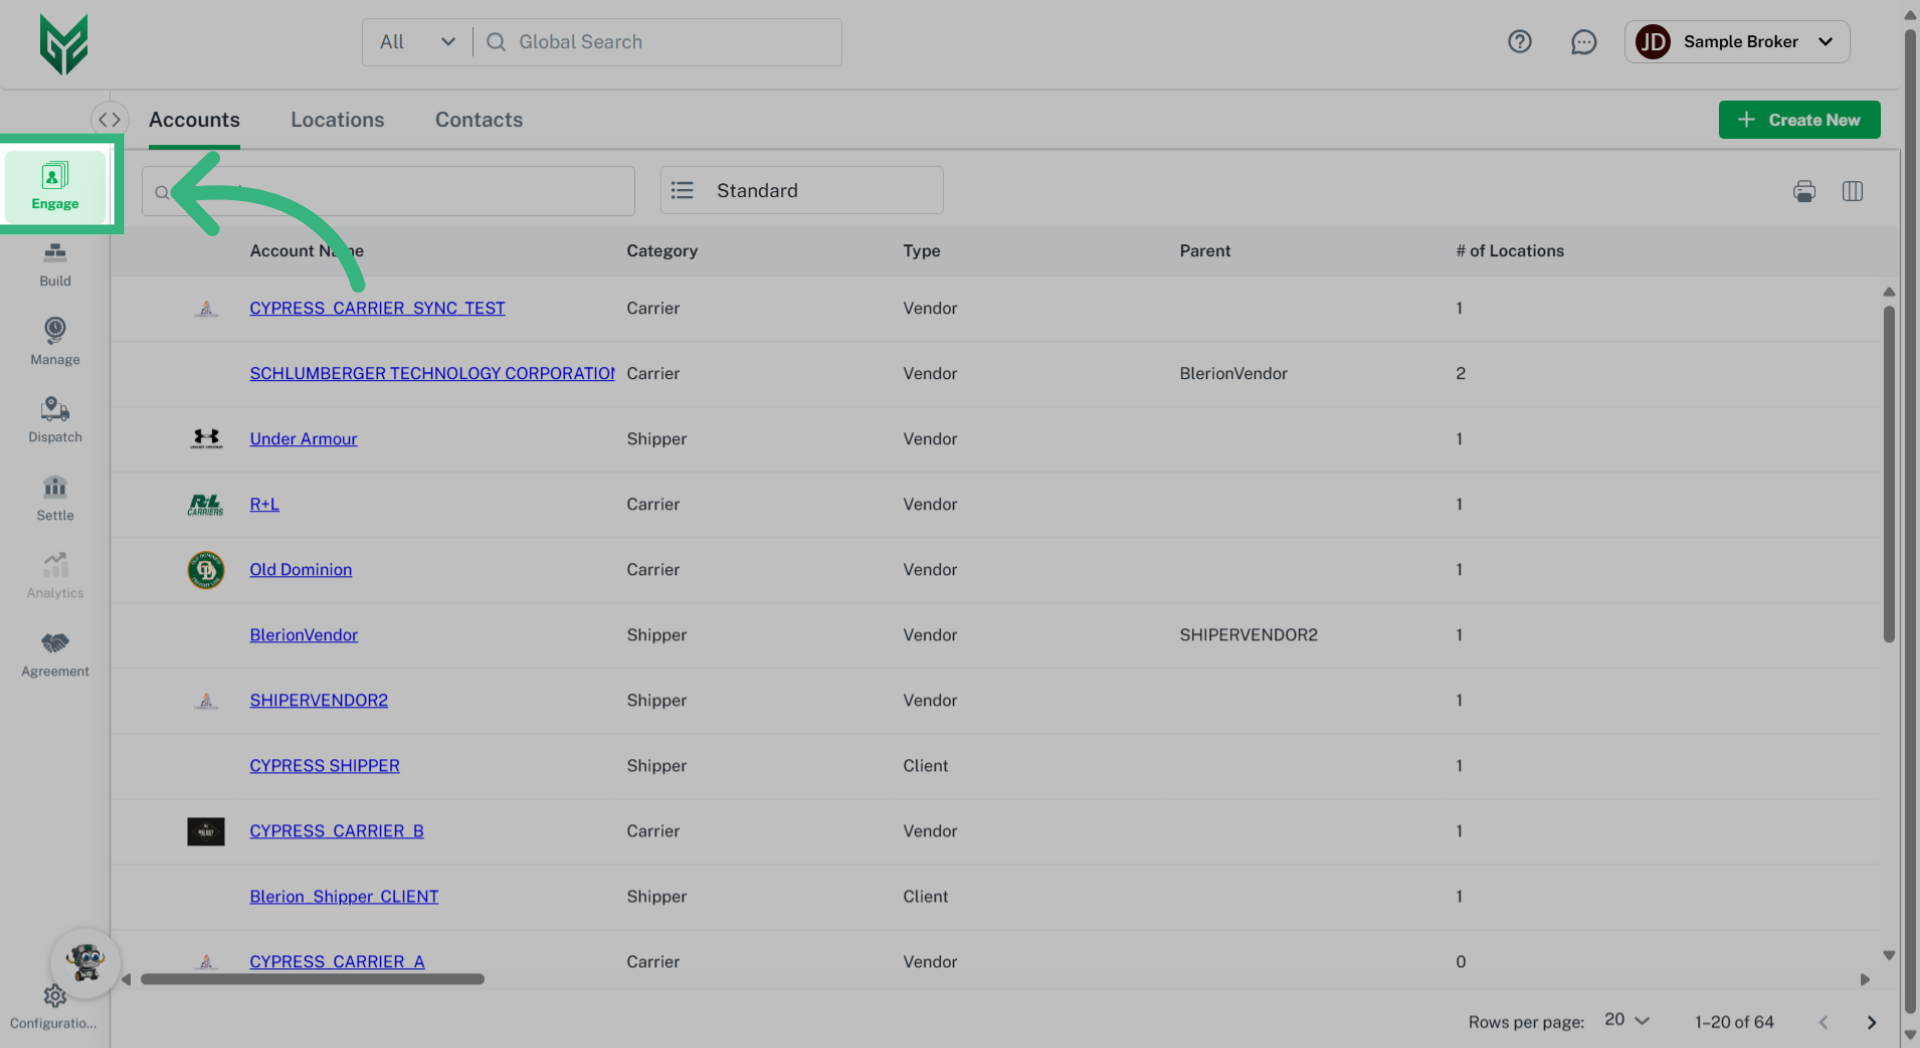
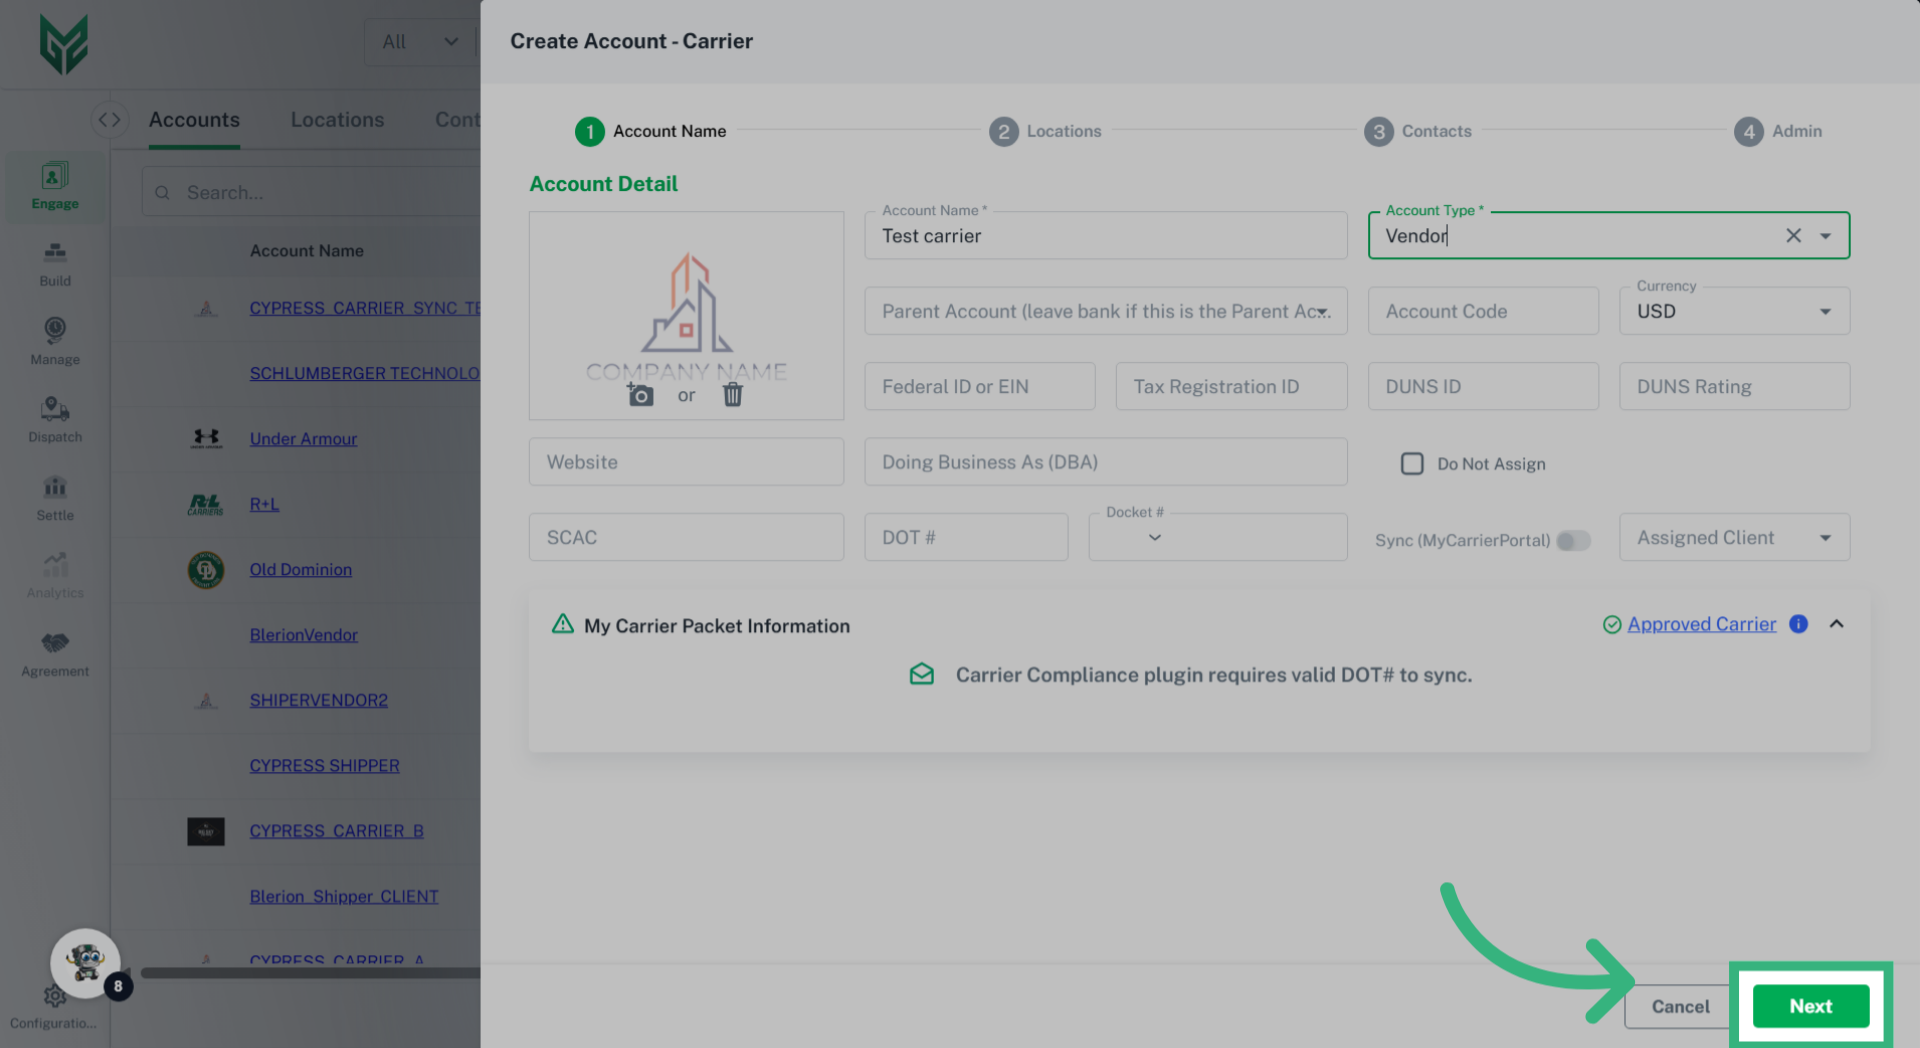
The Engage Account feature enables users to establish an entity within the Licensed Account of the TMS, representing an organization or company that will engage in various transactions within the system, such as shipments and settlements.
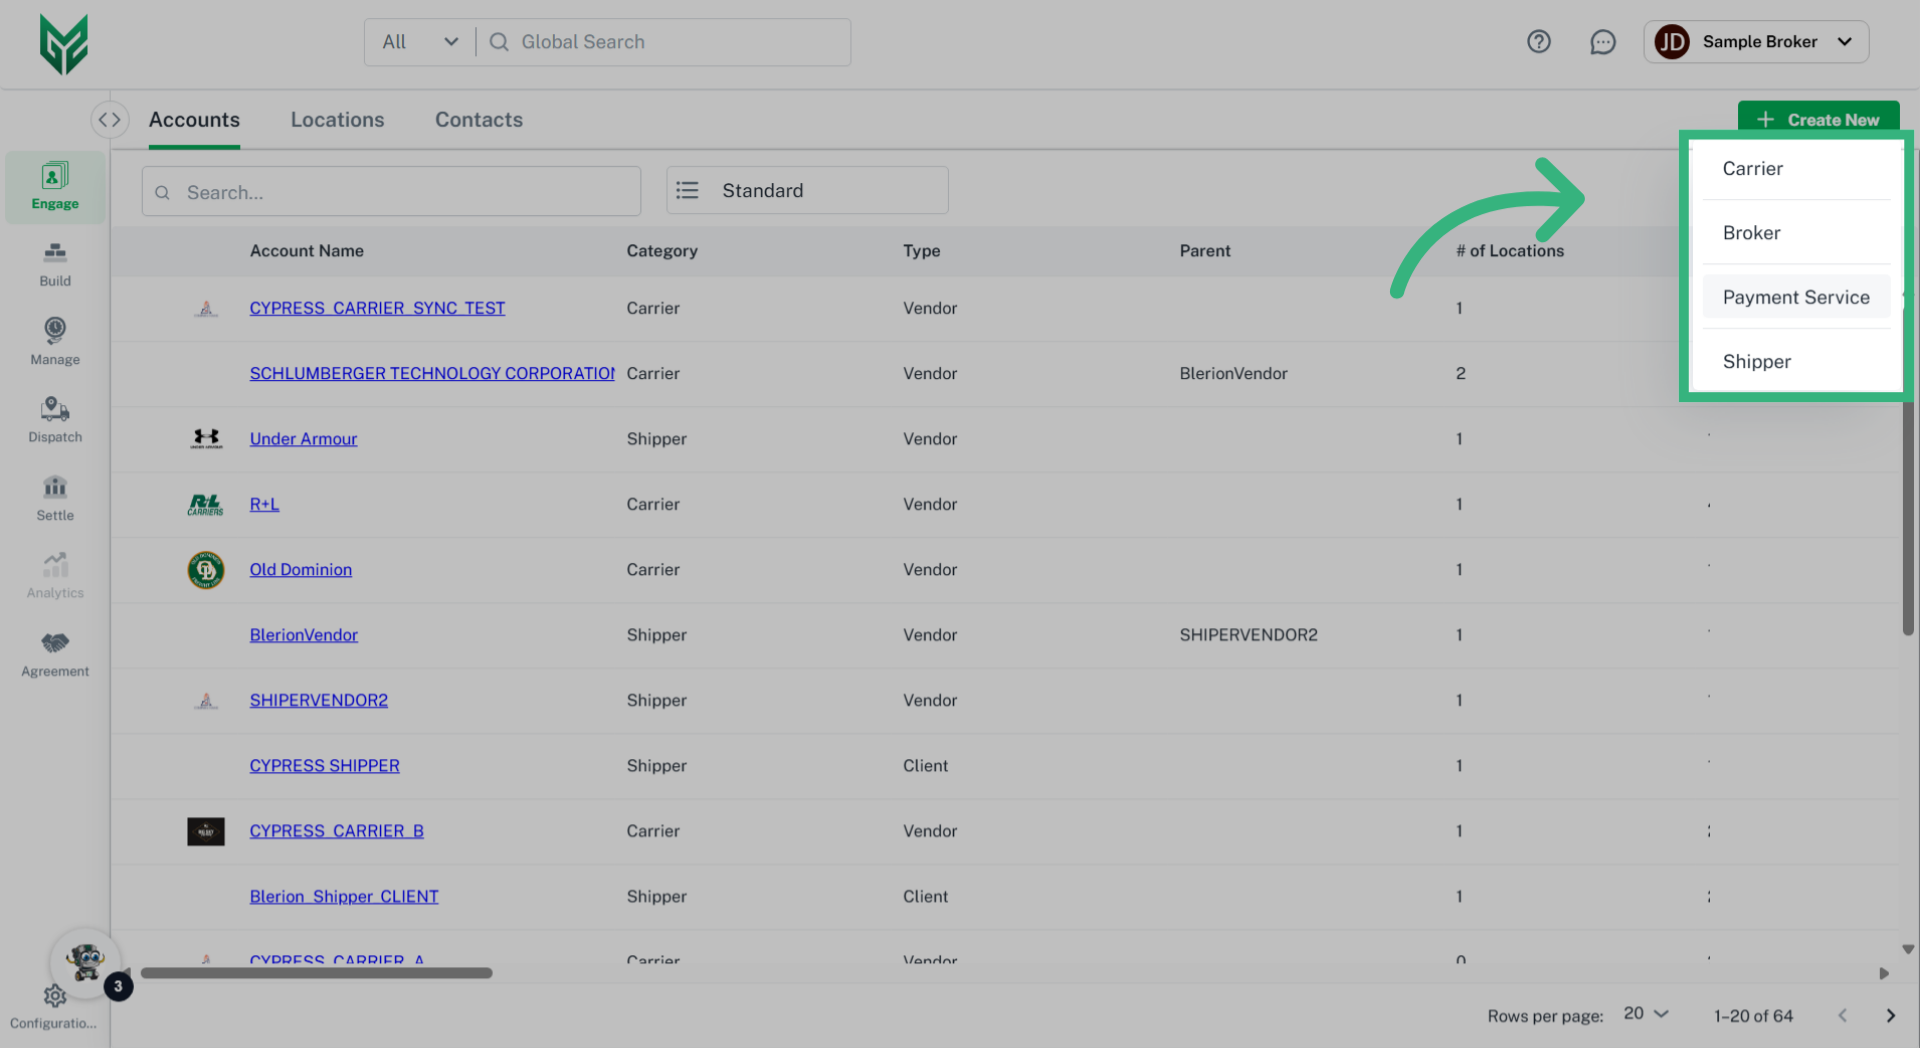
Engage Accounts can take on several personas, including:
- Broker
- Shipper
- Carrier
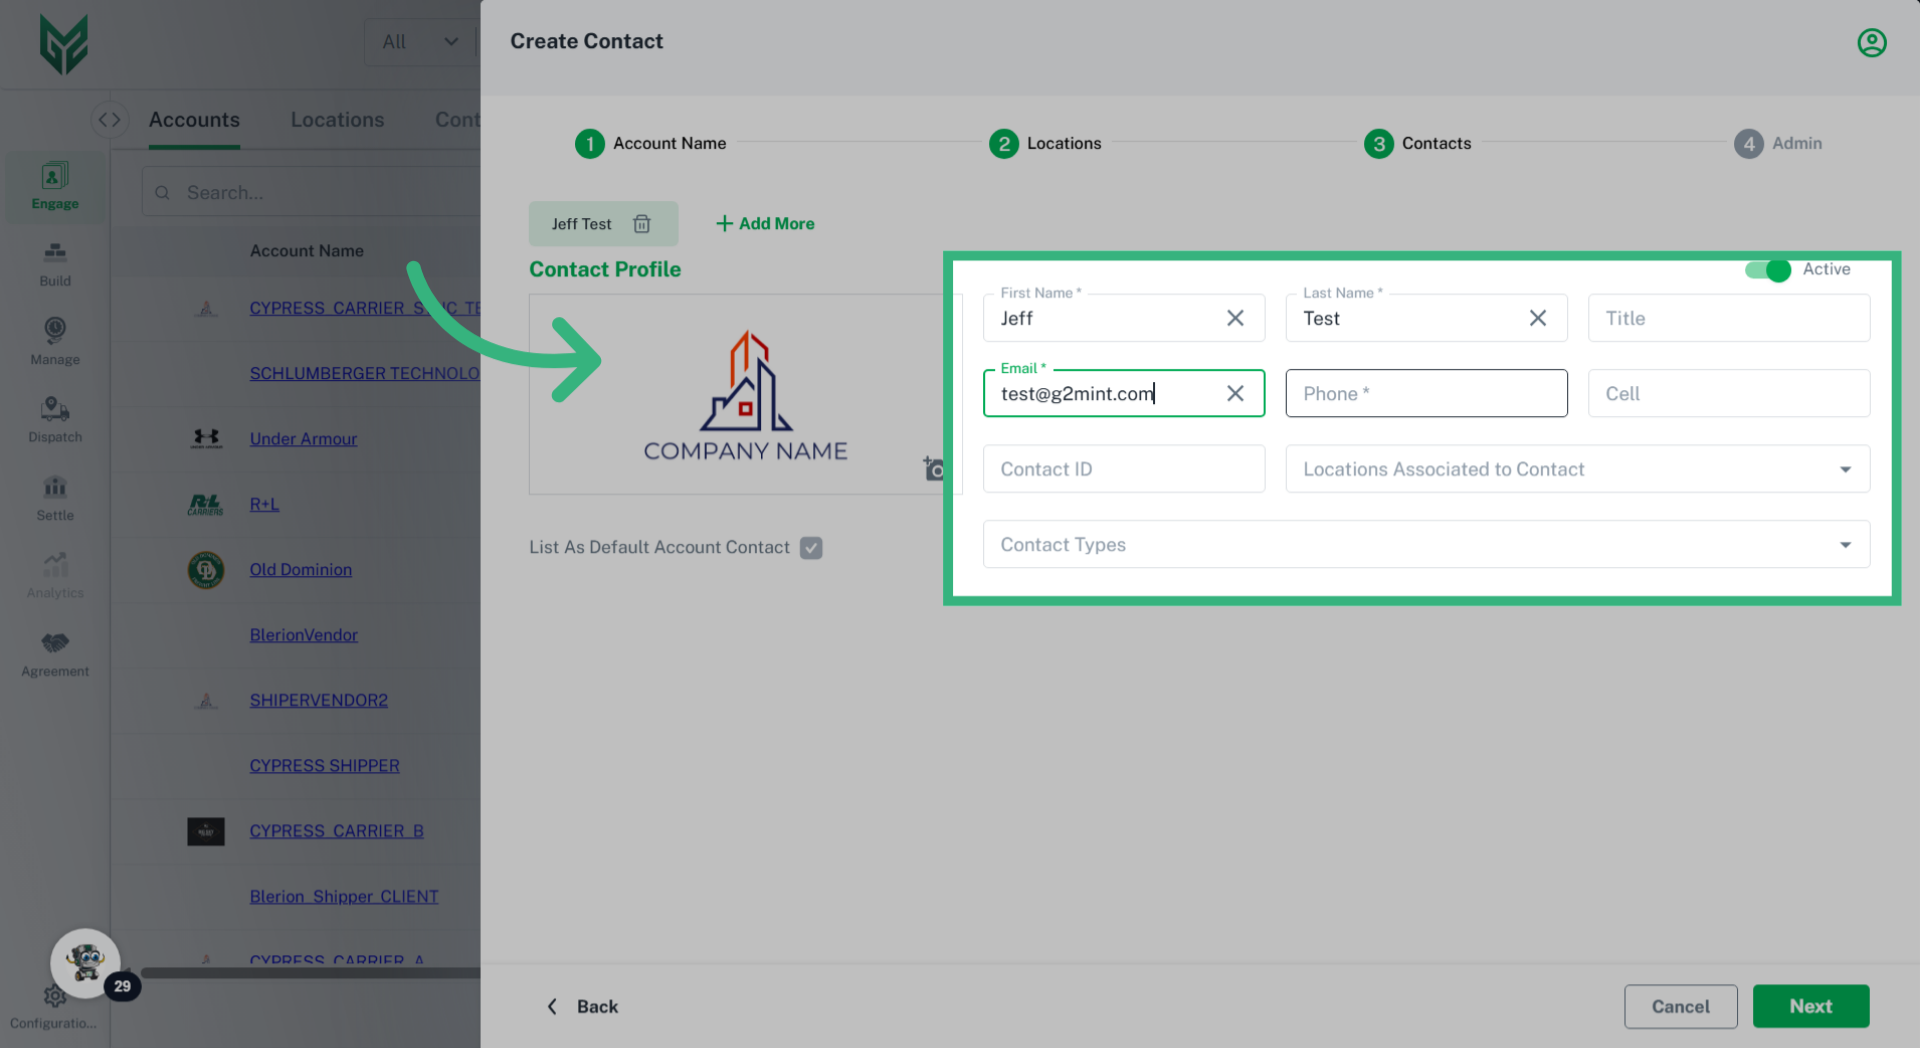
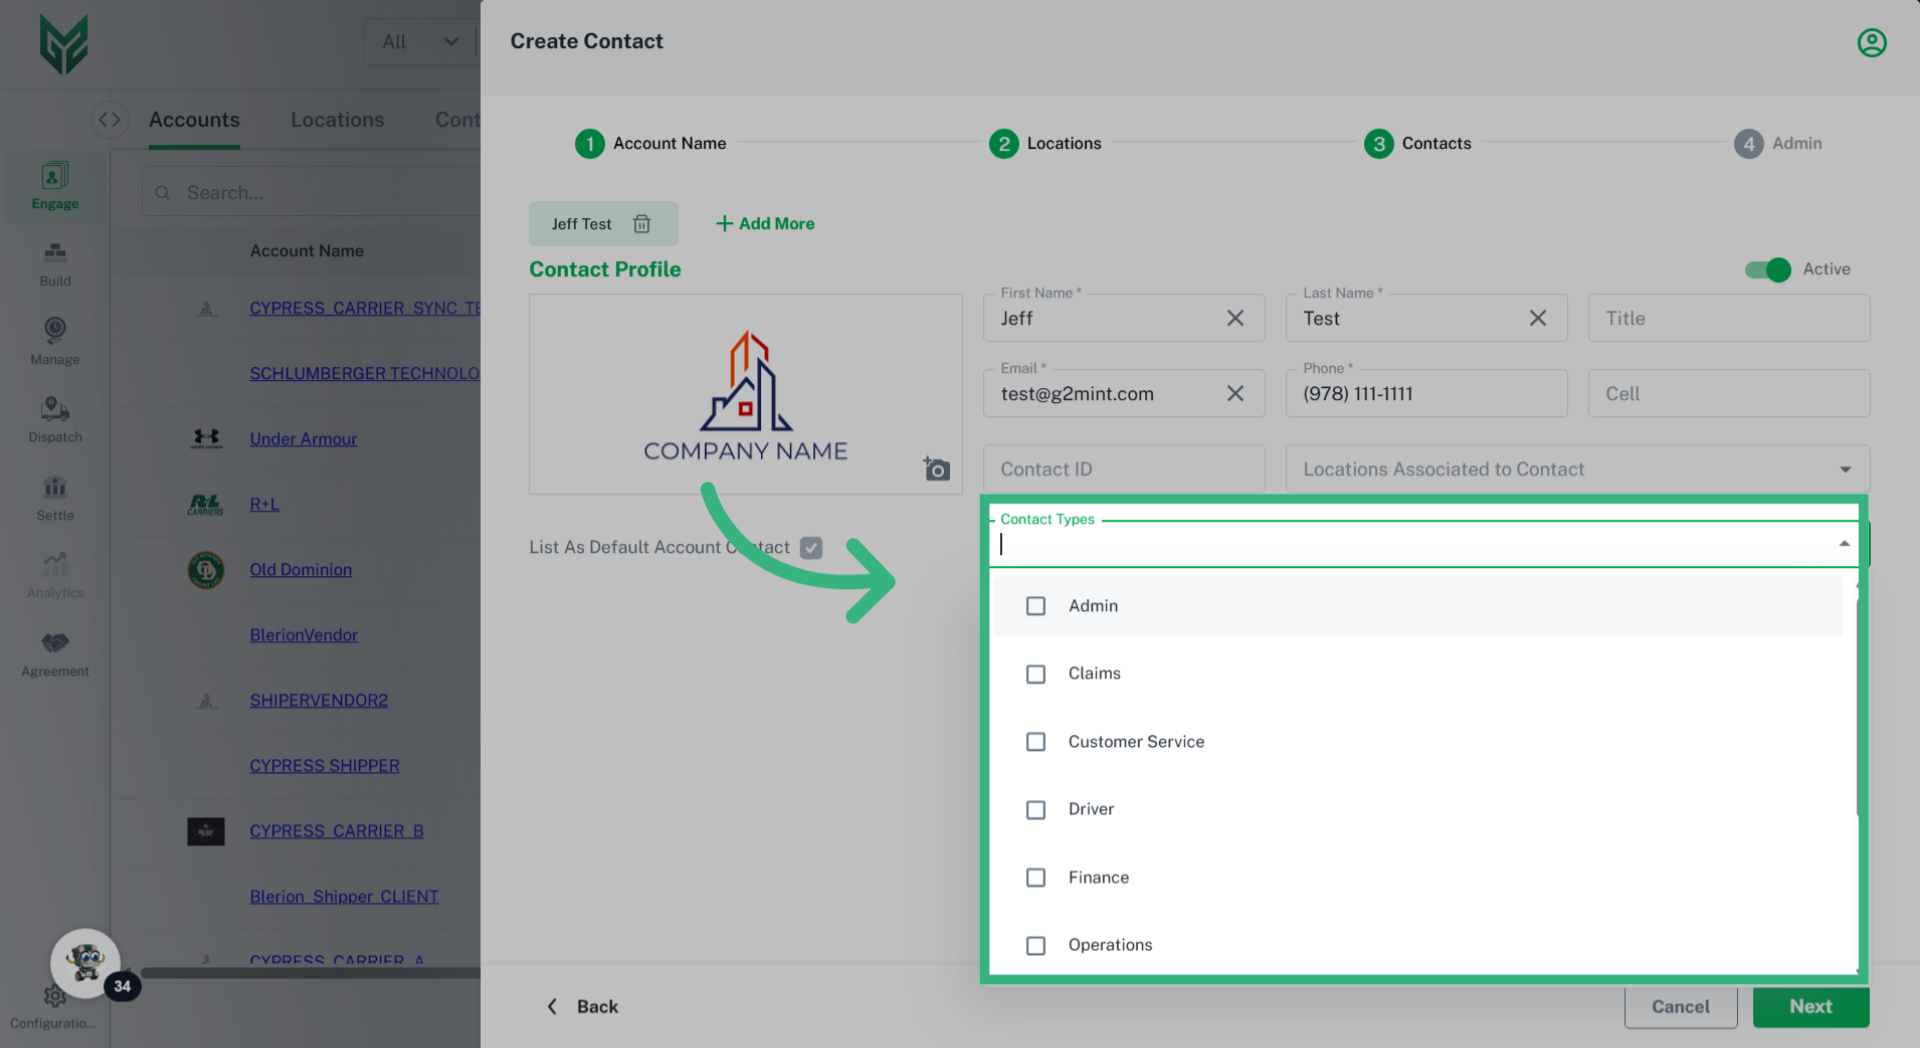
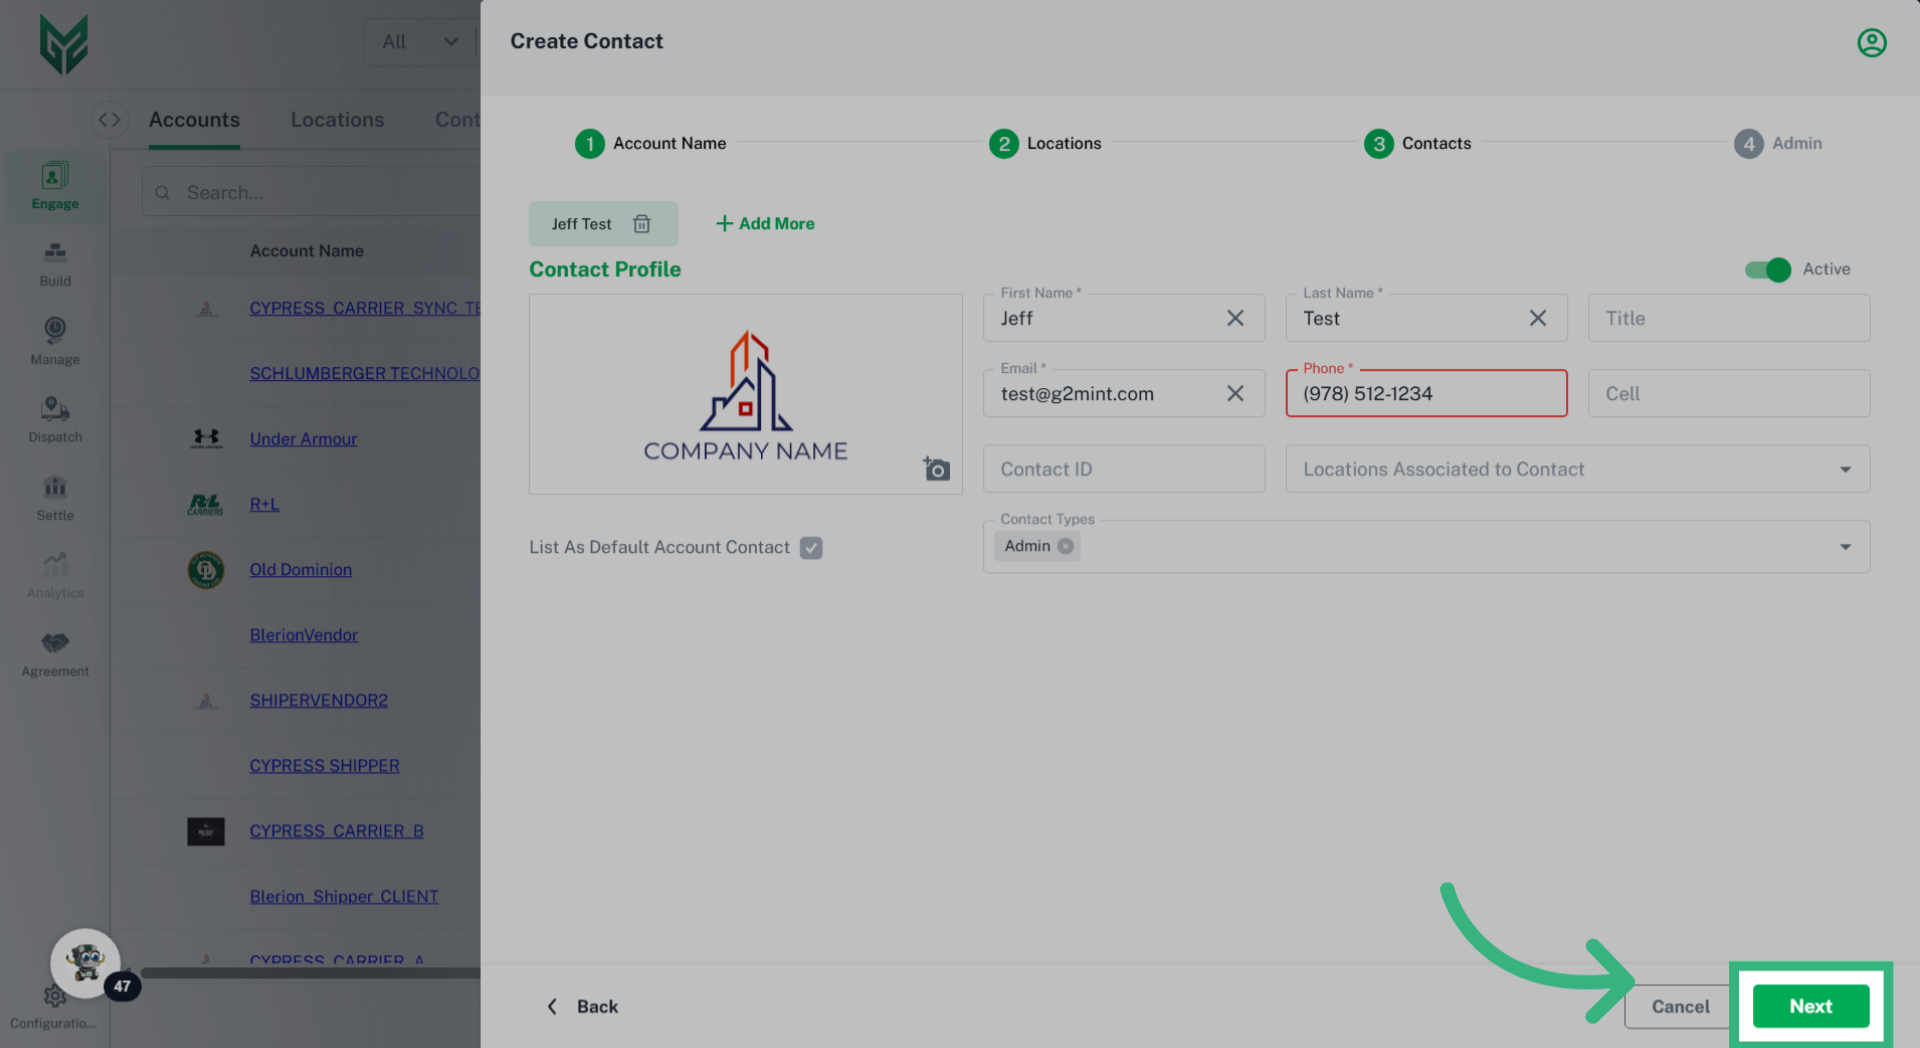
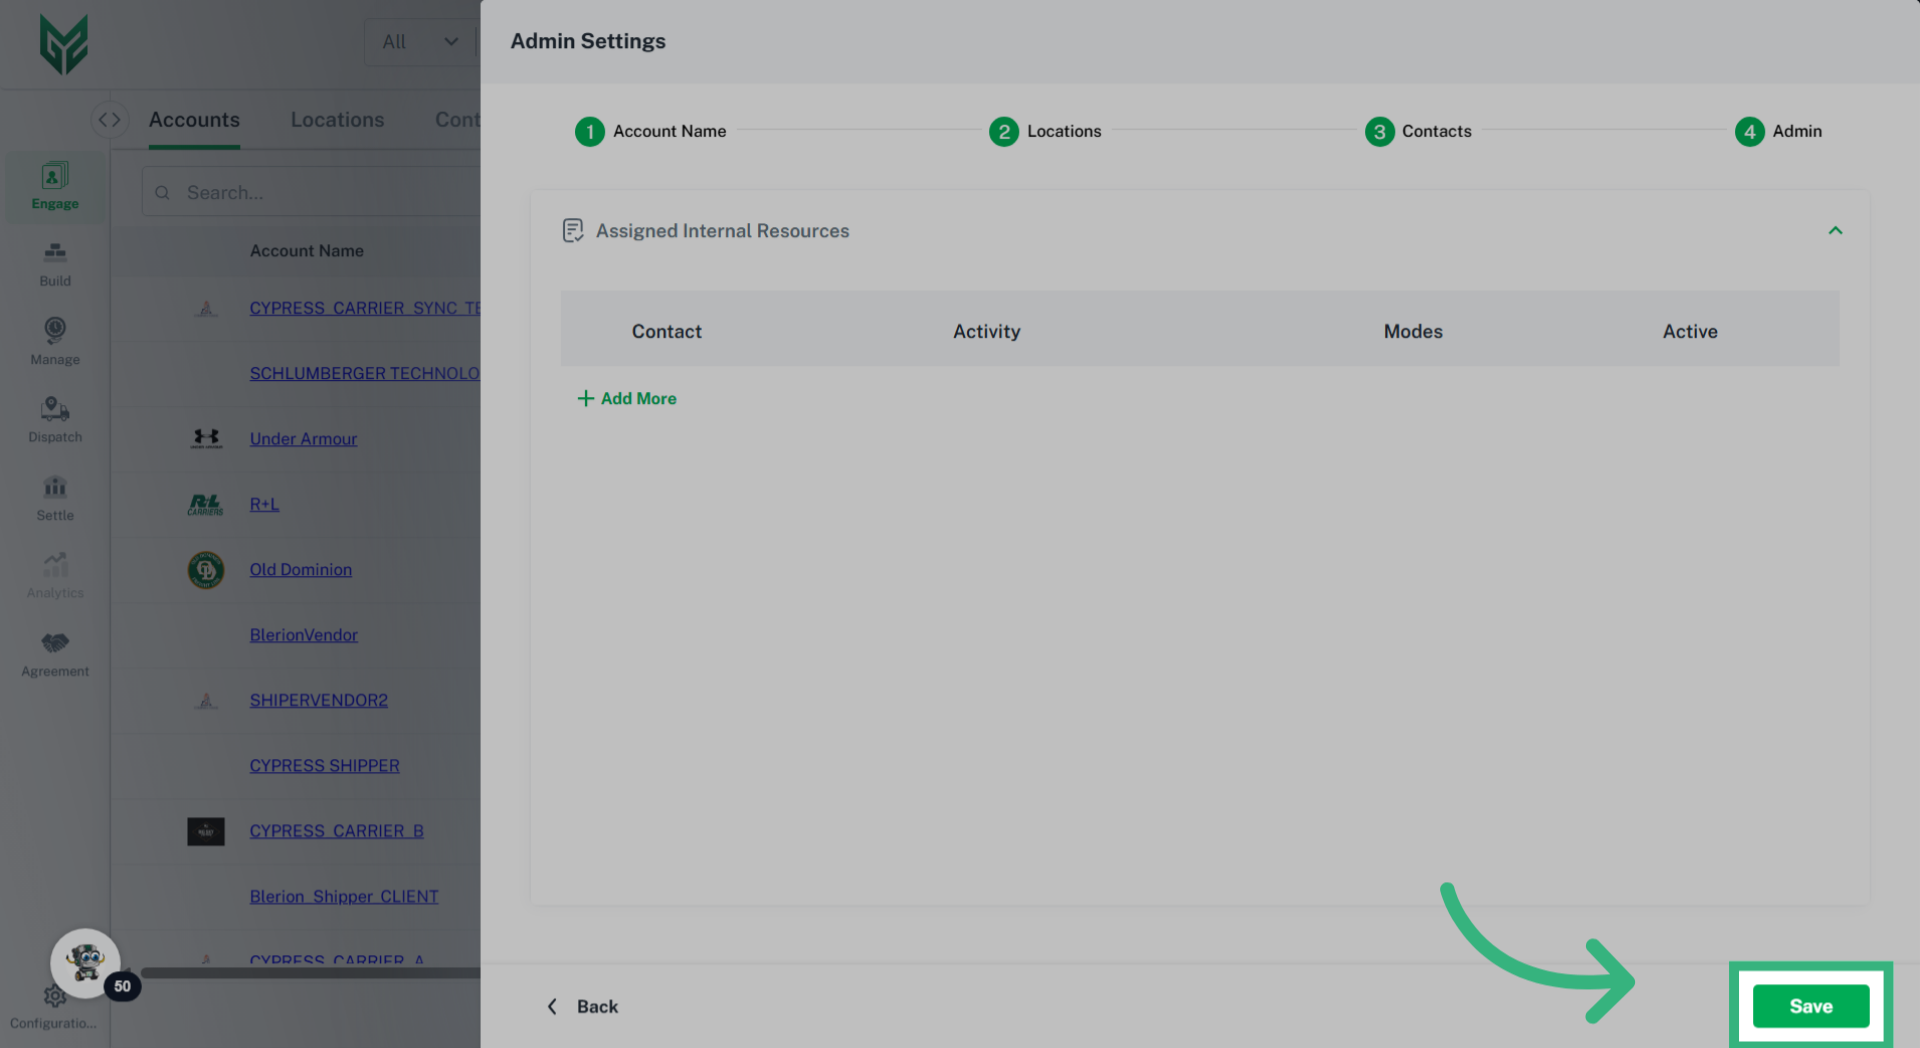
Each type of Engage Account is responsible for managing its specific attributes, including profiles, credit ratings, compliance, and capabilities. Furthermore, every Engage Account can have unique preferences and system settings tailored to its needs. In the G2M TMS, it is mandatory for each Engage Account to have at least one Location (typically designated as a Billing location) and one Contact (which includes a name and email address).
Solution Overview:
Once an Engage Account is created, all relevant information linked to that account will automatically populate in the application wherever applicable.
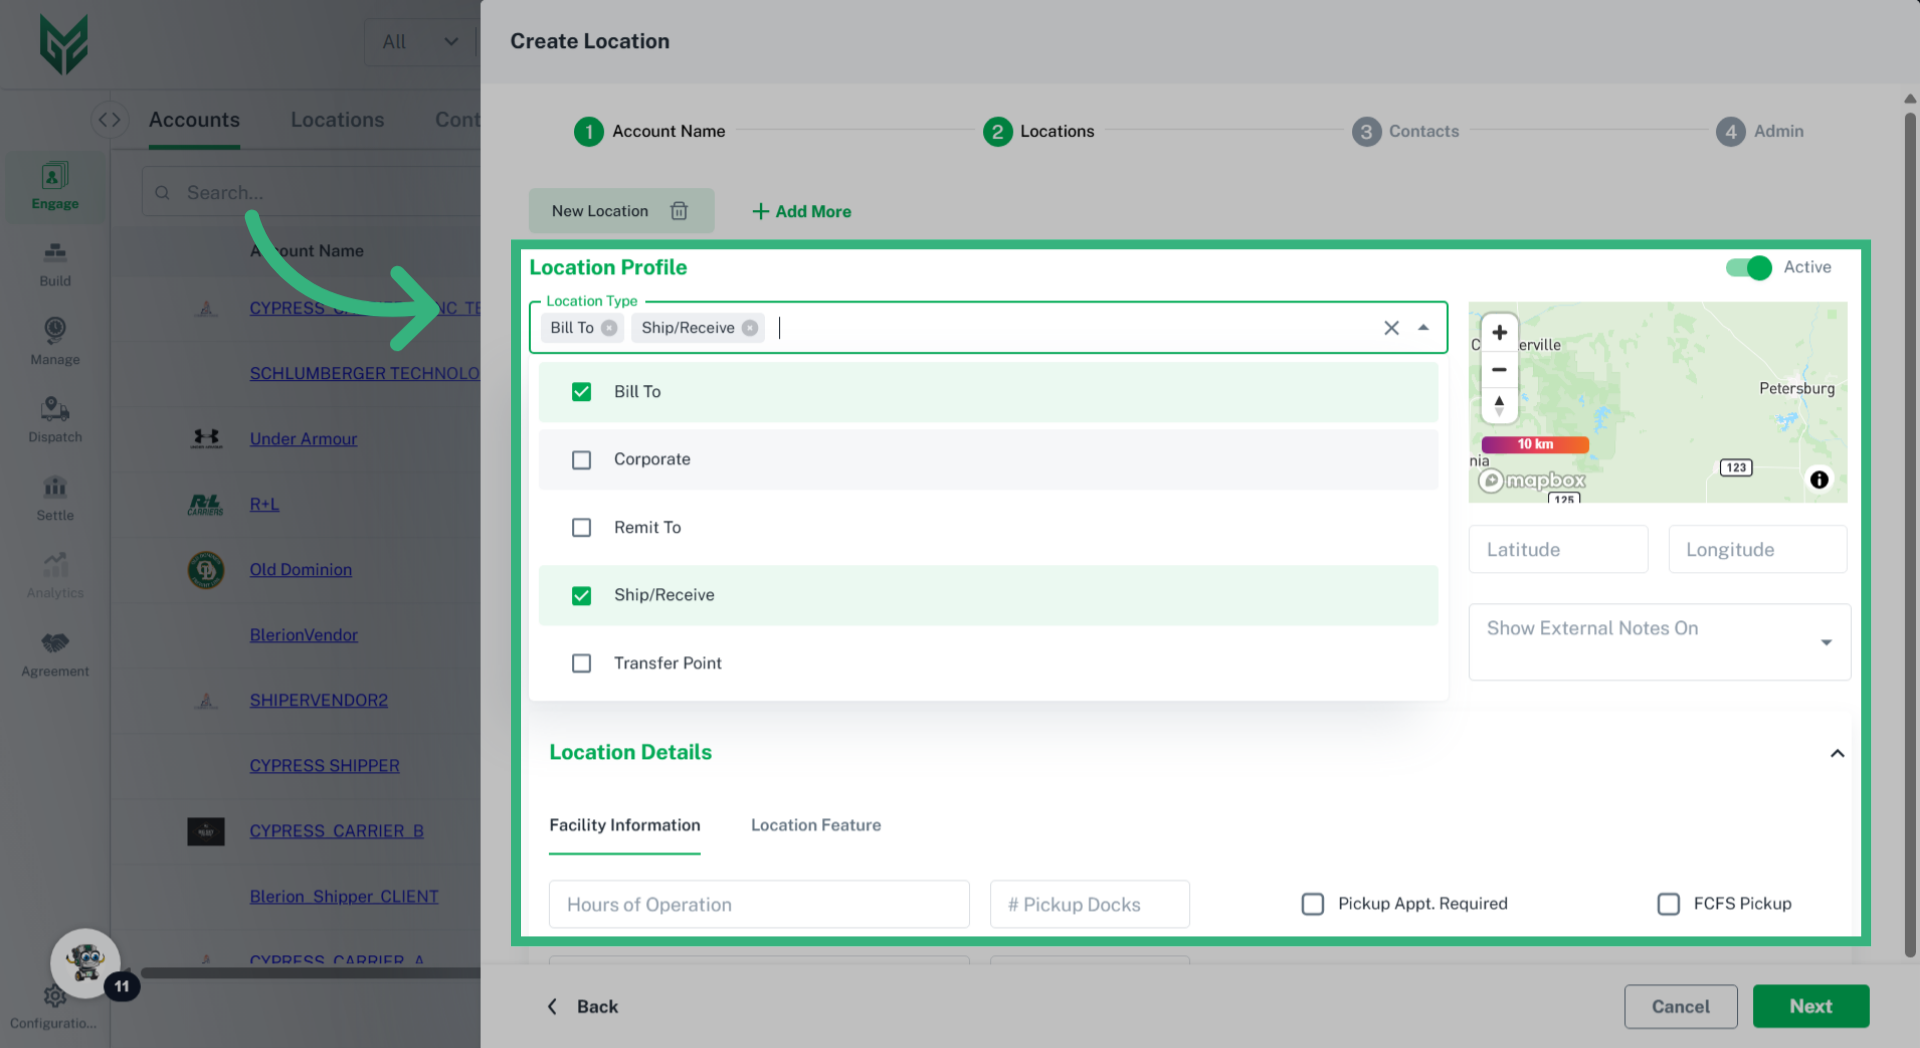
Locations is a required field when creating an account and can be categorized by their type (Bill To, Remit To, Ship/Receive, Corporate, or Transfer Point), along with location name, address, hours of operation, and accessorial for the licensed account. Certain fields will auto-populate based on the location type throughout the application. An account may have as many Locations as necessary.
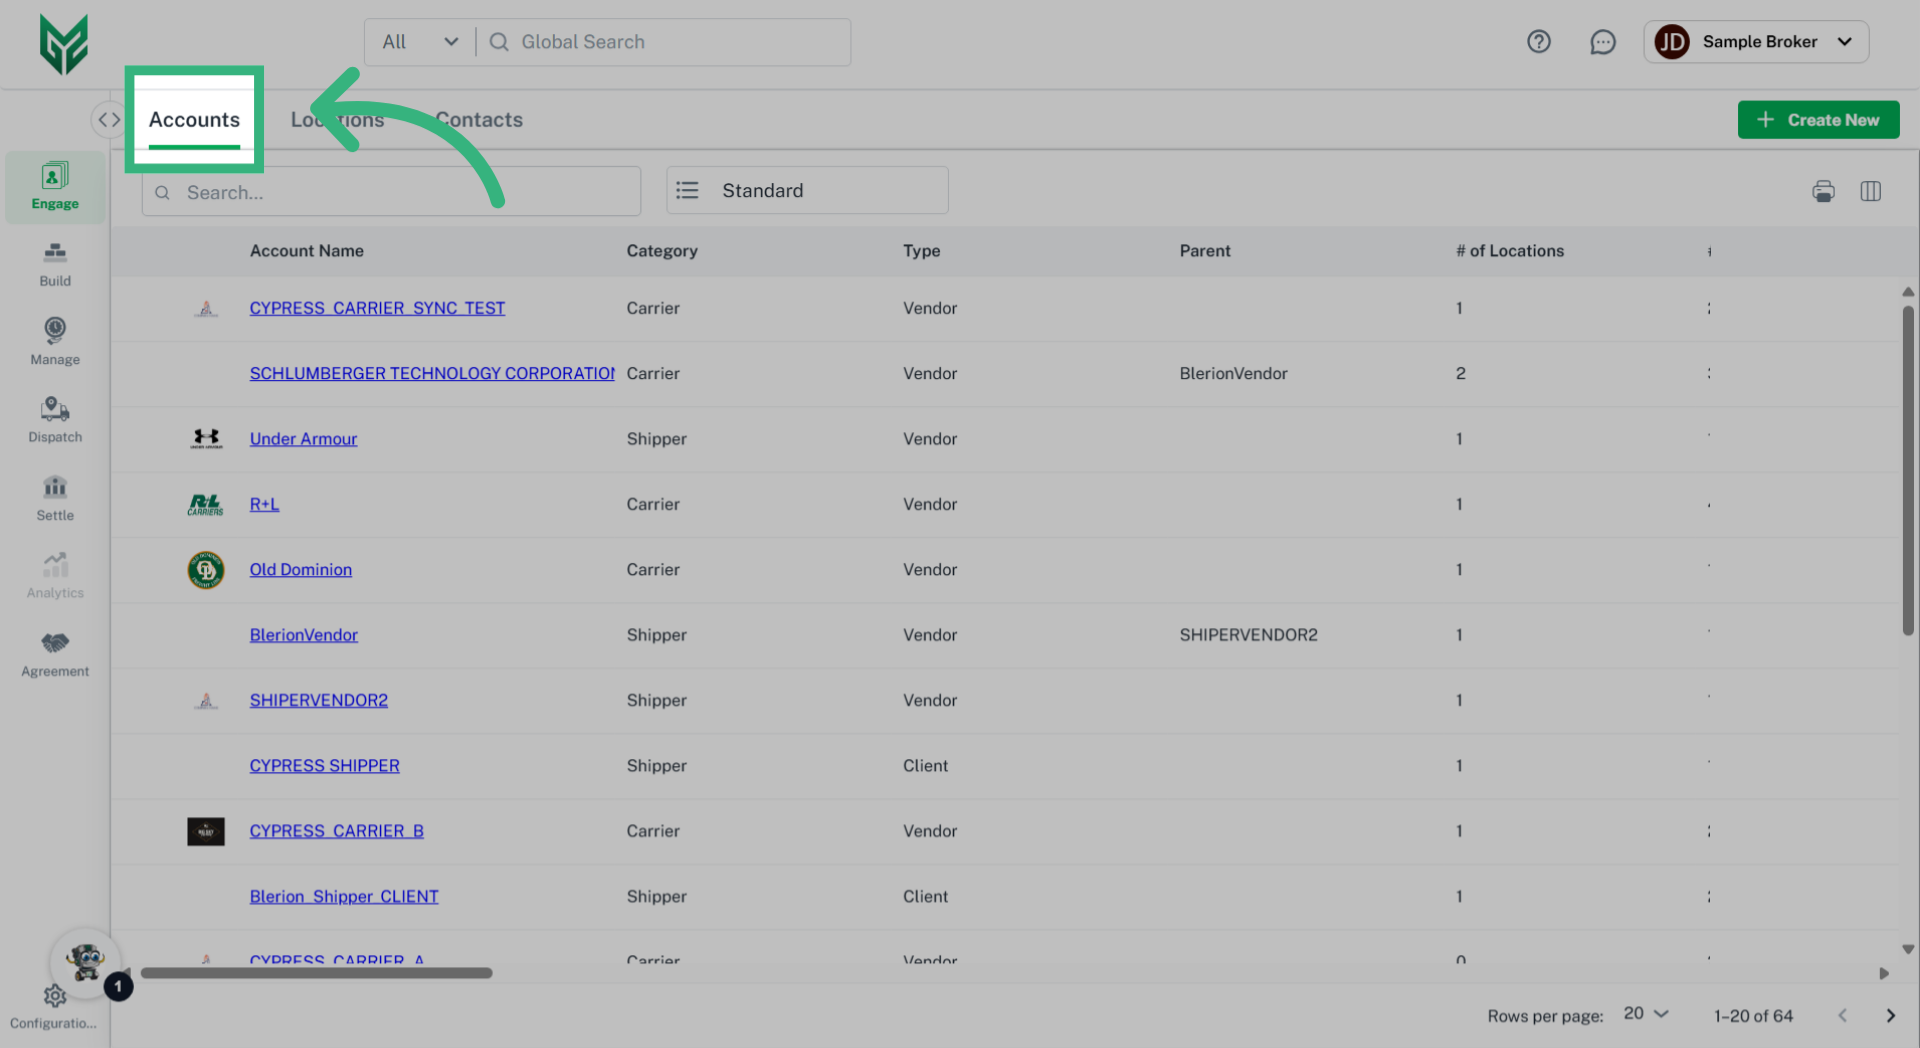
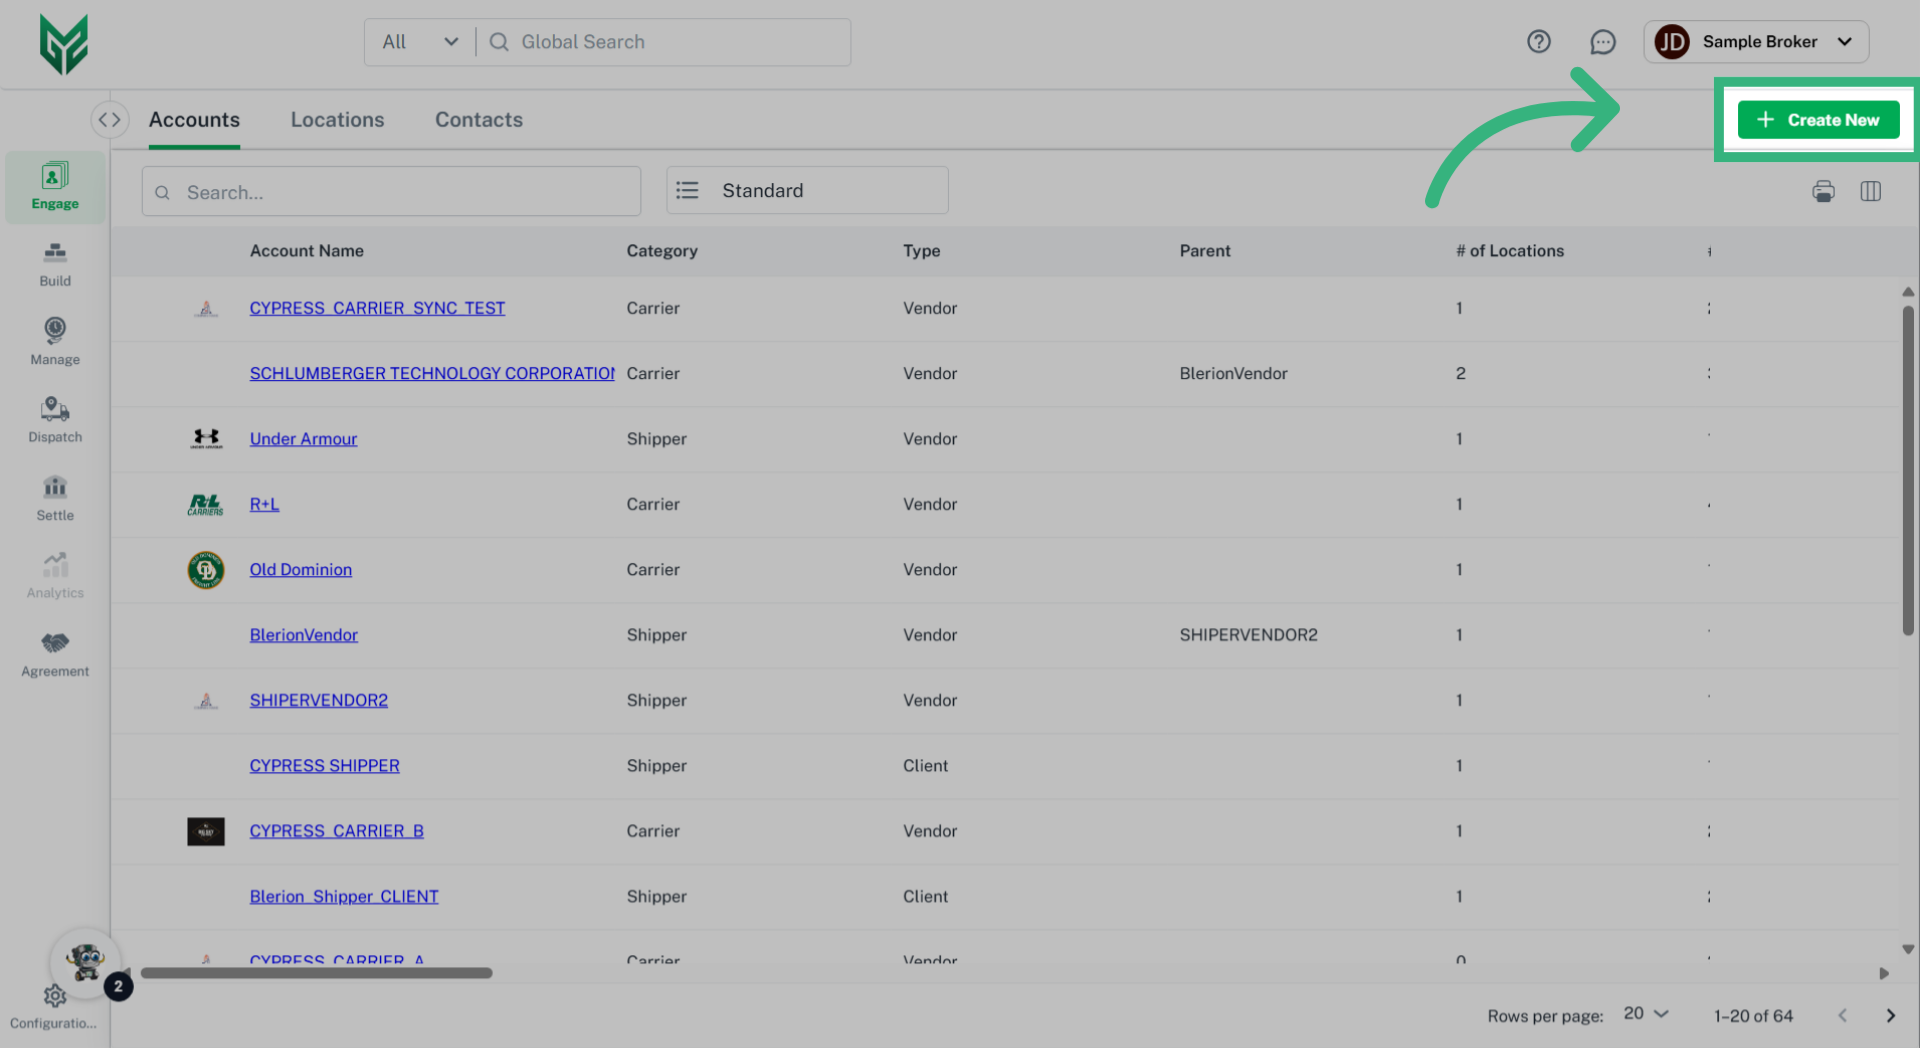
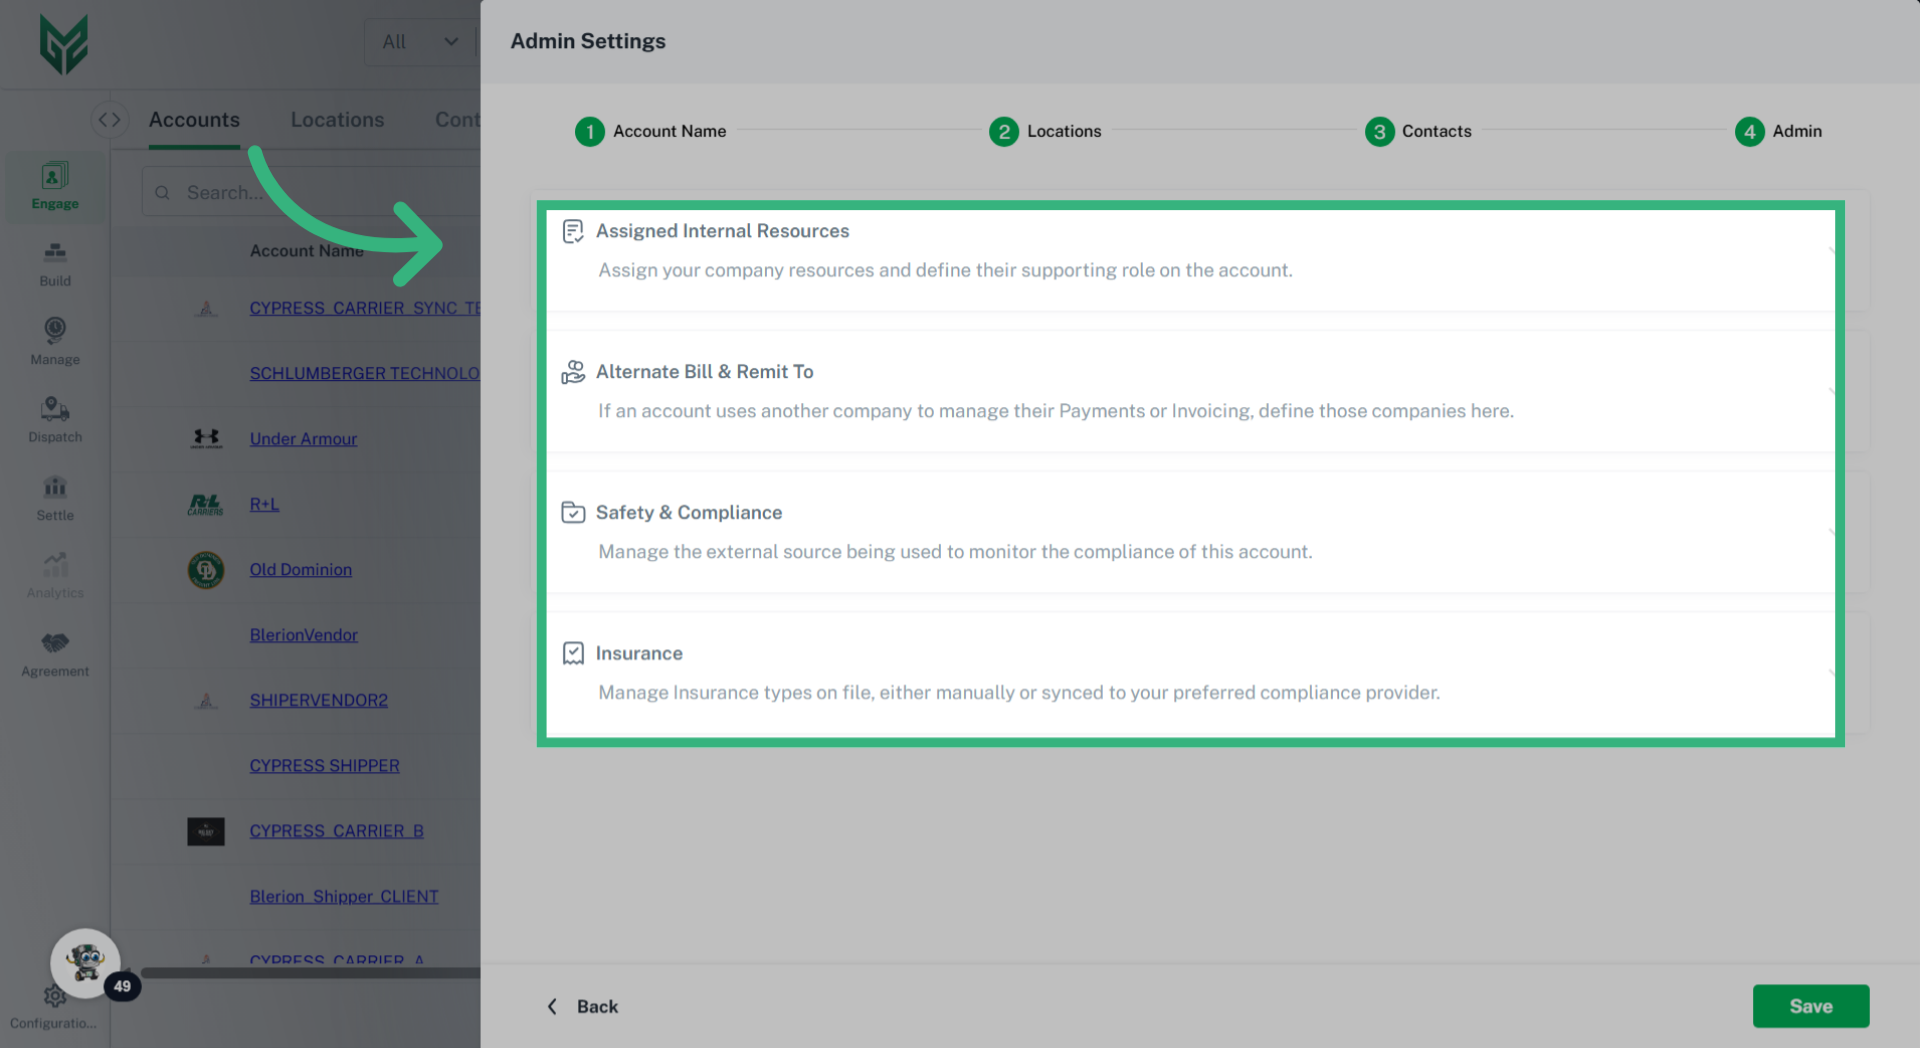
How to Create an Engage Account:


Location Fields include:
-
- Location Type: Multiple options can be selected. Options include:
- Bill To: (Broker and Shipper persona only)- This is the address where this account can receive an invoice. This Bill To address will automatically populate on a BOL or Invoice when Location is selected.
- Remit To: (Broker and Carrier persona)- This is the address where this will receive payment.
- Ship/Receive: This type is recommended to make building quotes and shipments more efficient. Ship/Receive Locations will be available to auto populate when creating a Quote or Shipment for this Account.
- Corporate: Identifies the location as this Account's corporate headquarters.
- Transfer Point: (Cross dock, Poll point, Ramp, Consolidation Center) Identifies the location as a place for transferring or transloading freight between different transportation modes (e.g., from OTR to rail) in an intermodal process.
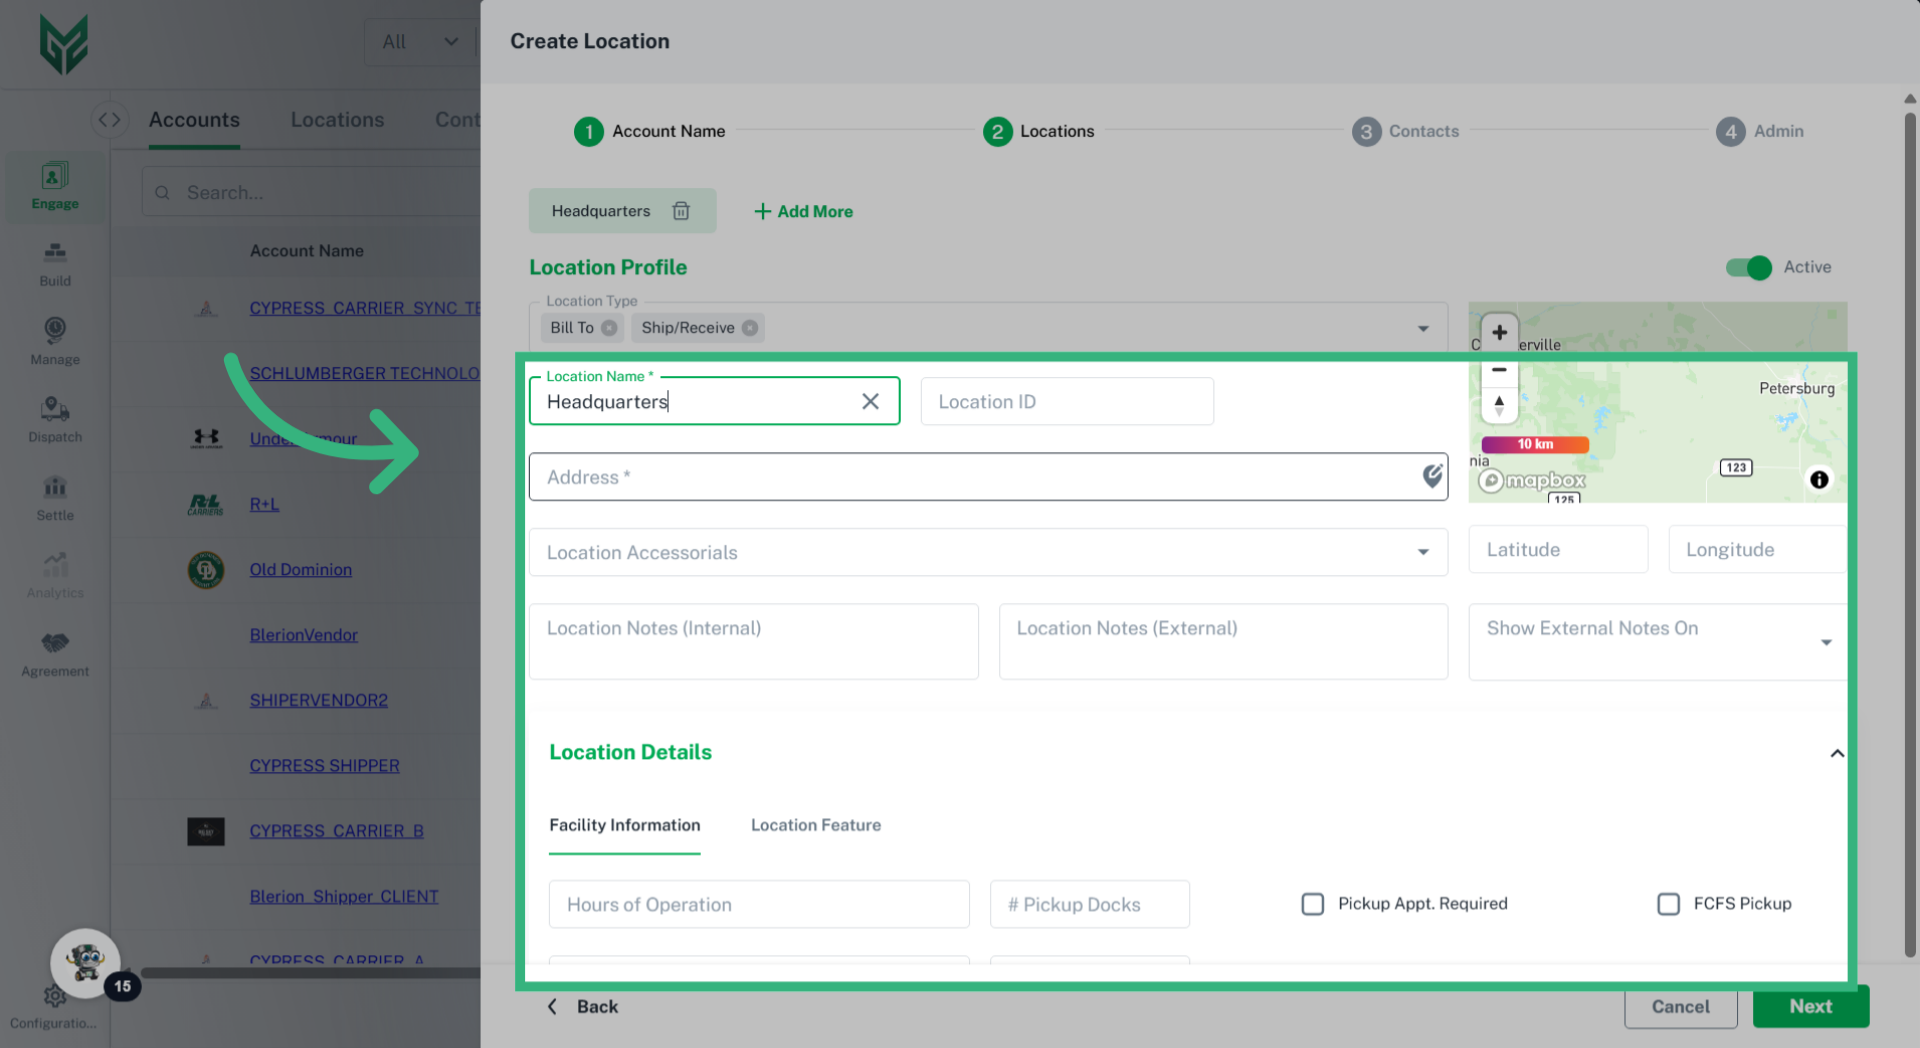
- Location Name*: Utilize a specific name that will associate to that location (required)
-
Location ID: Enter a unique location code/ID, which may help with future Integrations. If a location ID field is used for an integration, the ability to edit this field becomes restricted and can only be edited by your superuser.
- Location Address*: Enter specific residential or commercial address of Location (required)
-
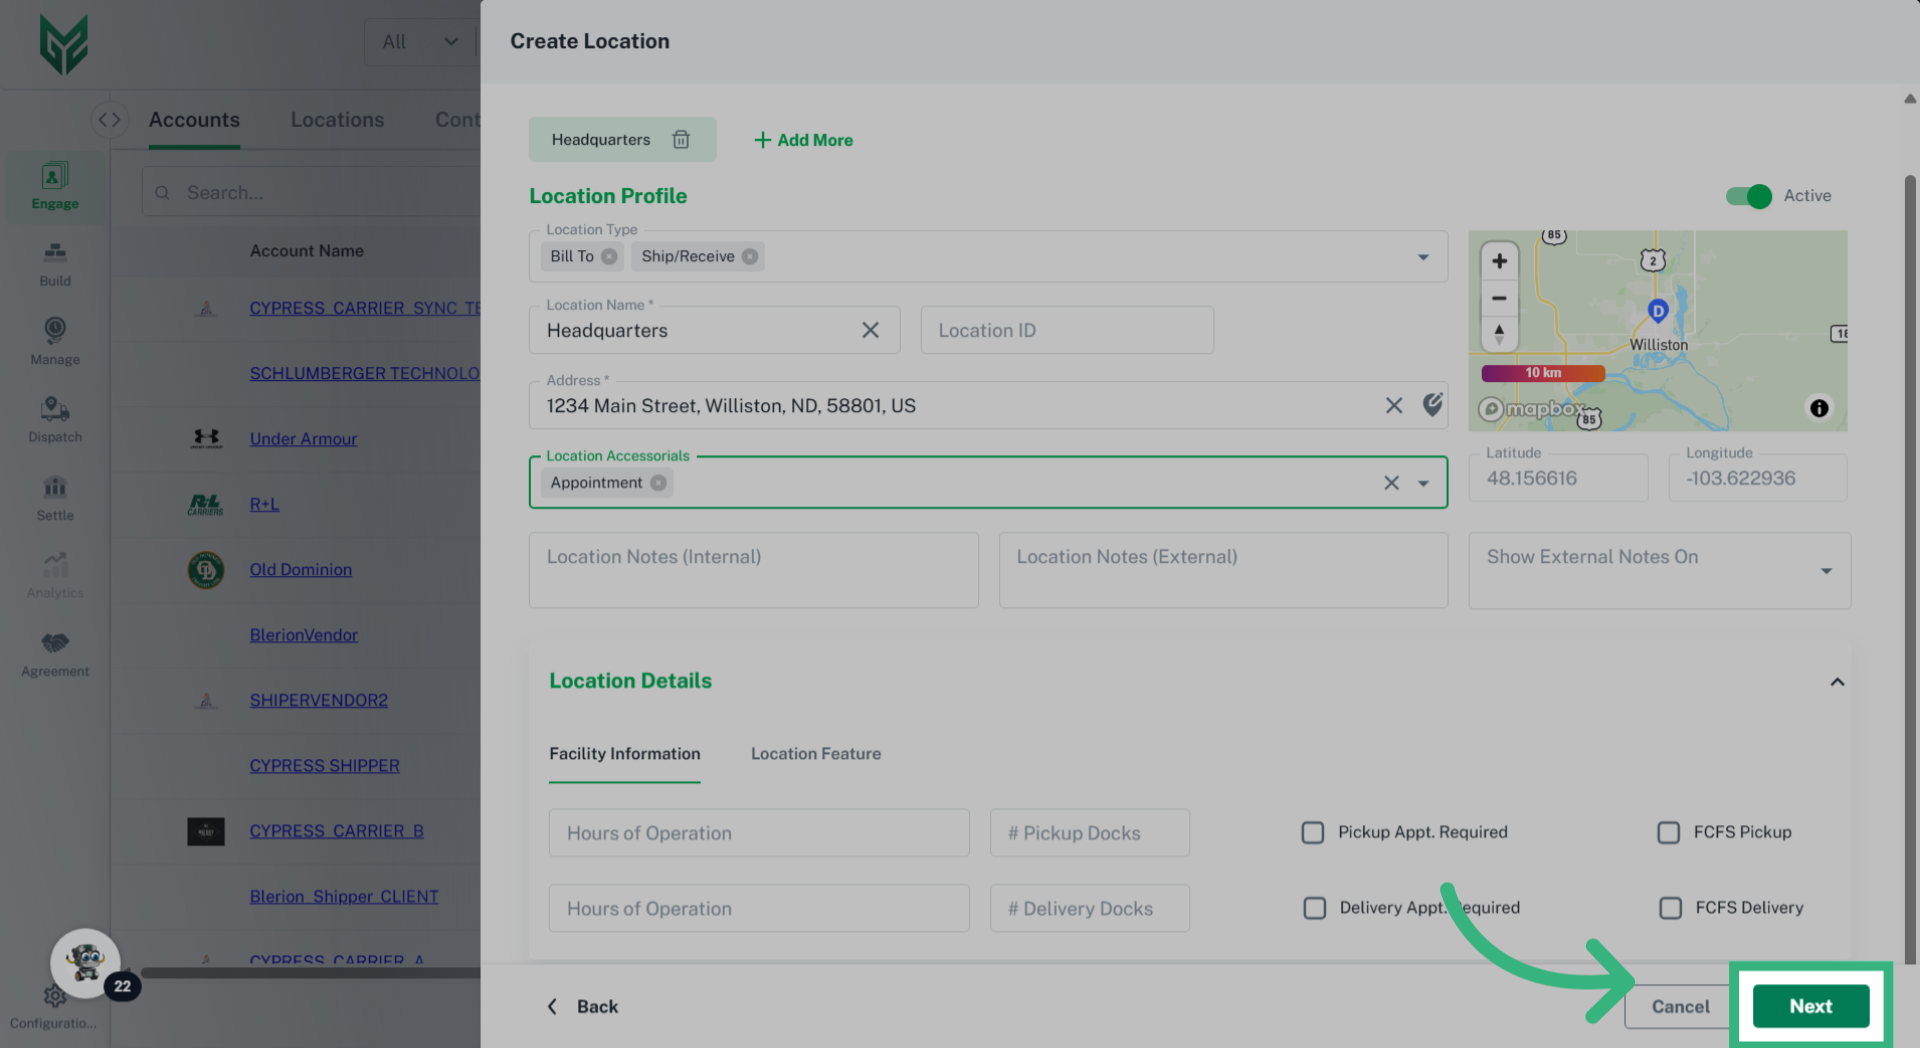
Location Accessorials: Each location can have specific accessorials associated with it to streamline building quotes or enforcing specific location standard accessorials.
-
Latitude/Longitude: Auto populates with address and can be used for visual purposes when building shipments.
- Internal Location Notes: Internal notes within G2Mint can be used for location-specific reminders or standard requirements. These notes are only visible to your organization.
-
External Location Notes: These can be used to provide actionable and relevant information on BOLs or Quotes. These notes, such as Delivery/Pick up instructions, Appointment Requirements, or specific contact information, aim to improve efficiency, prevent delays, and ensure smooth operations.
- Location Details:
- Hours of Operation: Configure (in our Configurations section) the operating hours for both pickup and delivery locations. This information will be displayed on shipments to assist with scheduling.
- # of Docks: For information only purposes.
- Appointment Required: Check box if this Location requires an appointment rather than a First Come, First Serve option.
- First Come, First Serve: Check this box if Location works on a First Come, First Serve basis rather than appointment.
- Location Type: Multiple options can be selected. Options include: