Last Updated: May 6, 2025
Applies to:
Shippers, Brokers, Carriers, and Partners
Common Scenario(s)/Challenge (s):
A Shipment encompasses various important details, including the starting point (origin), delivery location (destination), types of handling units, package specifications, the nature of the goods (commodity), freight classification, dimensions, and weight. Additionally, it may involve extra services such as hazardous materials handling or insurance coverage.
Solution Overview:
The Build: Shipments feature allows you to input and manage preliminary estimates for transporting goods on a customer's (Shipper's) account. This estimate includes details like origin, destination, handling unit, package type, commodity, freight class, dimensions, weight, and any additional services, such as hazmat handling or insurance. Based on these factors, the quote provides an estimated shipping cost. You can save the Shipment, convert it into a Load, or request a Rate from this section.
A Shipment can be created from scratch, via API, or an upload. Shipments can also be converted from a Quote or an Order, or it can be built from a Template. .
On this page:
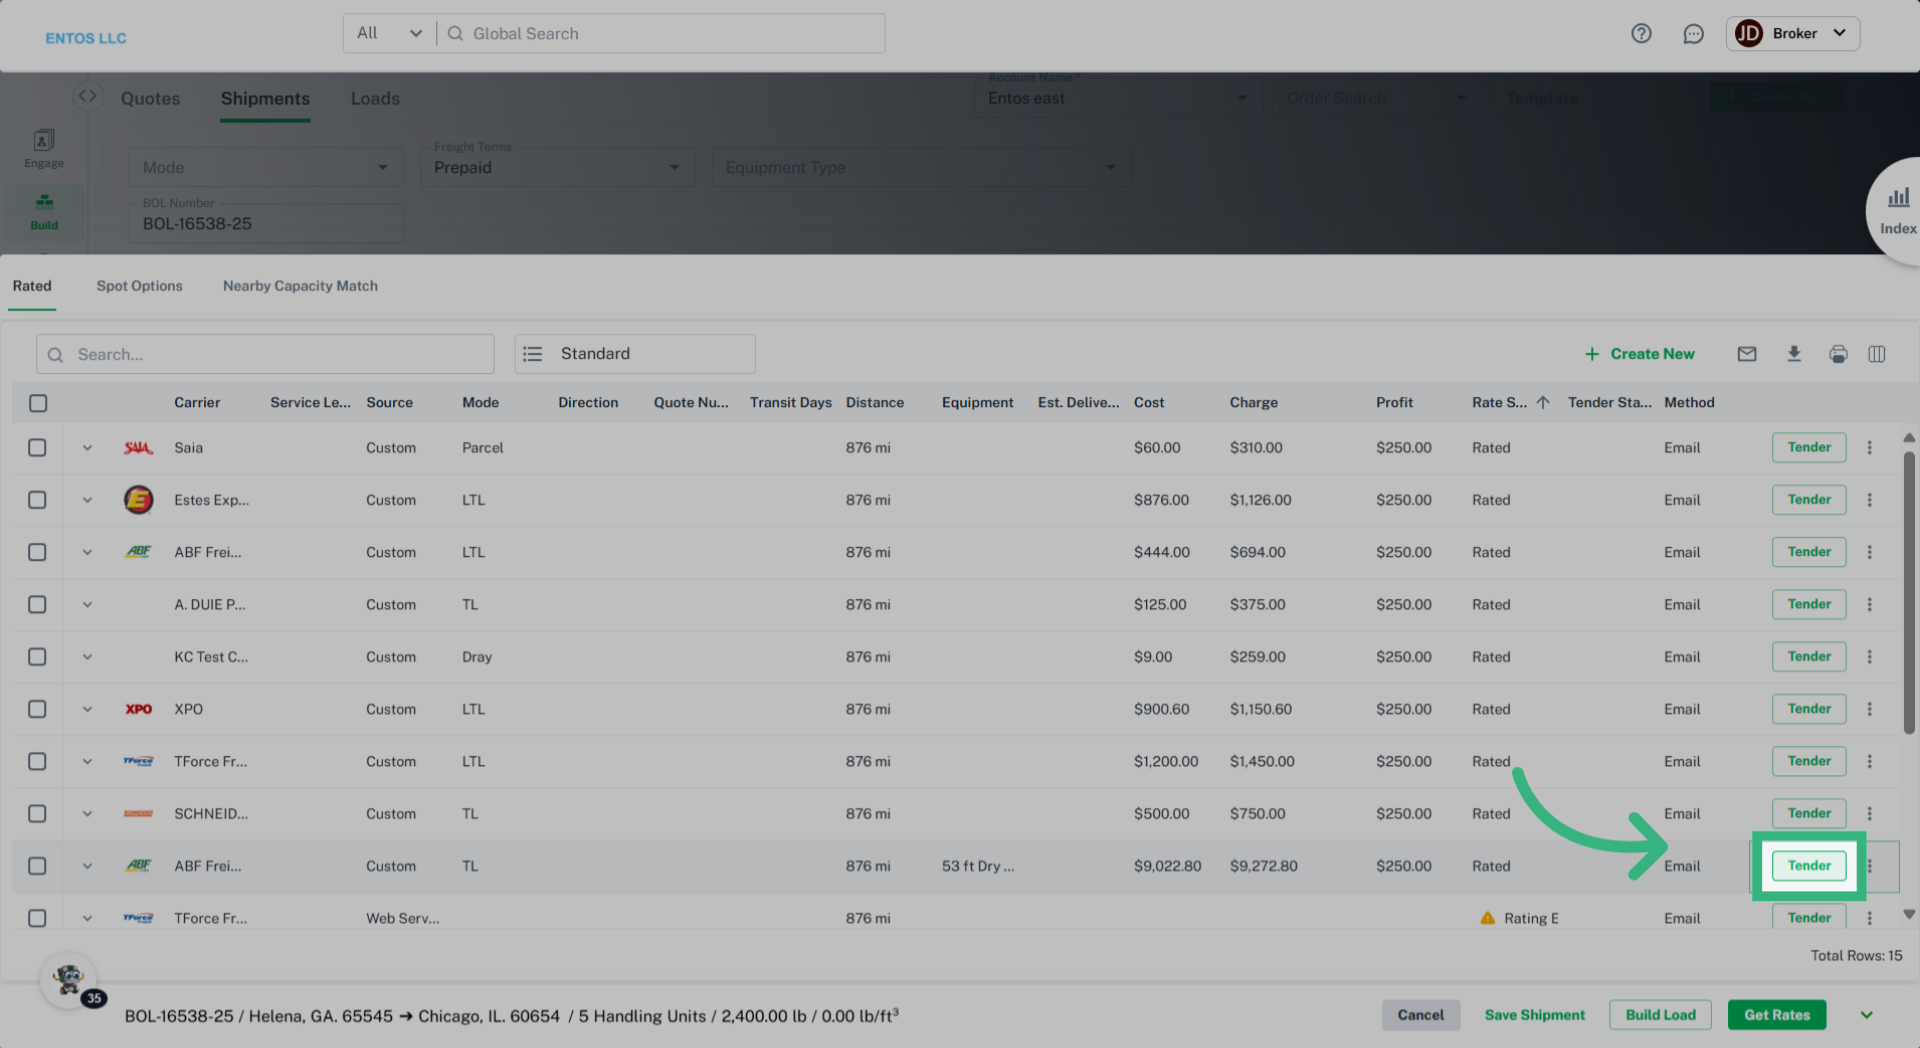
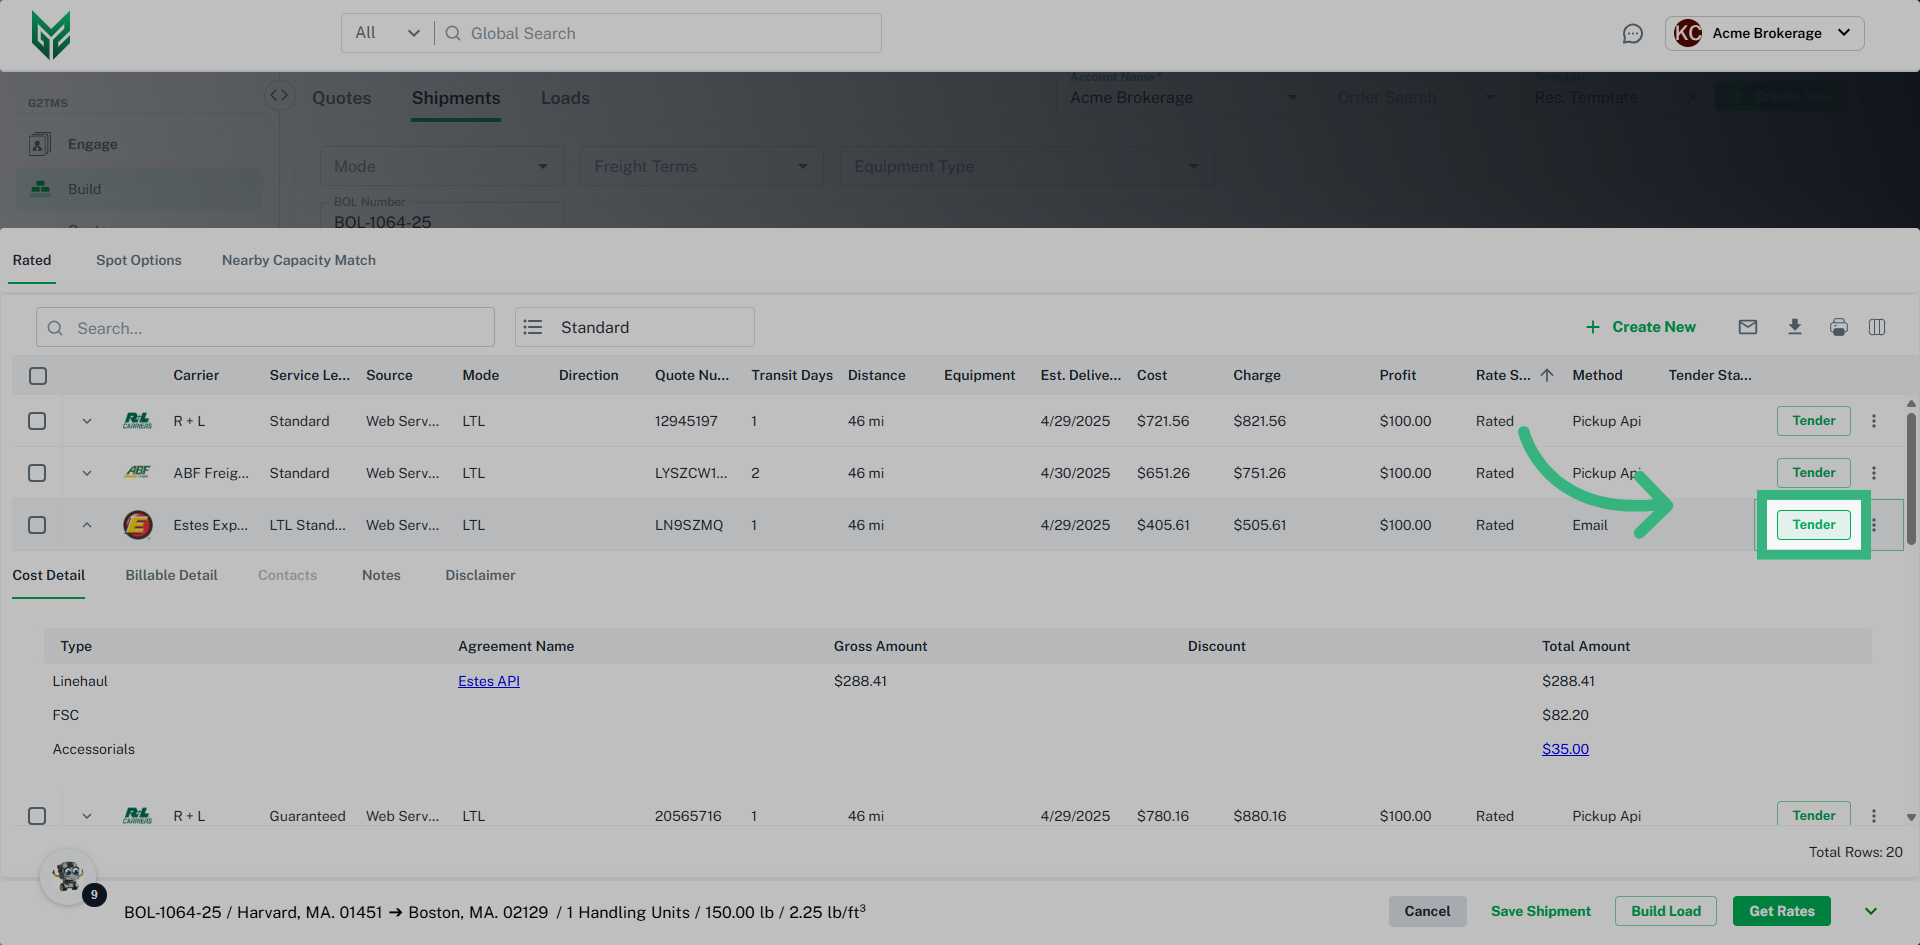
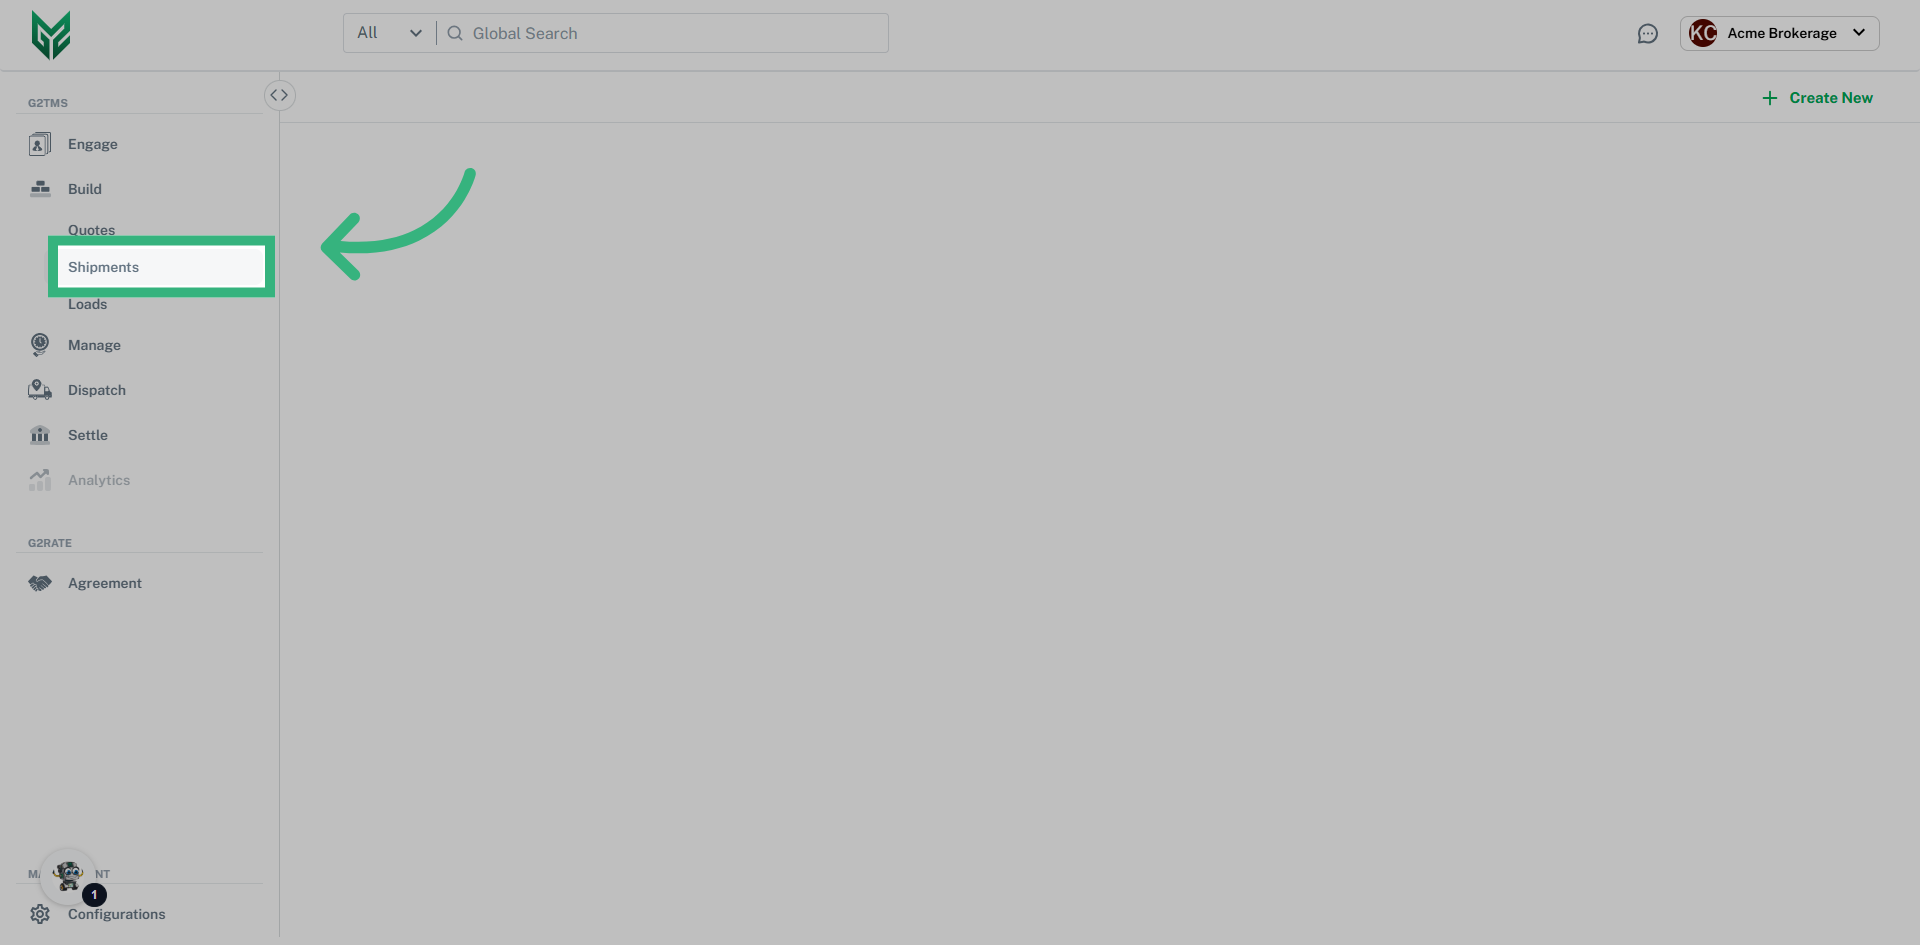
- Build and Tender a Shipment
- Convert a Shipment from a Quote
- Build a Shipment from a Template
- Create a Shipment Template
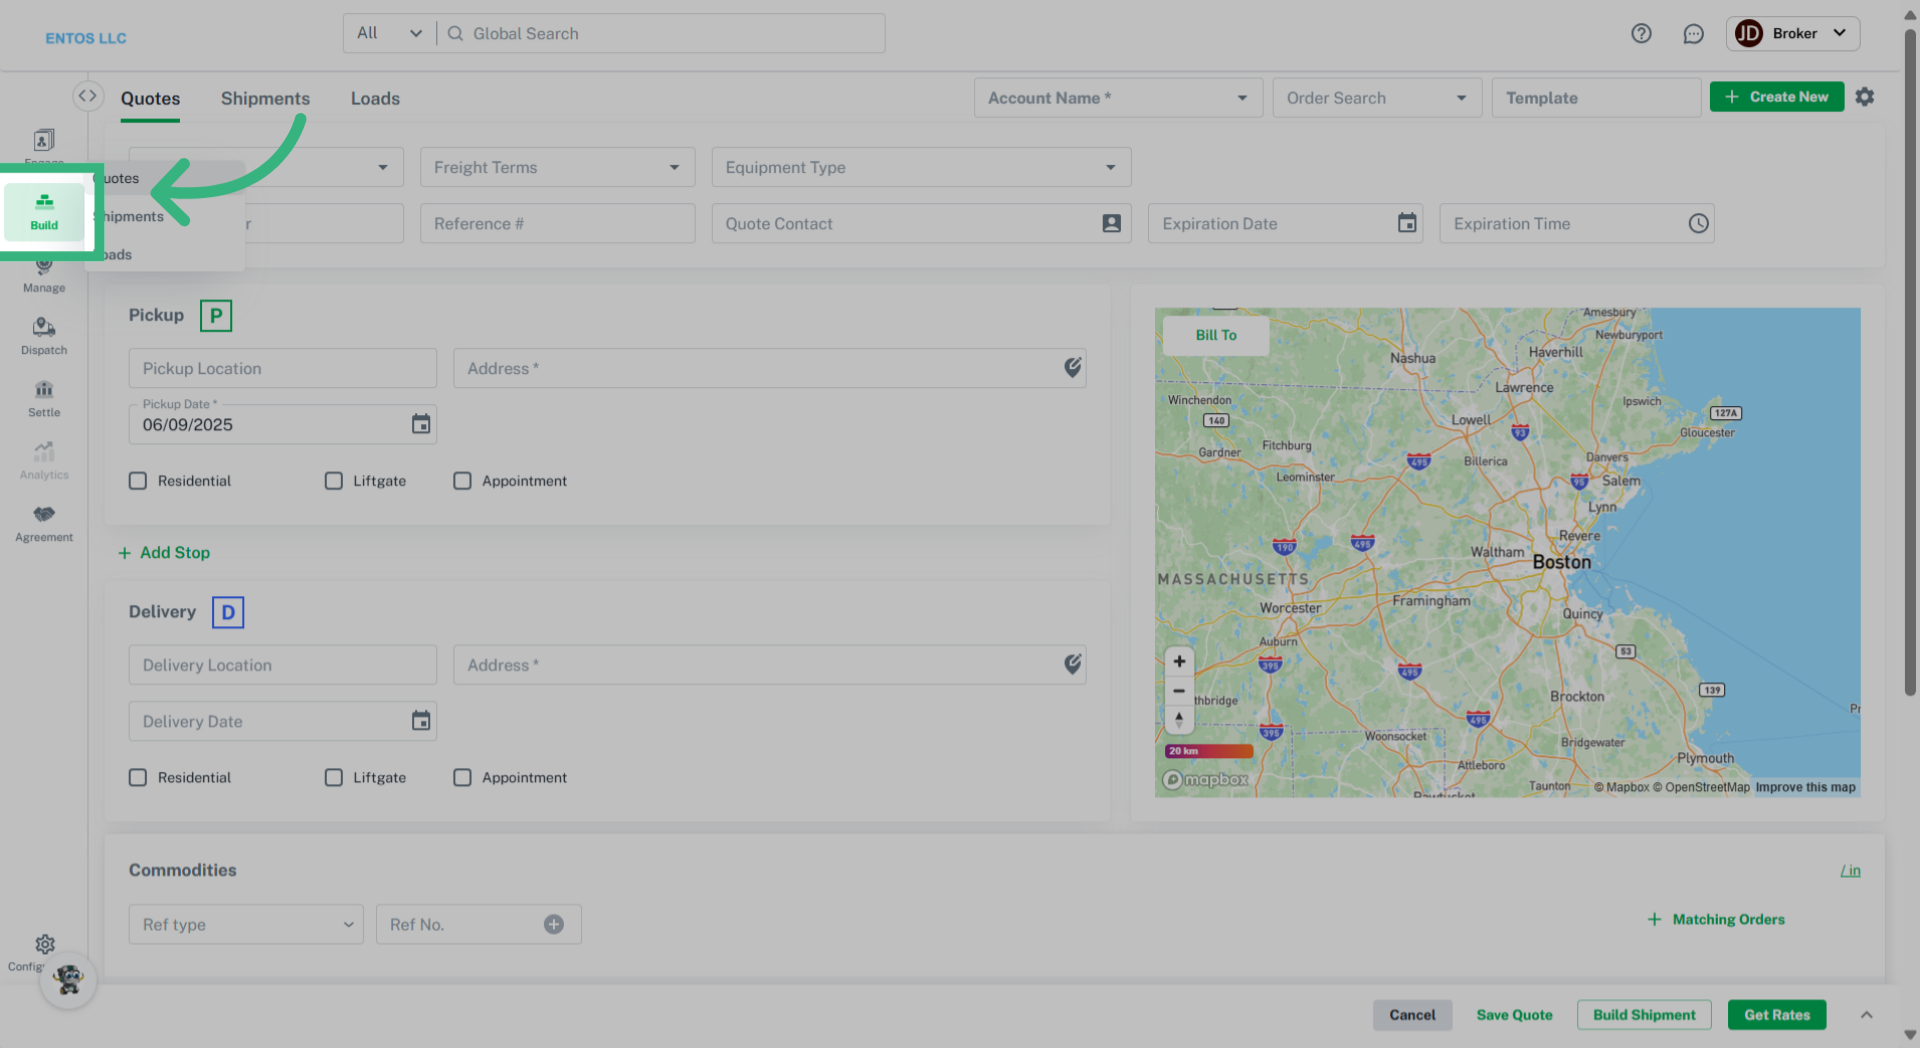
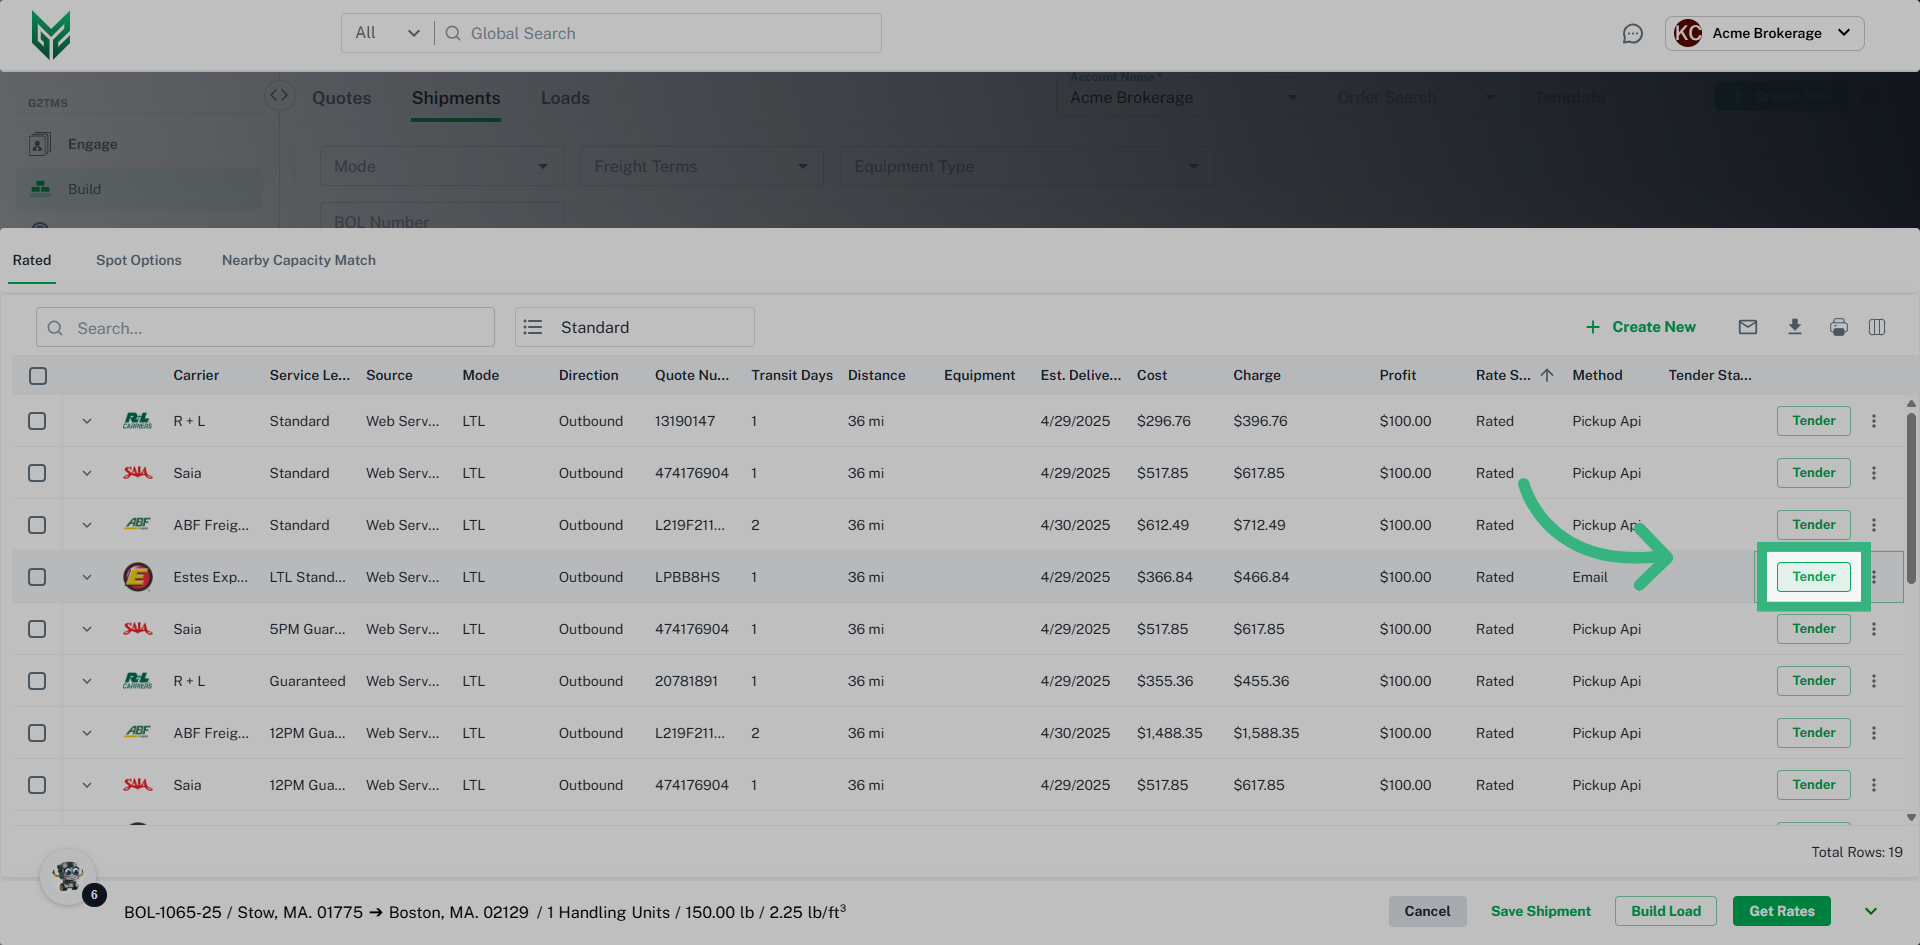
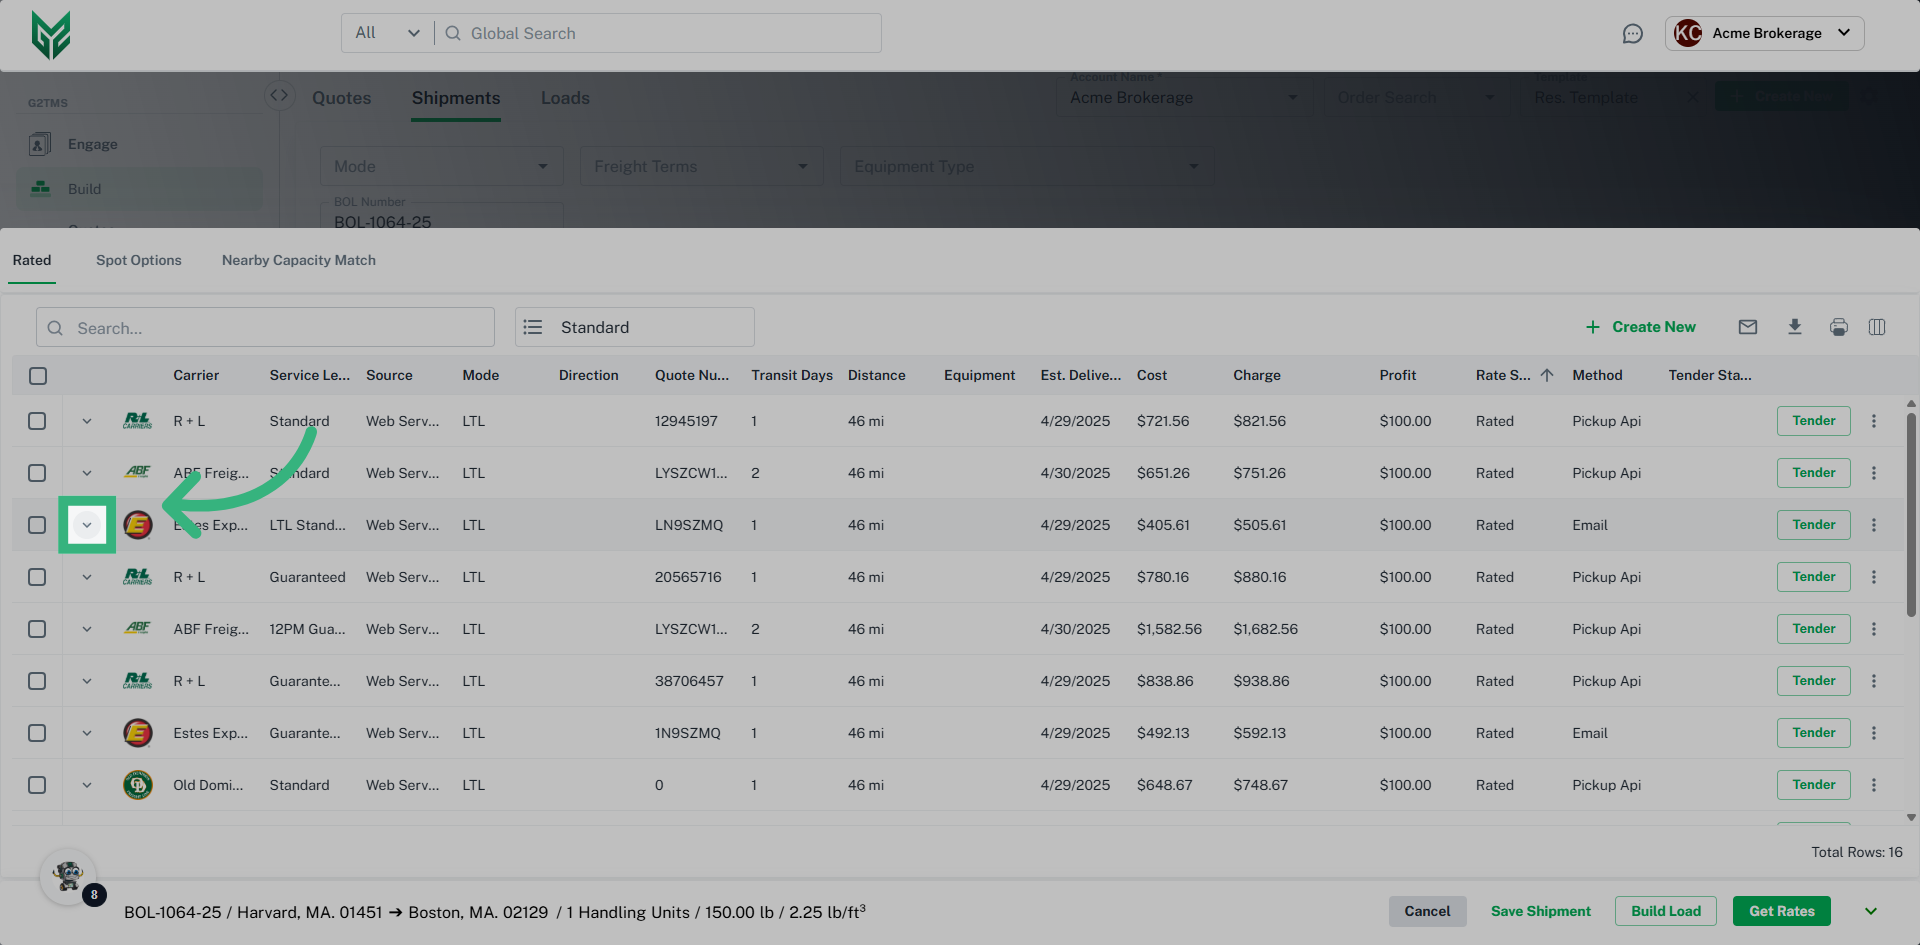
How to Build a Shipment?
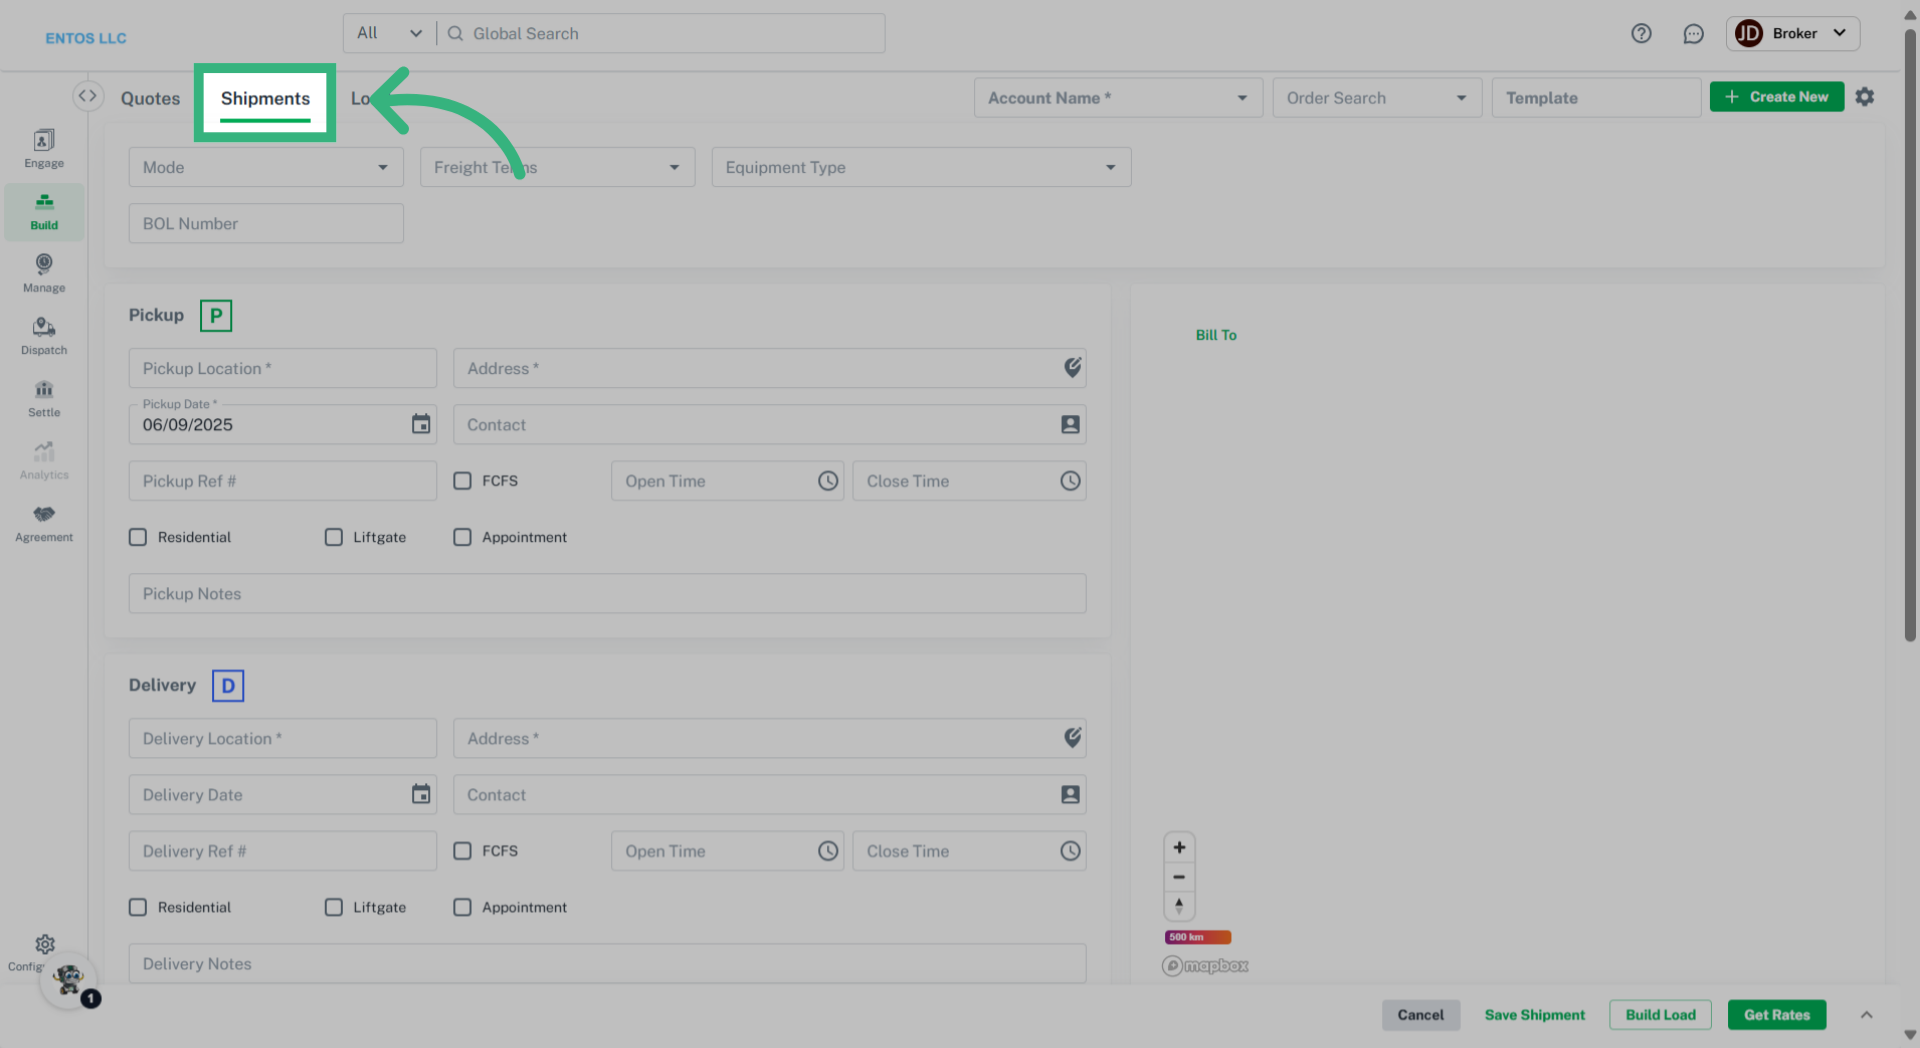
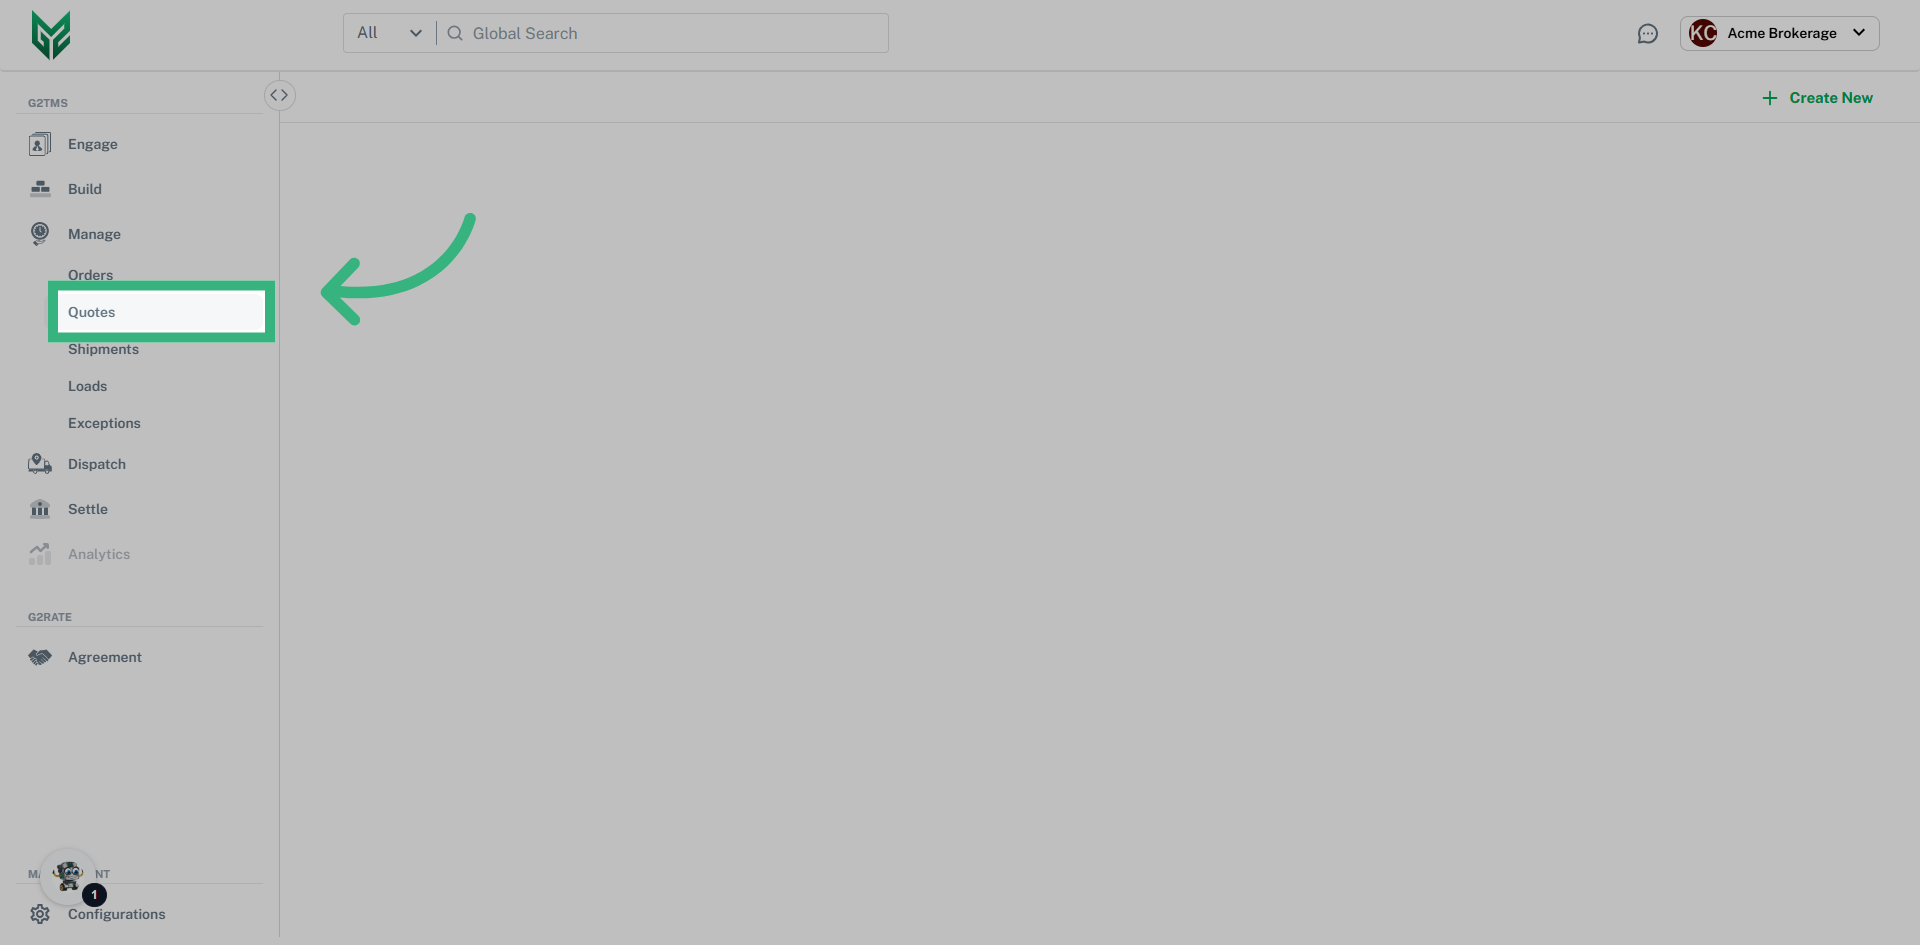
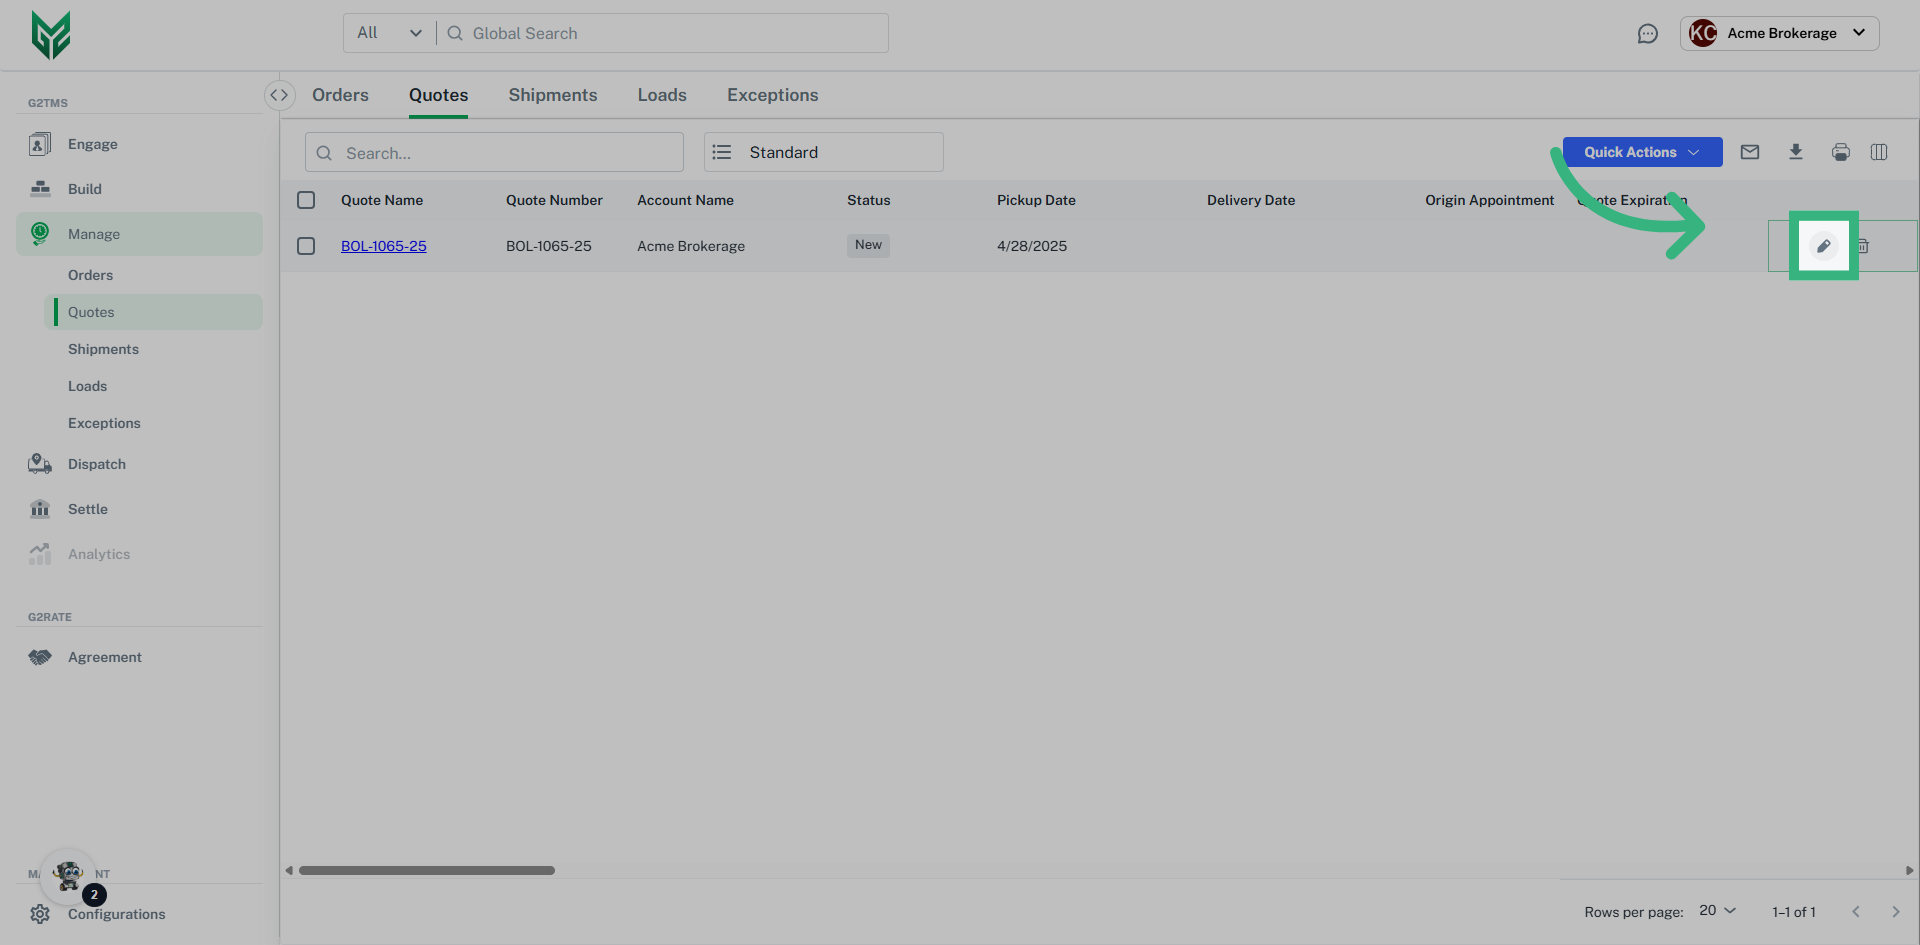
Convert a Shipment from a Quote

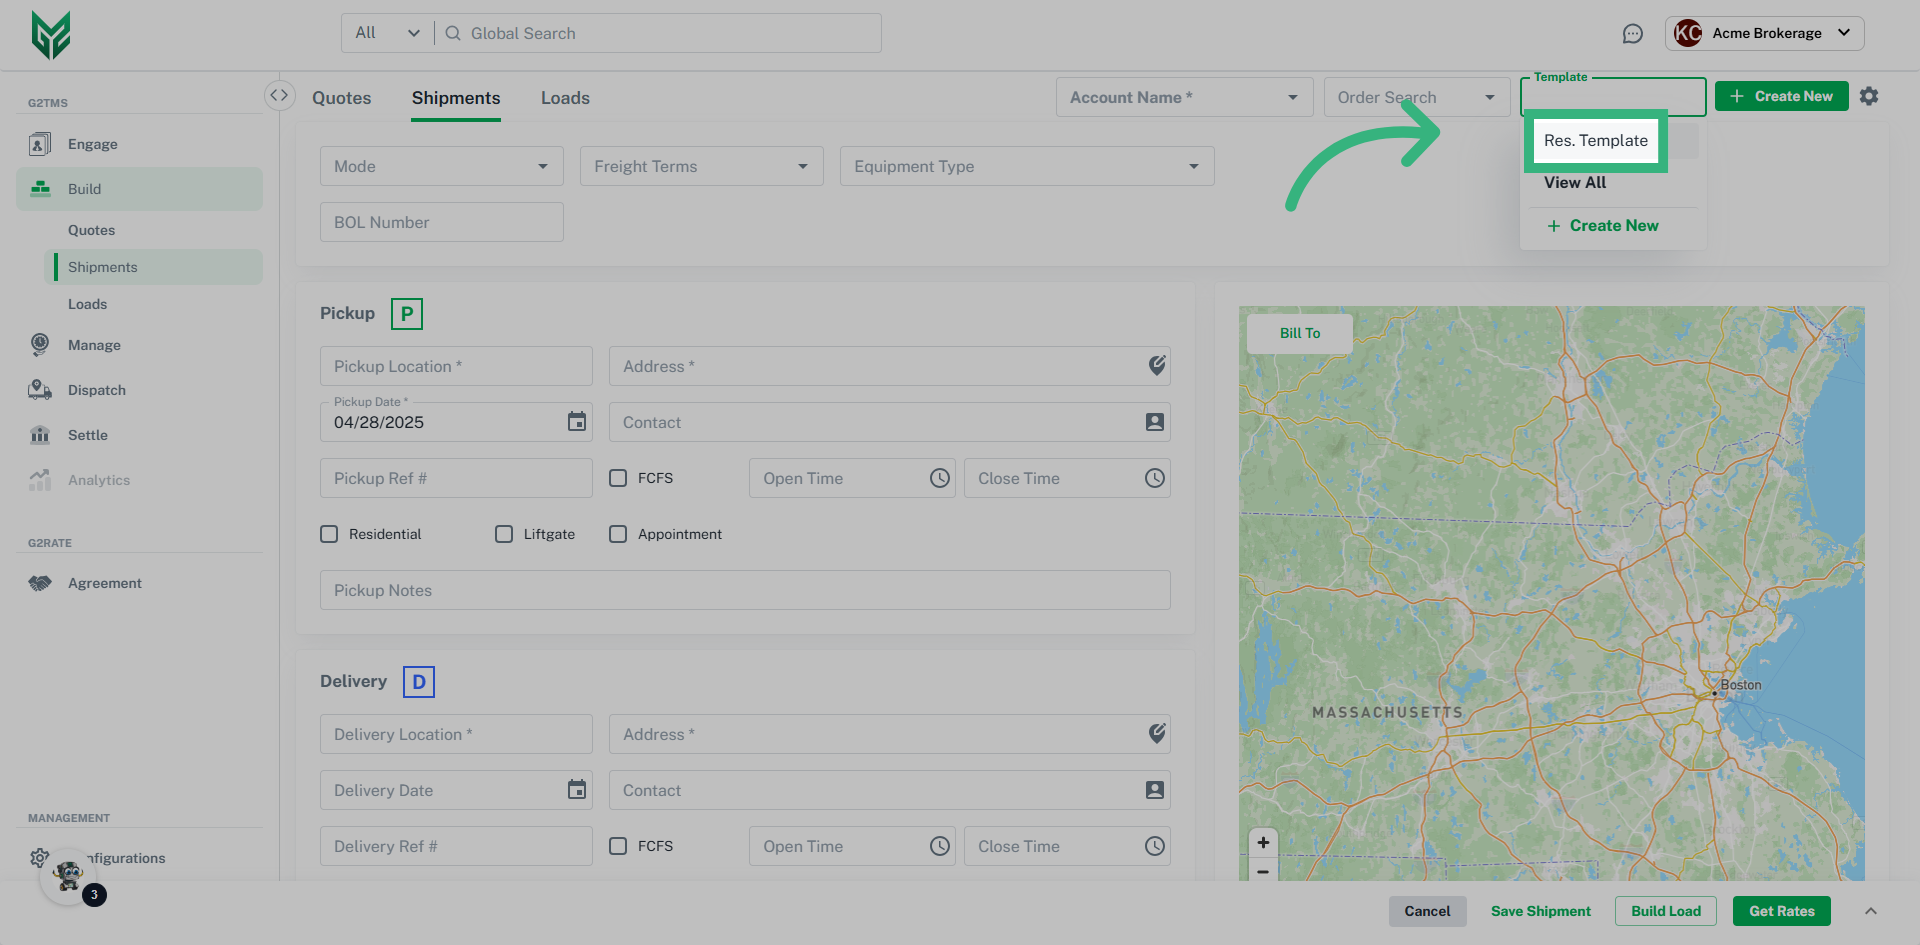
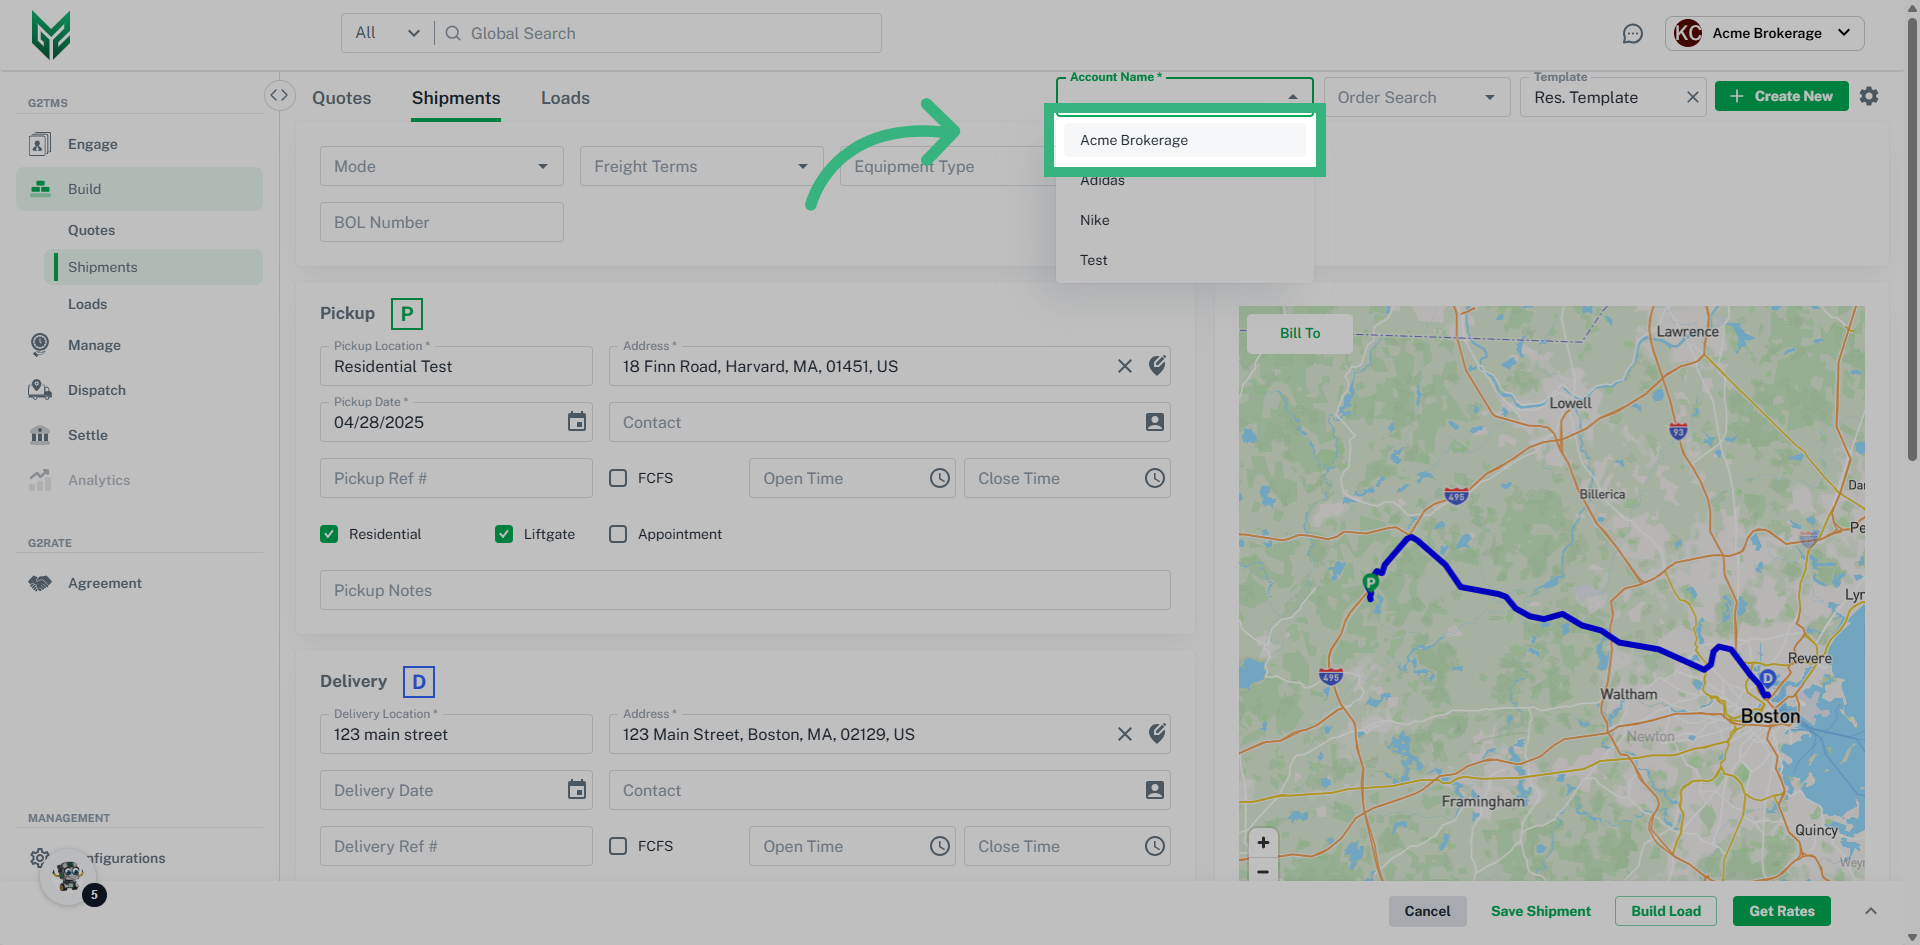
Building a Shipment from a Template


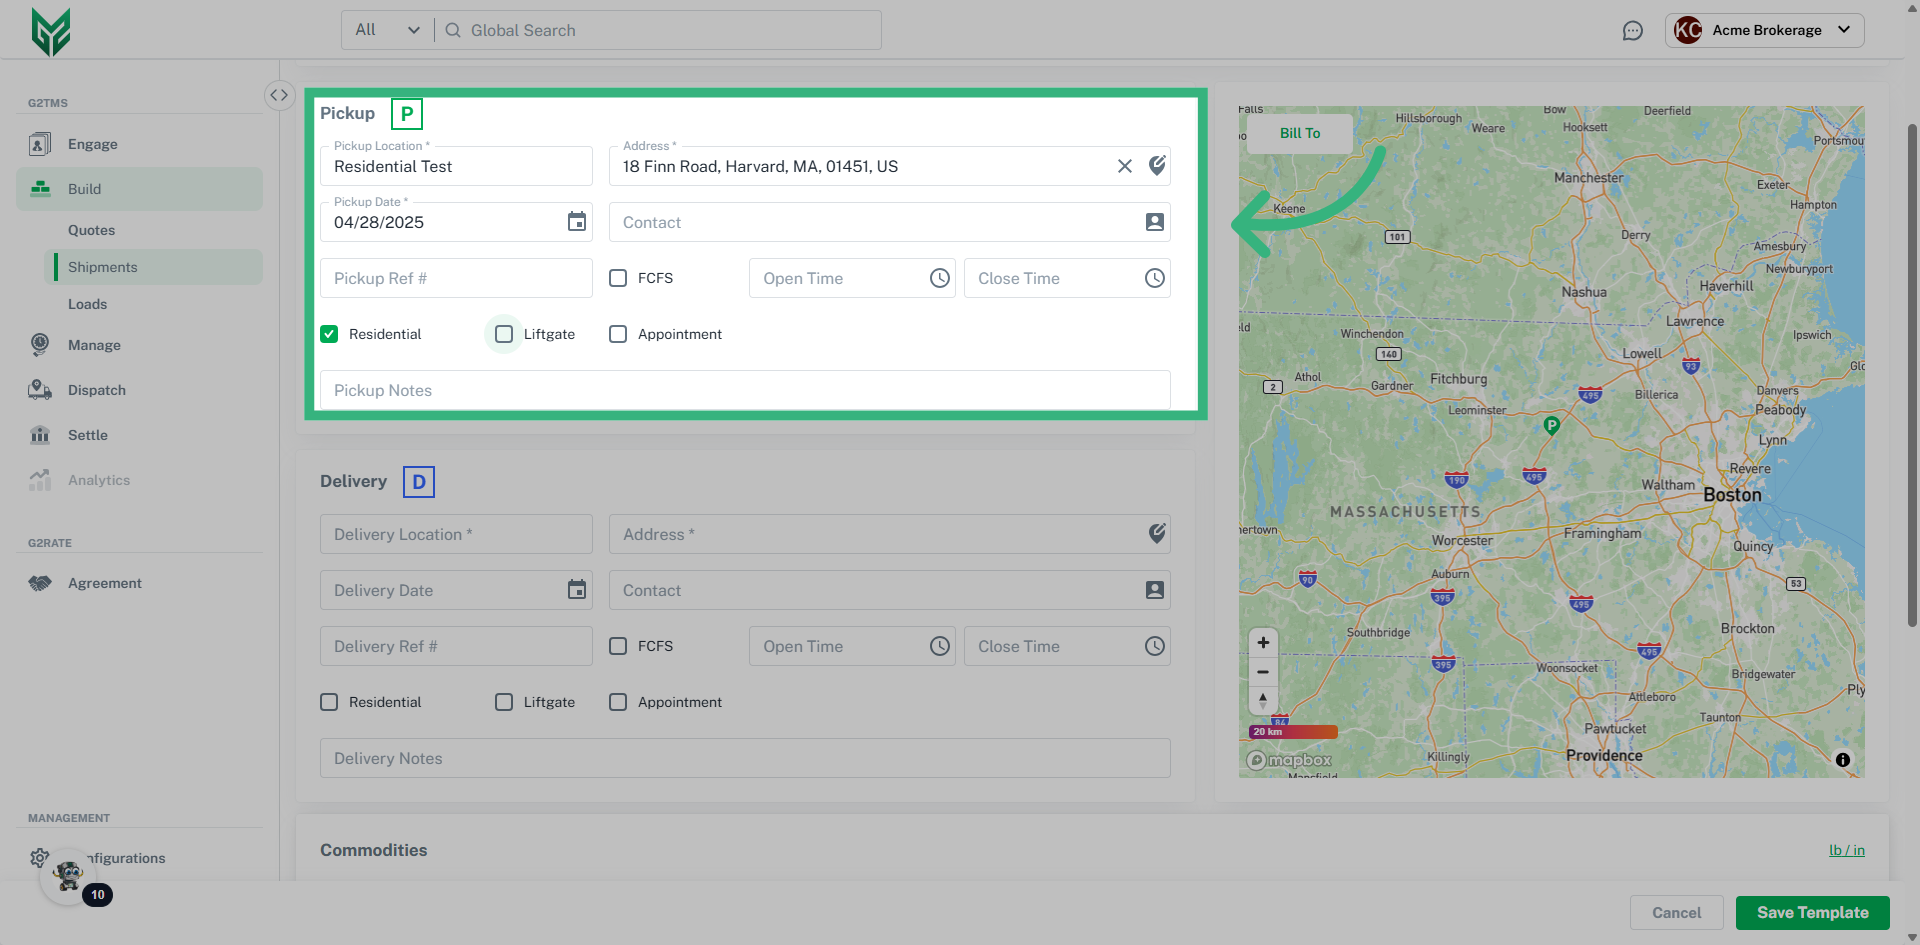
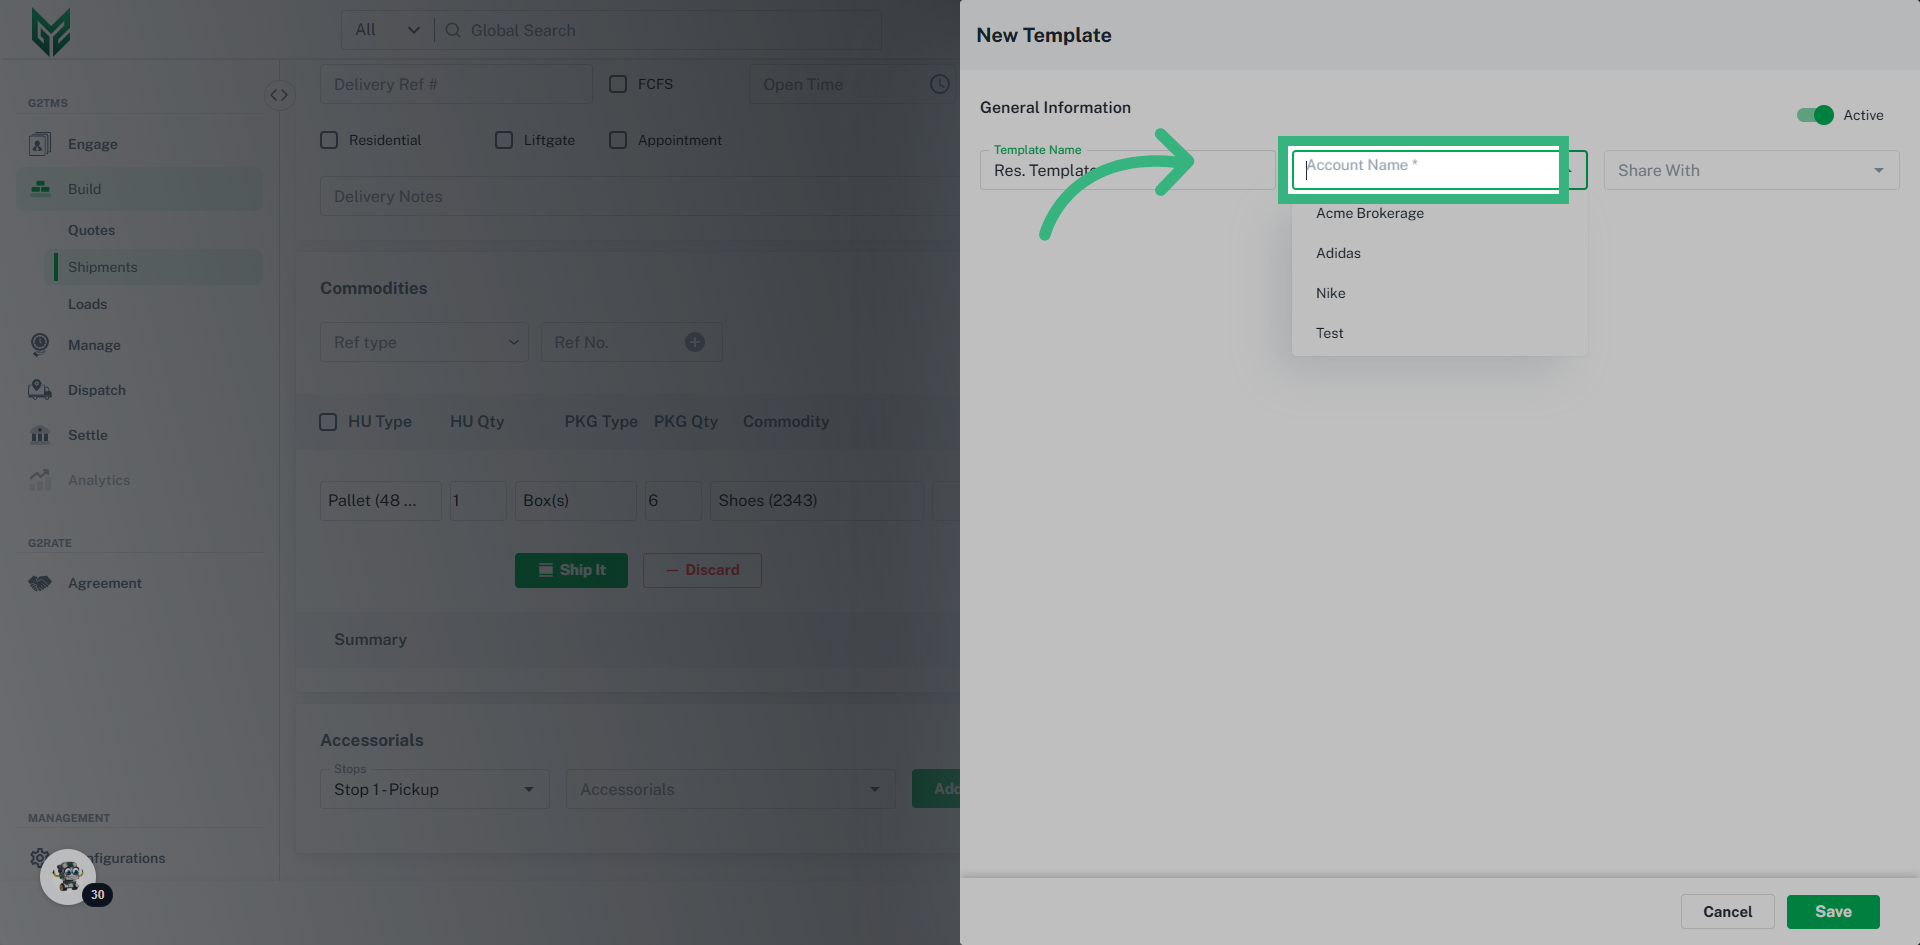
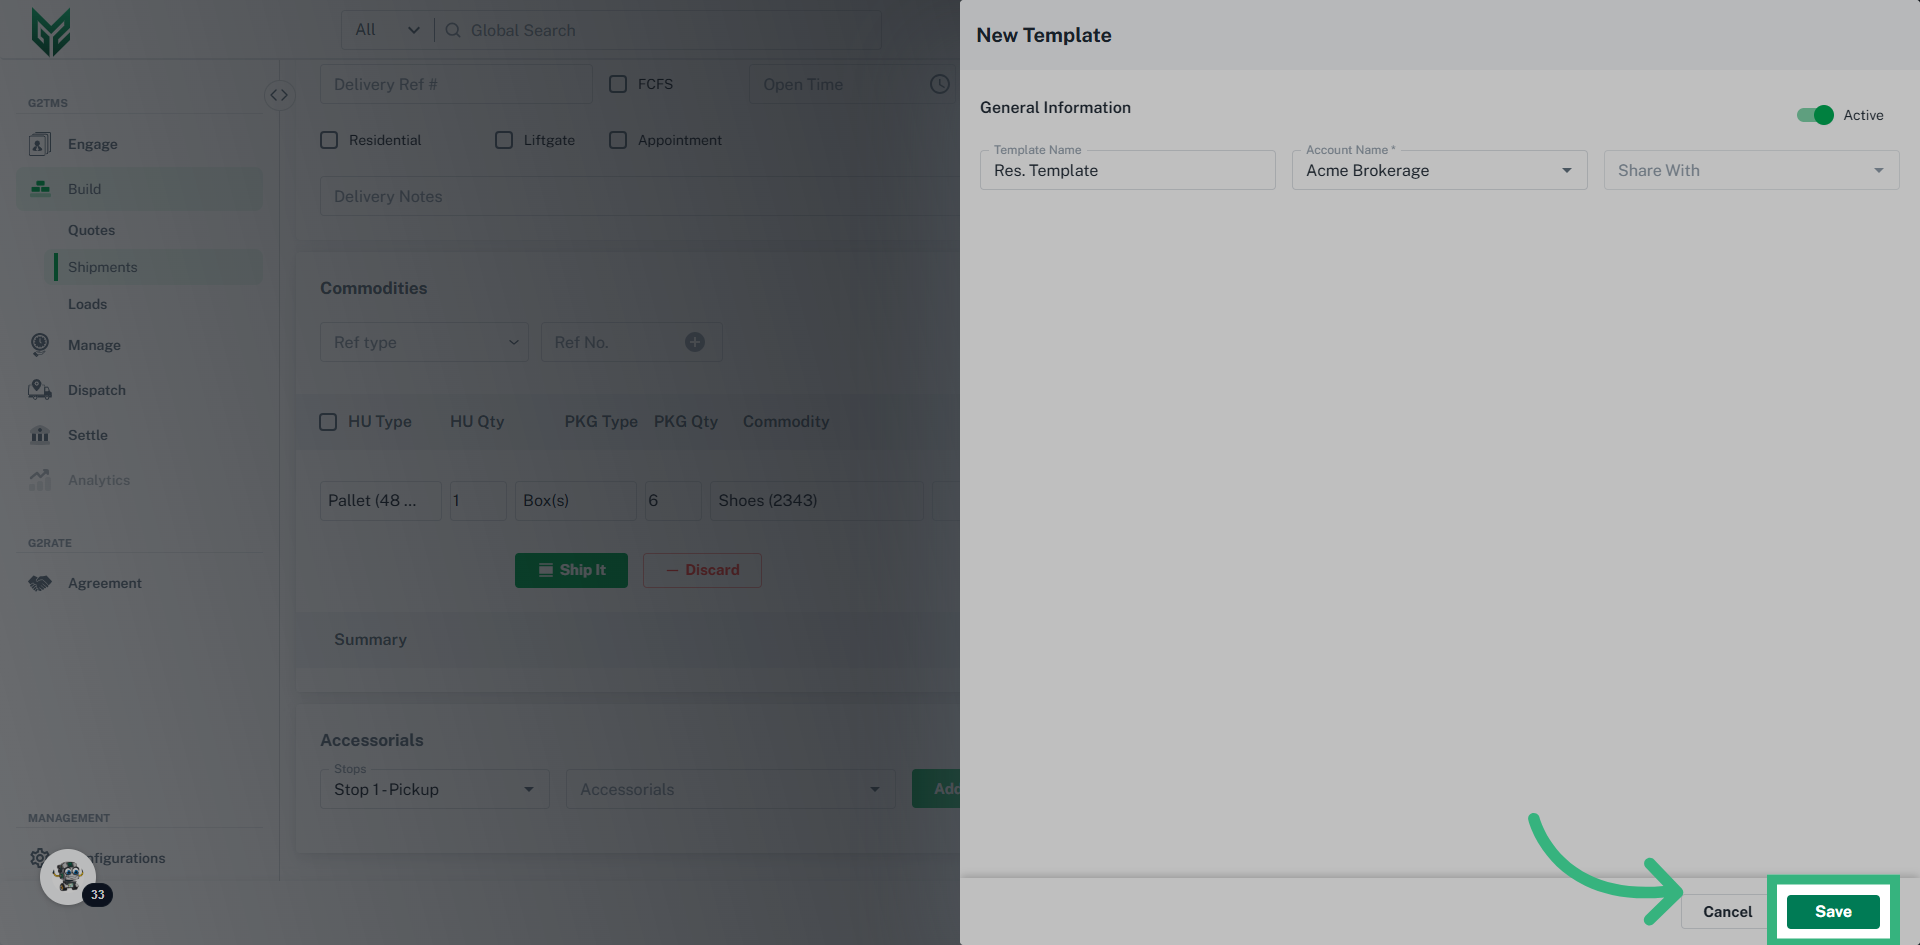
Create a Shipment Template
Shipment Information Input Fields:
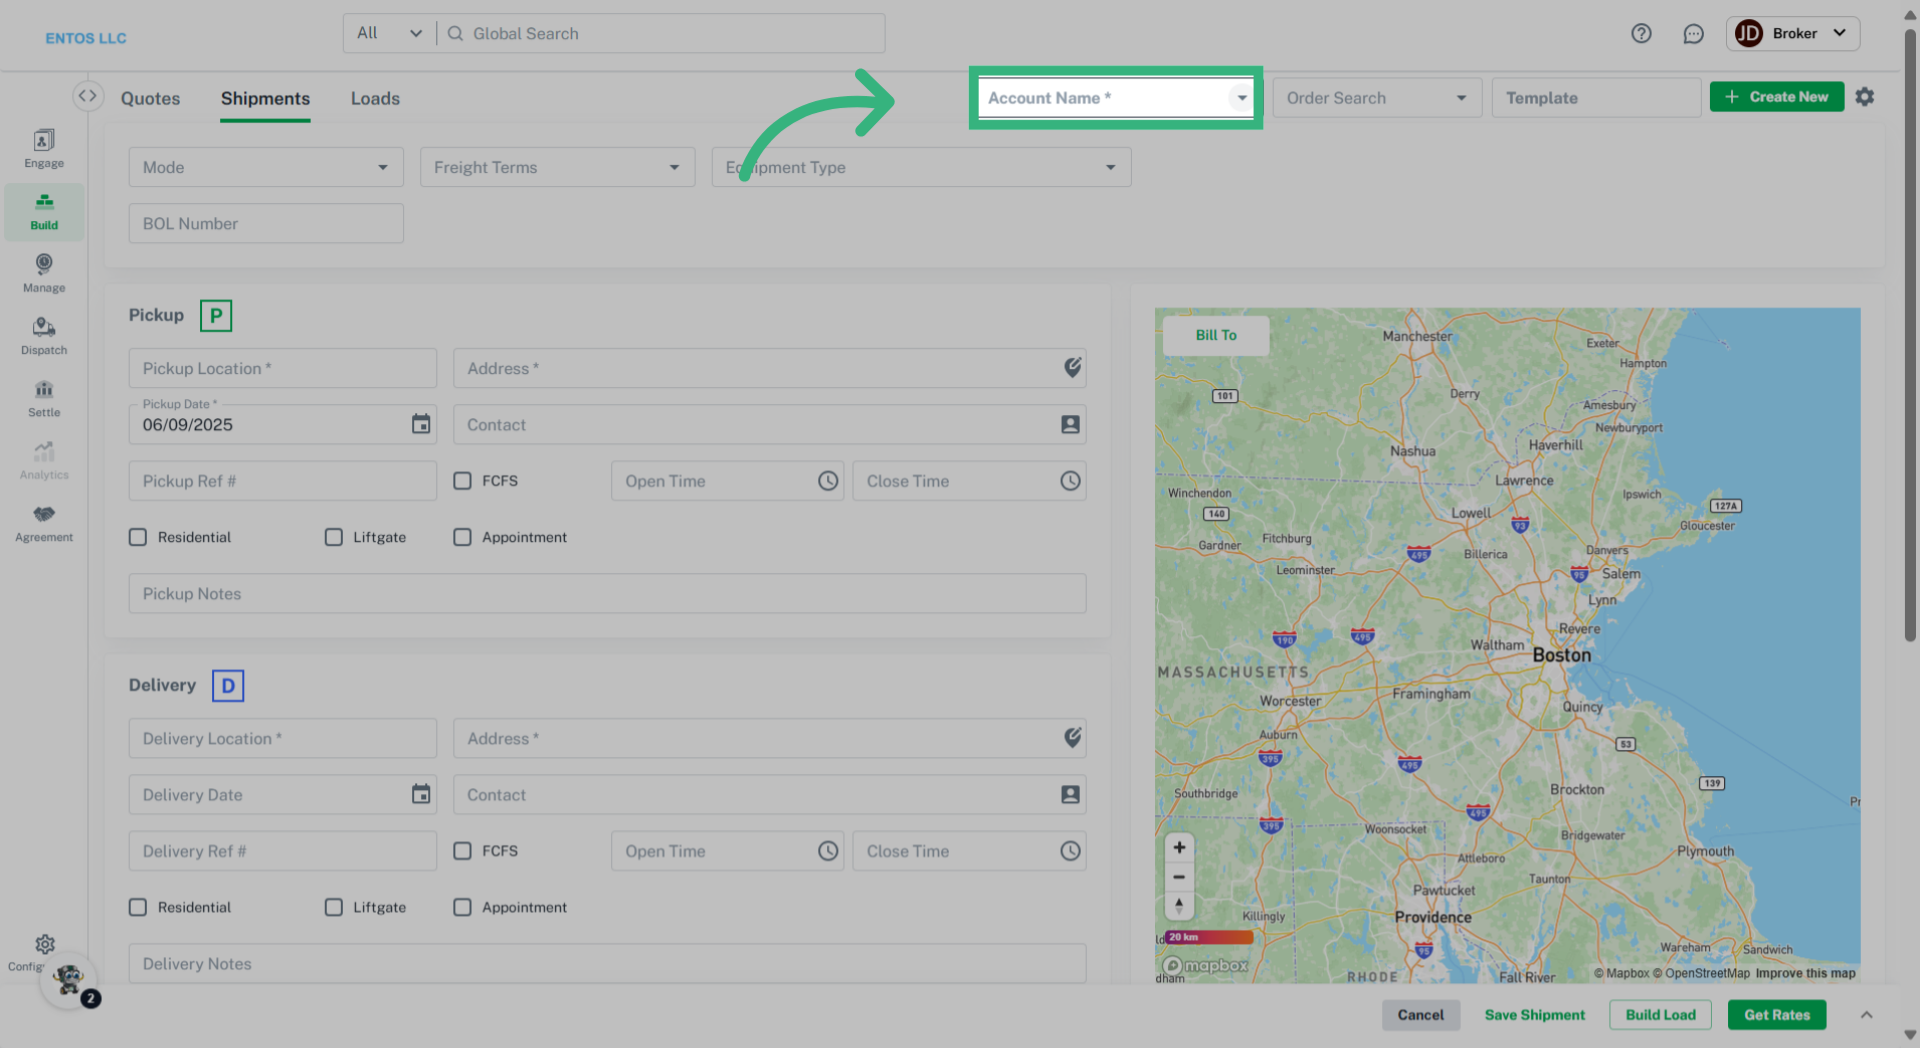
- The multi-select 'Account Name*' field in the Shipment build section allows you to assign one of your customers' accounts to a shipment, or you can use your account if the shipment is for an unspecified customer.
- The “Order Search” field is where you can find orders in our application through an API integration of your customer’s order and assign it to a quote.
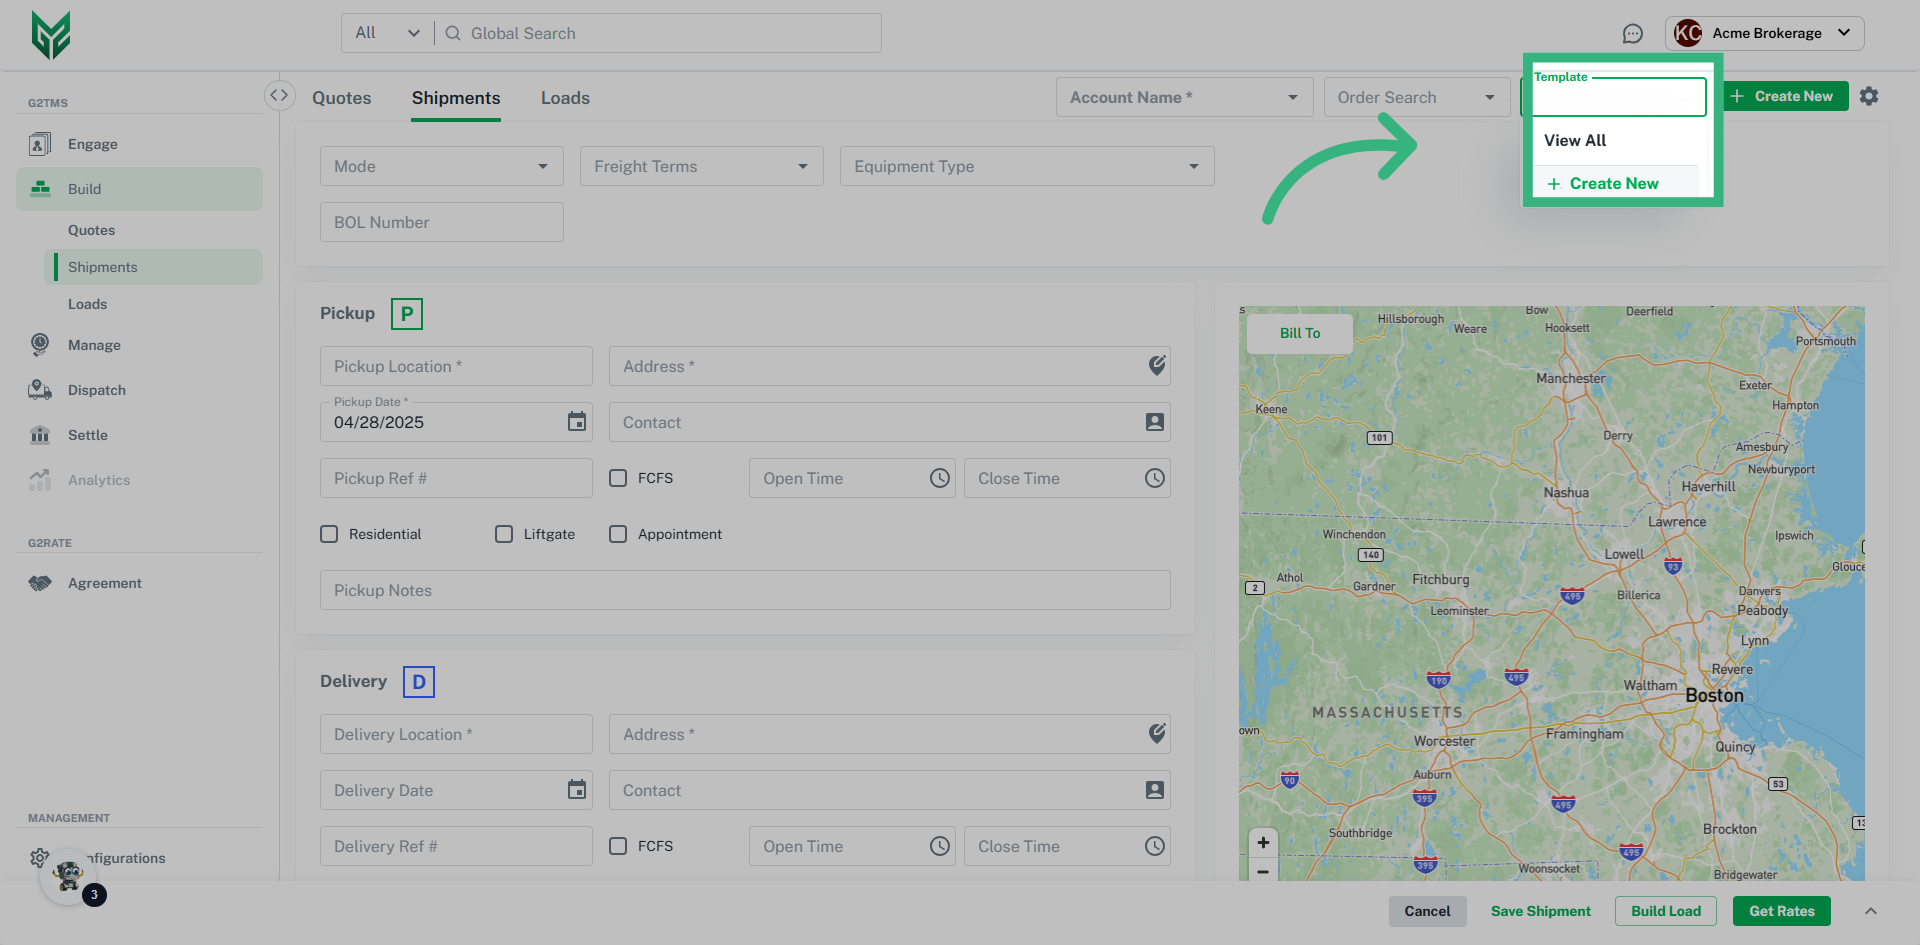
- The "Template" field allows you to create Shipment templates for shipments you use frequently to quickly load pre-filled information. You can select "+ Create New" to create a new template or "View All" to view existing templates that will autofill information on the shipment screen.
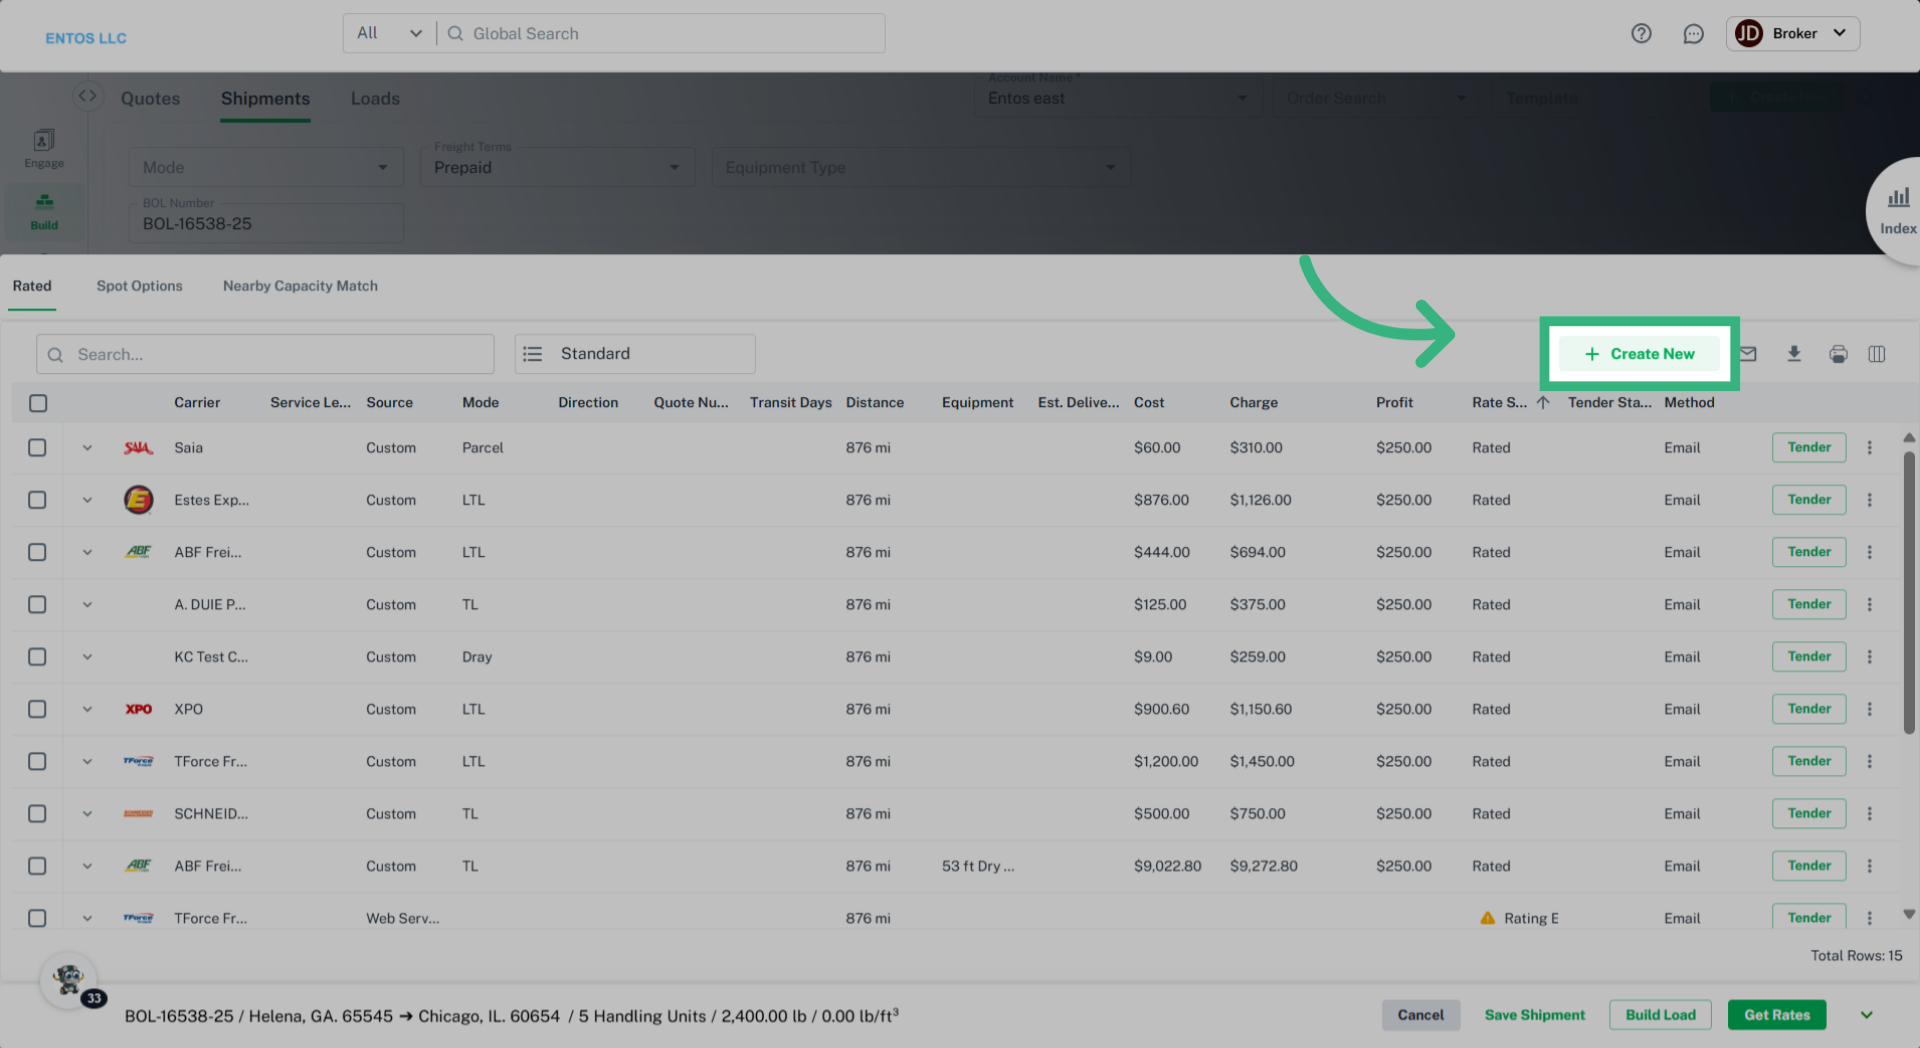
- Selecting “+ Create New” will allow you to create a new shipment.
- Selecting the gear icon will open a sidebar, "Edit Shipment Builder Settings," which will allow you to choose your Freight Terms default for shipments when you expand "Header Settings," and in "Commodity Settings," you can expand and select your unit of measurement (UOM) default. Additionally, you can toggle off and on the "Auto Assign Commodity(s)" of your freight content default.
- The “Mode” field allows you to assign a transportation mode e.g., Truck Load (TL) or Less than Truck Load (LTL) to the shipment.
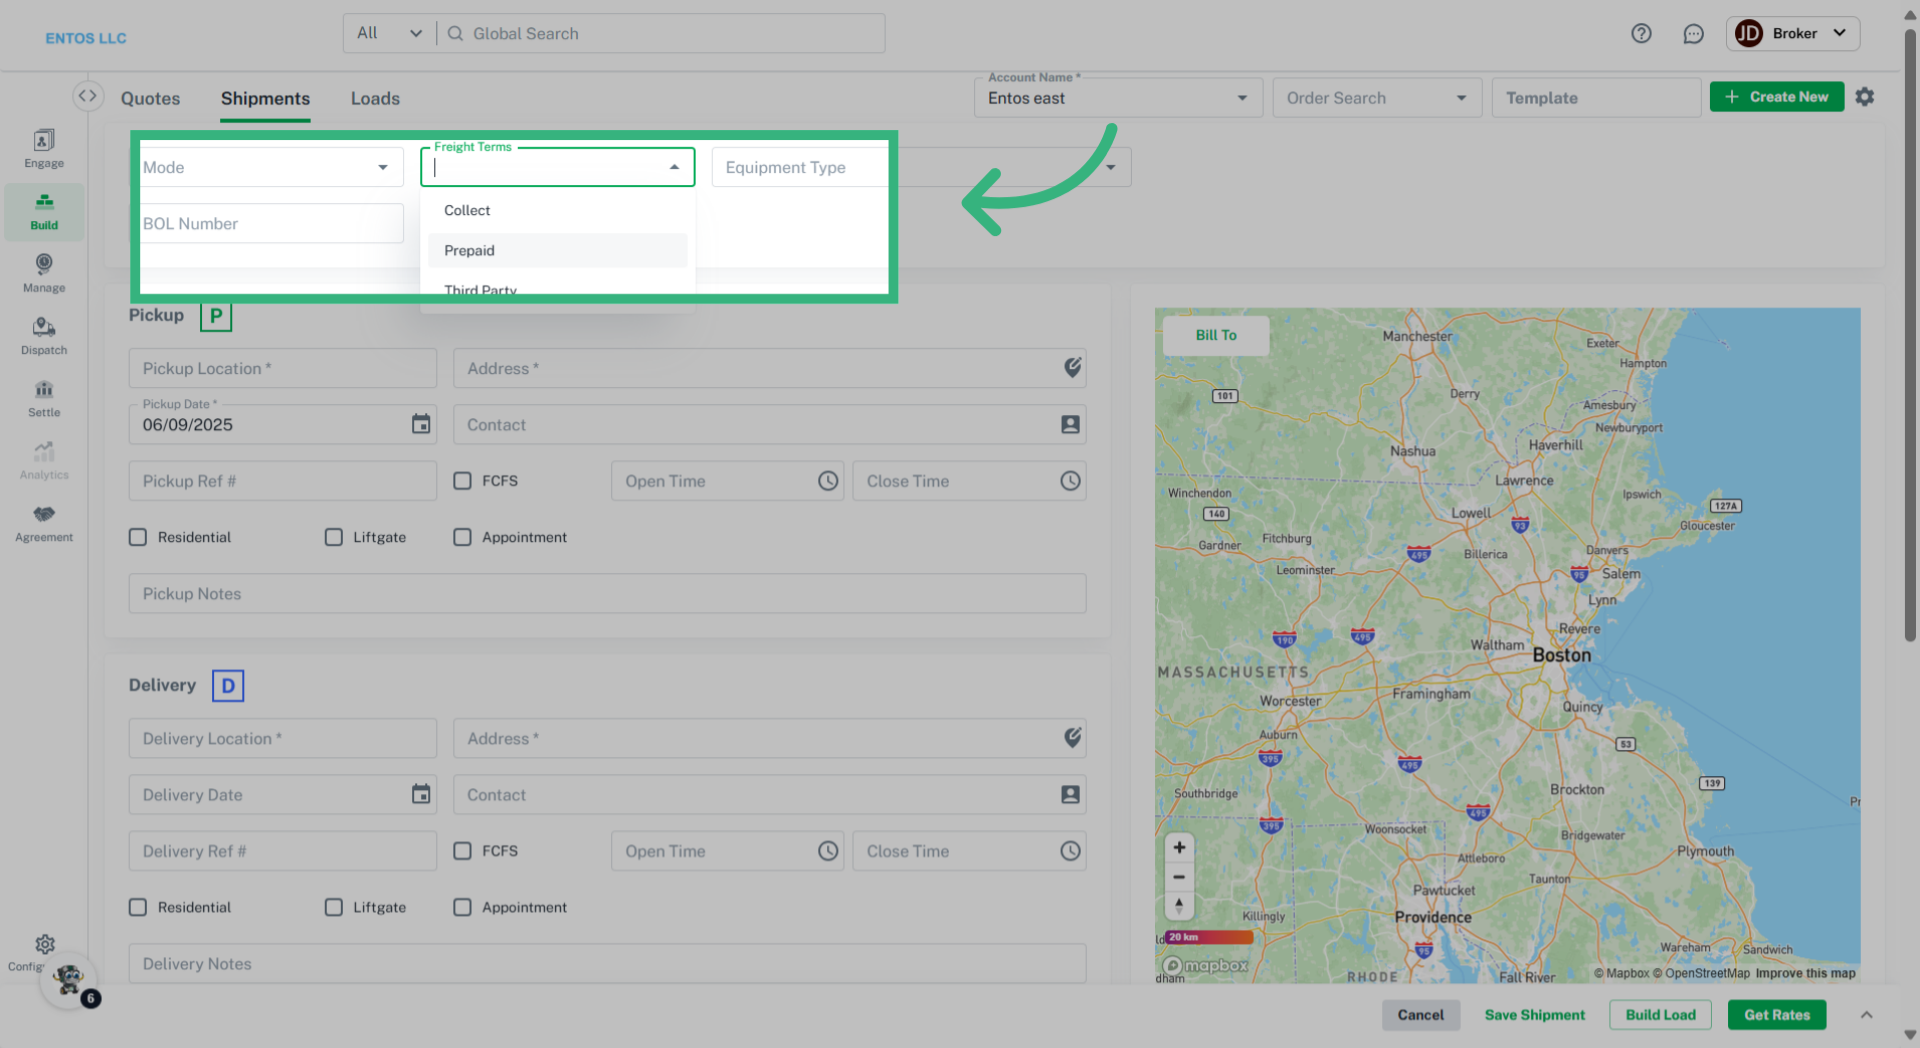
- The "Freight Terms" feature lets you assign payment terms to a shipment. If the freight bill is "Collect," the consignee/destination pays the shipping charges. If it's "Prepaid," the shipper/origin pays. For ‘Third Party’ a separate entity covers the charges. Note: The selected Freight Terms will be printed on the BOL, indicating who is responsible for paying the carrier for the shipment. Use the gear icon on the right to create a Default Freight Term for your shipments.
- The multi-select 'Equipment Type' field allows you to select an equipment type (if assigned in Configurations) to move your customer's commodity. Note: For Equipment Type created i.e., ‘Refrigerated’ additional input fields ‘Min Temp’ and ‘Max Temp’ will appear.
- The "BOL Number" field allows you to assign your own shipment number or it will auto-fill with one when you select Save or Get Rates.
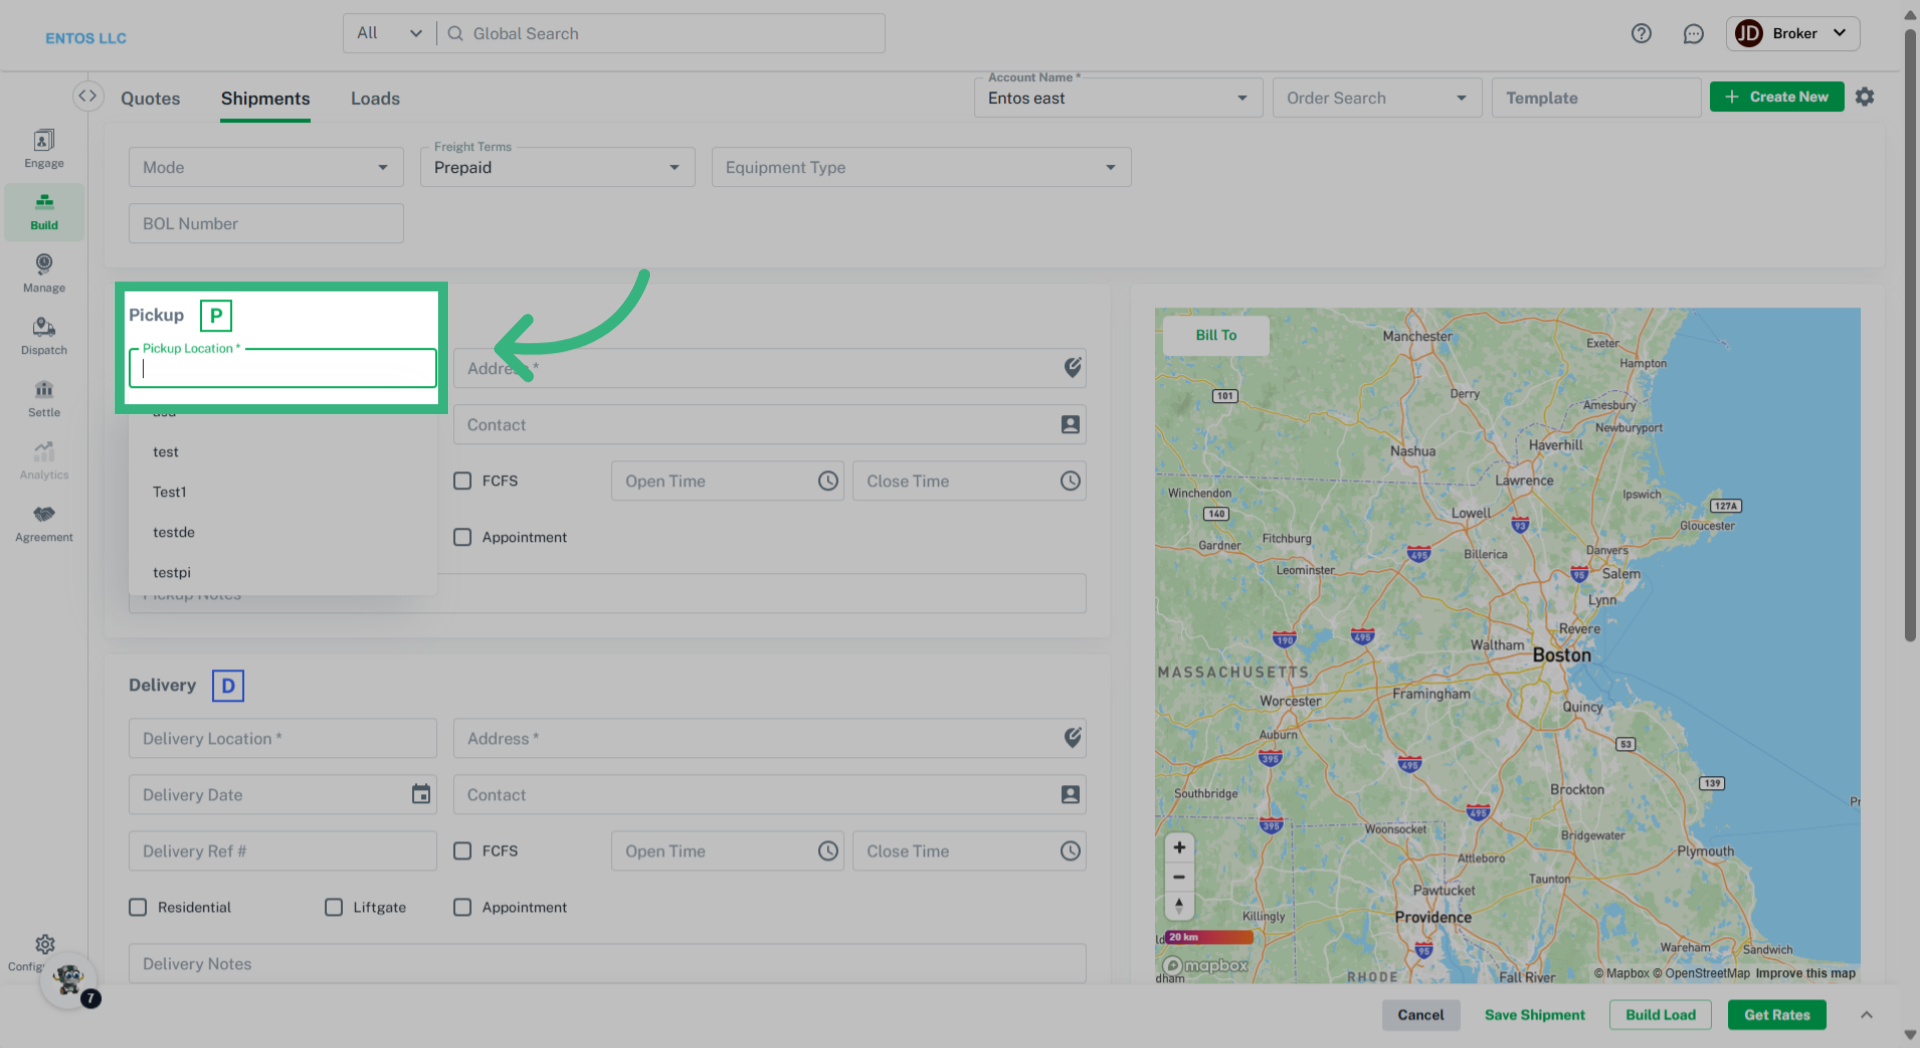
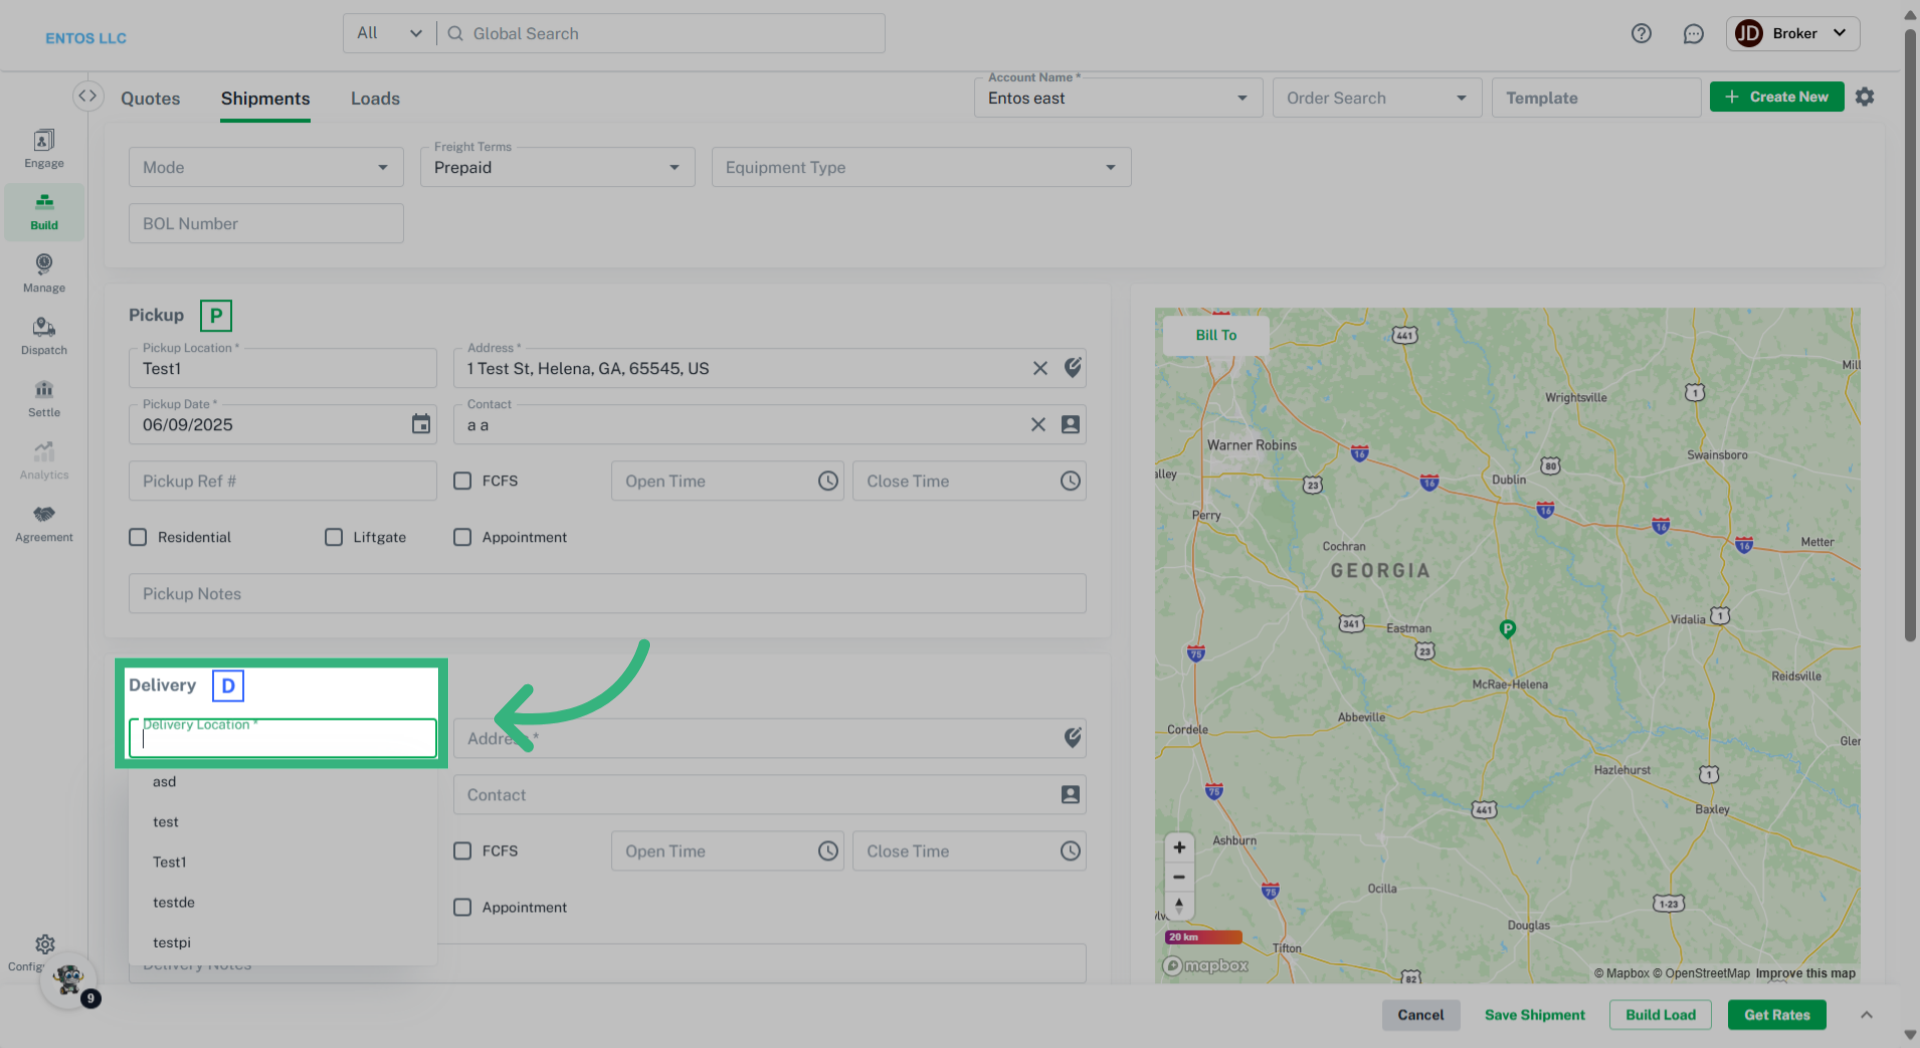
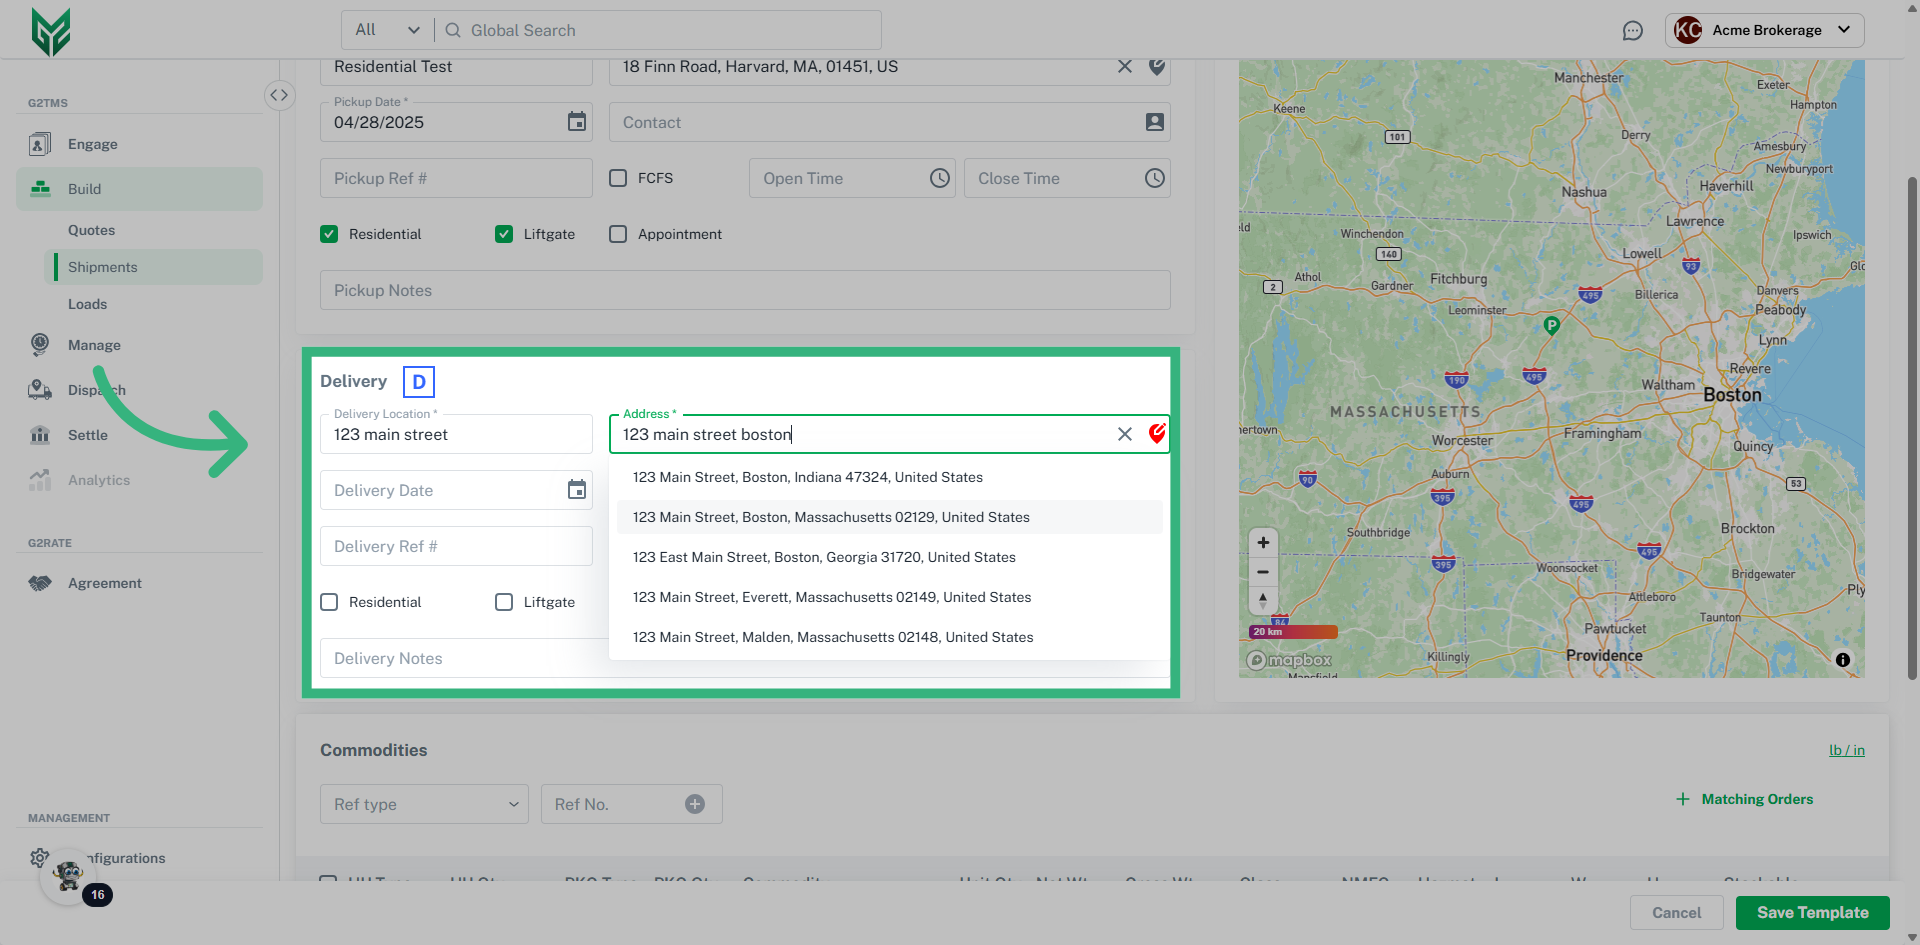
- The ‘Pickup’ (P) and ‘Delivery’ (D) fields allow you to select an assigned location (in Engage) from the Account Name* field. Selecting the Pickup/ Delivery Location box will provide a picklist associated account from Engage Location AND the Address Book.
- The 'Date Picker' field will auto-fill with the current date in the Pickup section or you can manually input dates for both Pickup and Delivery.
- In the Pickup and Delivery sections, you can check the appropriate boxes to select commonly used accessorials (Residential, Liftgate and Appointment). The selected accessorials will automatically appear in the Accessorials Summary section.
- The 'Bill To' field will autofill with the point of contact who is identified in their profile as the contact associated with the location that receives the bills. You can also update the point of contact by clicking on the ‘Bill To” and edit the details in the pop-up dialog.
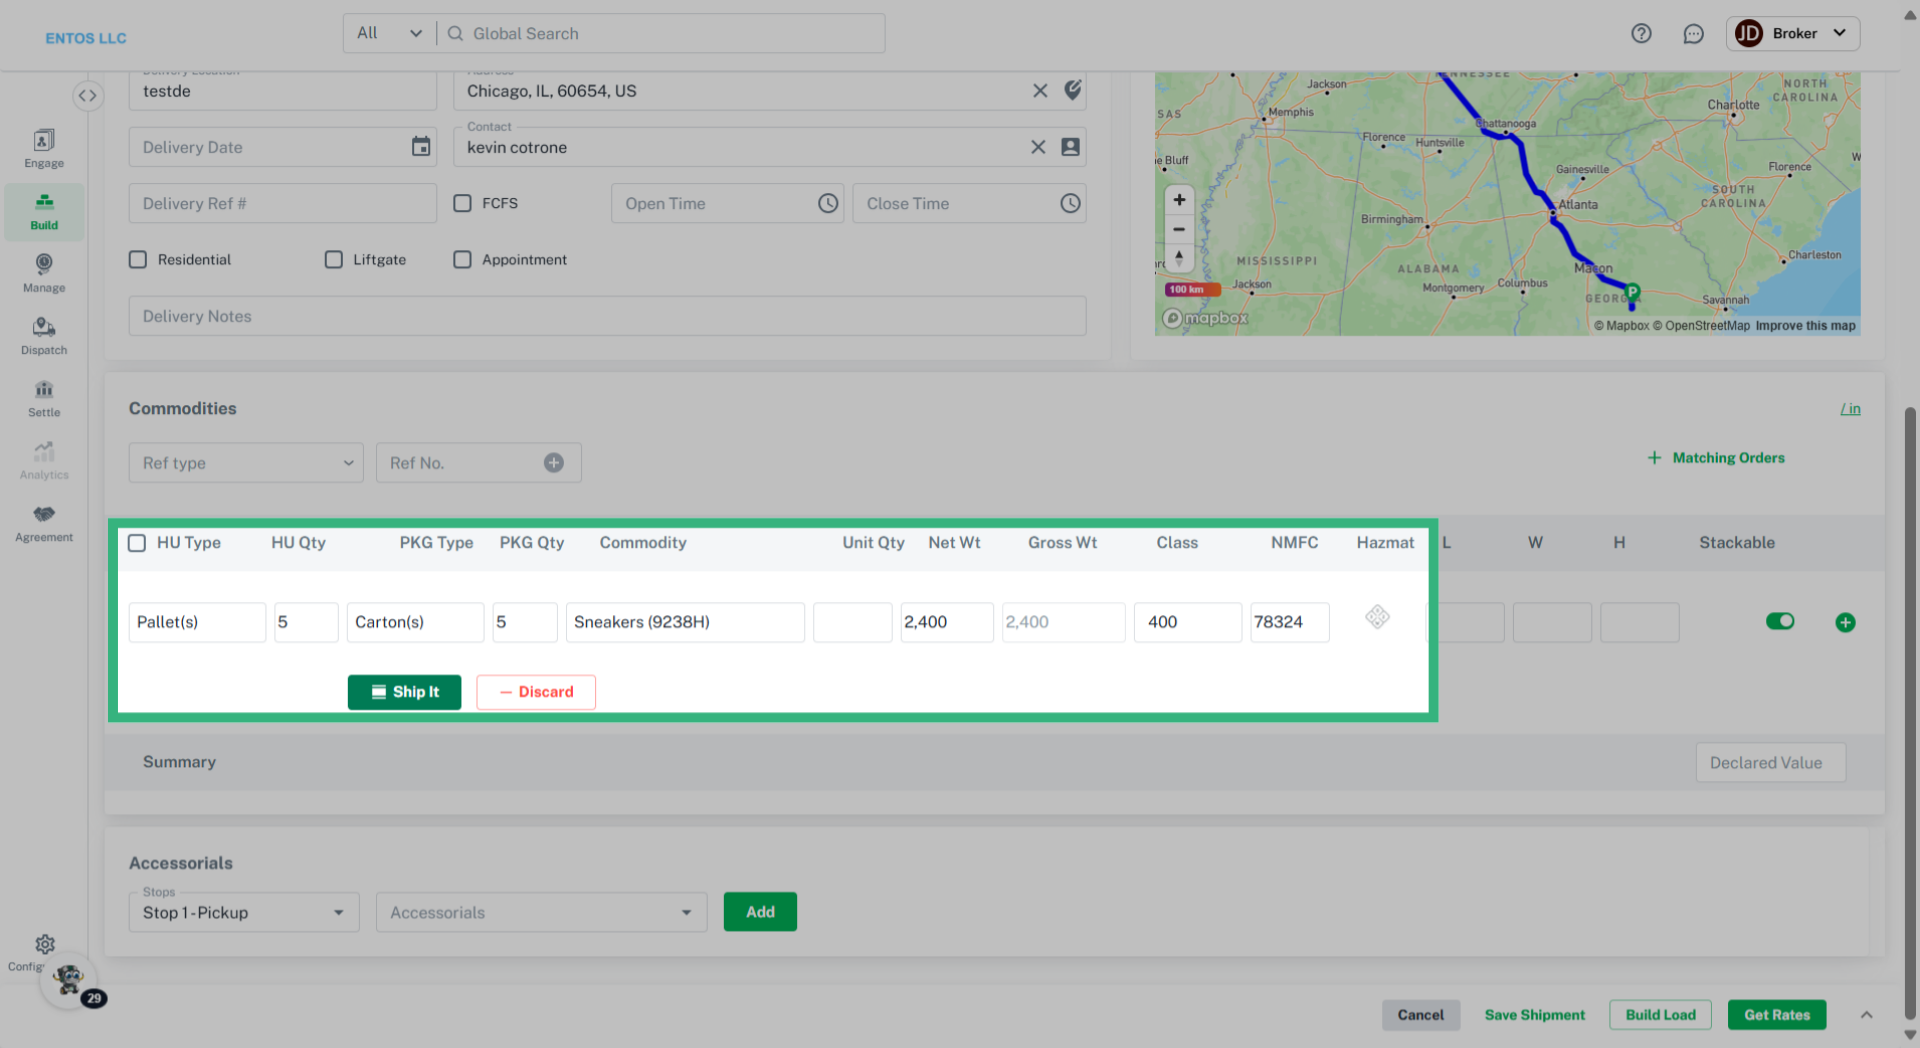
- The "Ref type" and "Ref No." fields allow you to assign a reference type to the commodities, i.e., Sales, Transfer or Purchase order and assign a corresponding alphanumeric input for identification purposes.
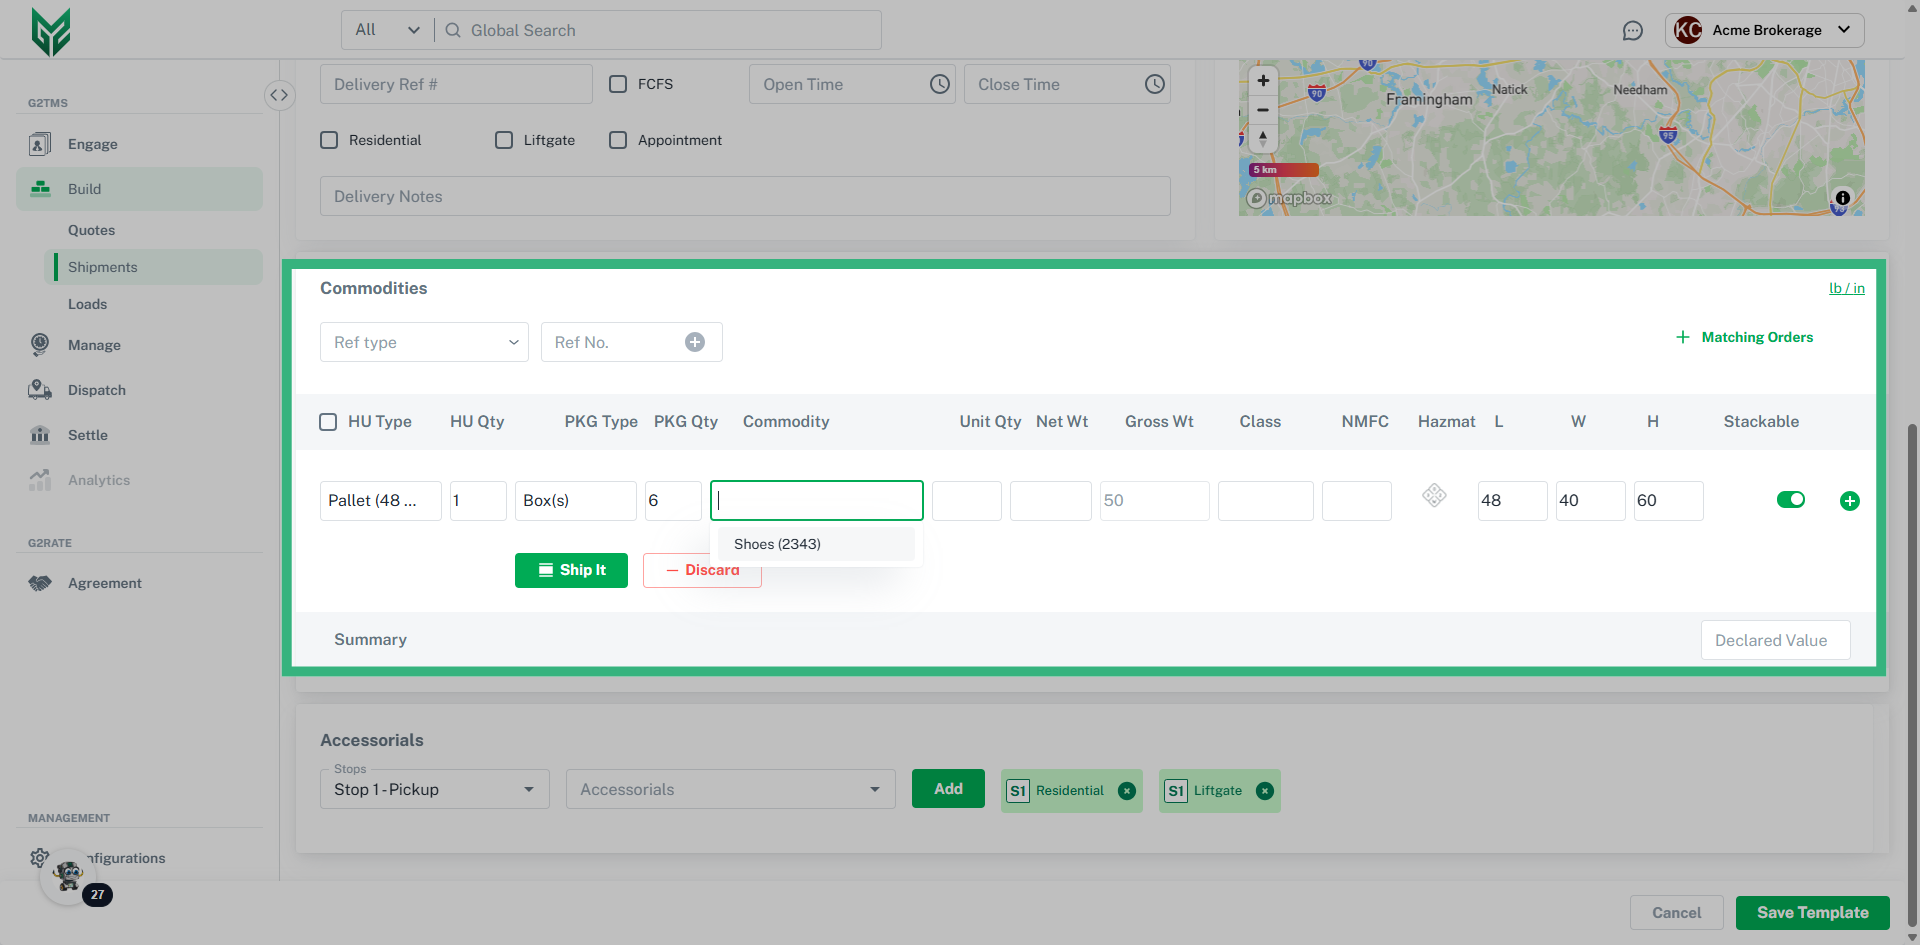
- The 'HU Type' and 'HU Qty' fields allow you to select a Handling Unit Type (HU Type) (if assigned in Configurations) and manually specify the number of Handling Unit Quantity (HU Qty) for the shipment.
- The 'PKG Type' and 'PKG Qty' fields allow you to select a Package Type (PKG Type) (if assigned in Configurations) and manually specify the number of Package Quantity (PKG Qty) for the shipment.
- The 'Commodity' and 'Unit Qty' fields allow you to select a Commodity (if assigned in Configurations) or manually add one, along with specifying the number of units for the shipment.
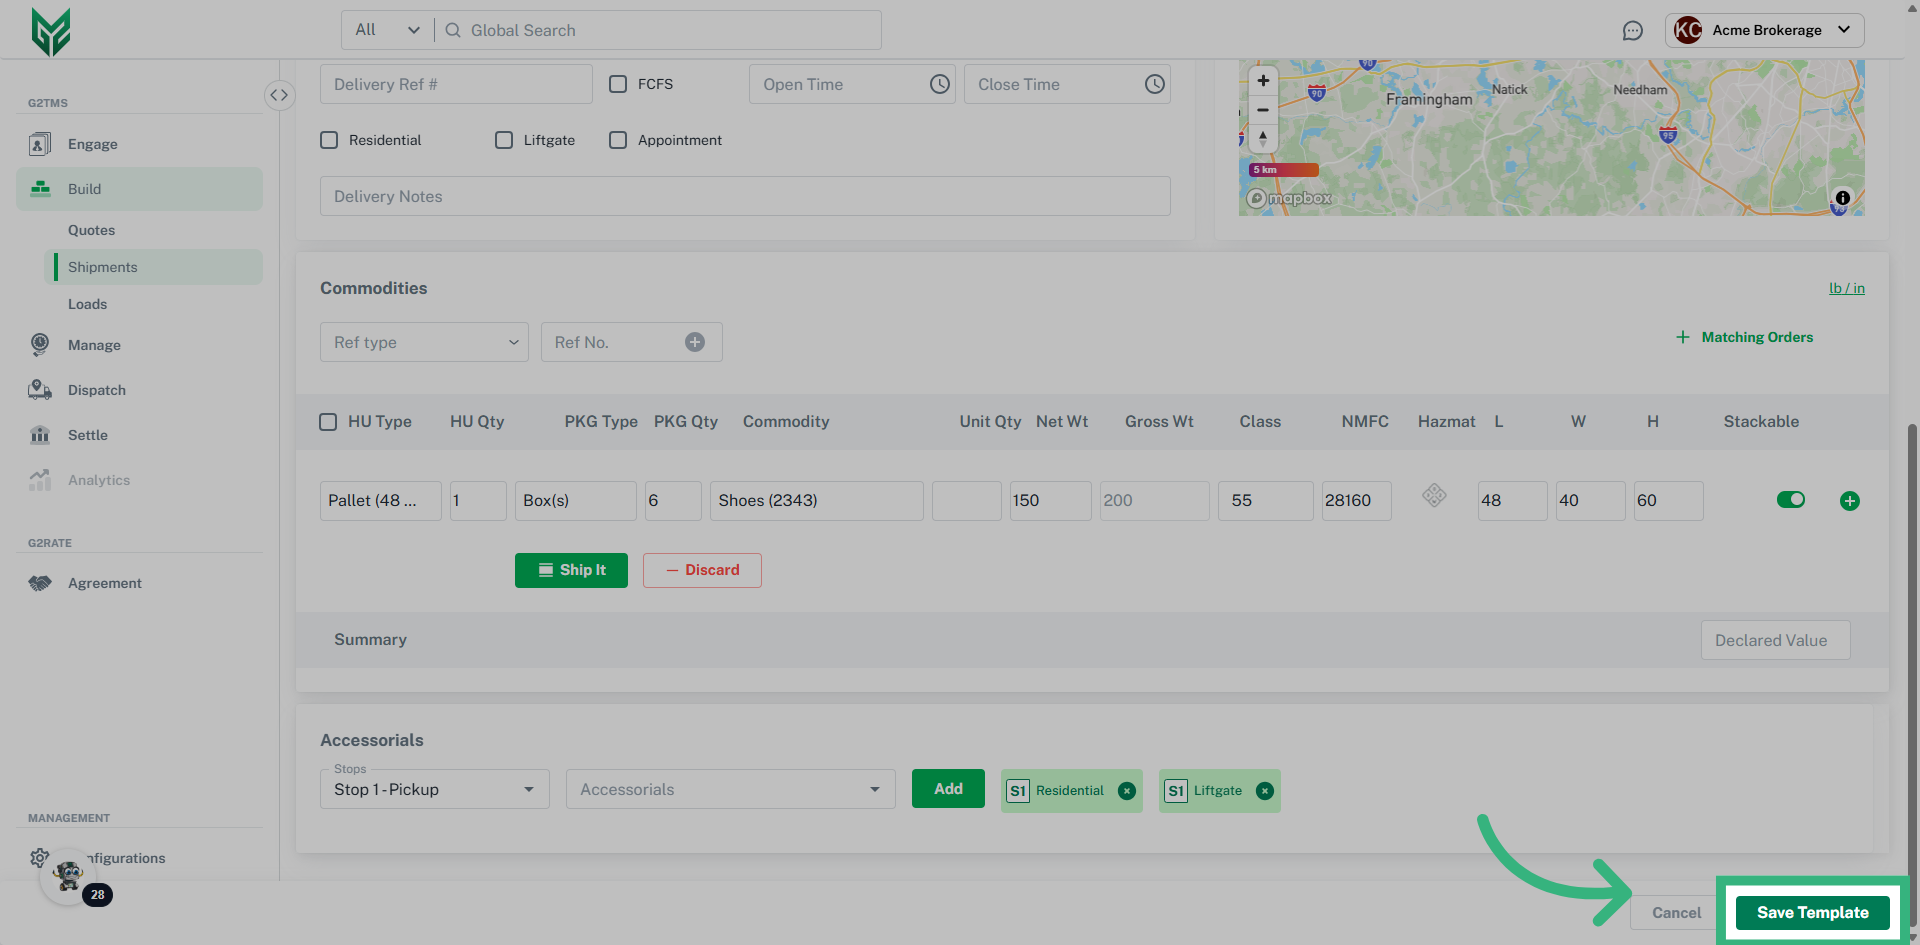
- The 'Net Wt' field is calculated when you select a Commodity from the list or manually input one, and then enter the unit quantity. The system multiplies the unit weight by the quantity to give the total net weight. For example, if a Commodity has a net weight of 15 lbs and the quantity is 100, the net weight for that line will be updated to 1,500 lbs.
- The 'Gross Wt' field is calculated by selecting the HU Type (if it has a tare weight) and specifying the HU Qty. The system multiplies the Commodity's unit weight by its quantity to get the Net Wt, then adds the total HU weight to get the Gross Wt. For example, if the HU Type is a Pallet with a tare weight of 85 lbs and the Commodity has a unit weight of 2 lbs with a quantity of 1,000, the Net Wt is 2,000 lbs, and the Gross Wt is 2,085 lbs (with the pallet added).
- The 'Class' field will auto-fill with the freight class of the selected Commodity (if assigned) or it can be manually entered.
- The 'NMFC' field will auto-fill with the National Motor Freight Classification (NMFC) from the selected Commodity (if assigned) or can be manually entered.
- Clicking the 'Hazmat' icon in the Commodities section opens a sidebar to view or input Hazmat information. If the Commodity has Hazmat details assigned in Configurations, they will appear automatically, or you can manually enter the required fields for that specific Commodity. If the Commodity is marked as Hazmat, the required fields (marked with an asterisk*) will appear on the BOL. For example, the BOL will display: “UN Number (UN)” + “Item Description” + “Hazmat Classification (numbers only)” + “Hazmat Packaging Group” (e.g., UN4356, Apples, 1.2, II).
- The 'L-W-H' fields will auto-fill with the Length (L), Width (W) and Height (H) of the selected Commodity (if assigned) or it can be manually entered.
- The 'Stackable' toggle in the Commodities section allows you to enable or disable whether the Commodity line item, with its handling unit, can be stacked on top of another Commodity line item with a handling unit.
- Enable Advanced Parcel Comparison can be activated by selecting the Settings Icon (top right of screen, next to Create New), and activating the toggle. Once activated, Commodities can be rated at the package level.
- Clicking the green
icon button in the Commodities section allows you to create a new package or commodity line (everything but HU Type and HU Qty).
- The '- Discard' functionality in the Commodities section allows you to clear the input fields before adding either a Ship On HU or Ship Loose to the quote for convenience.
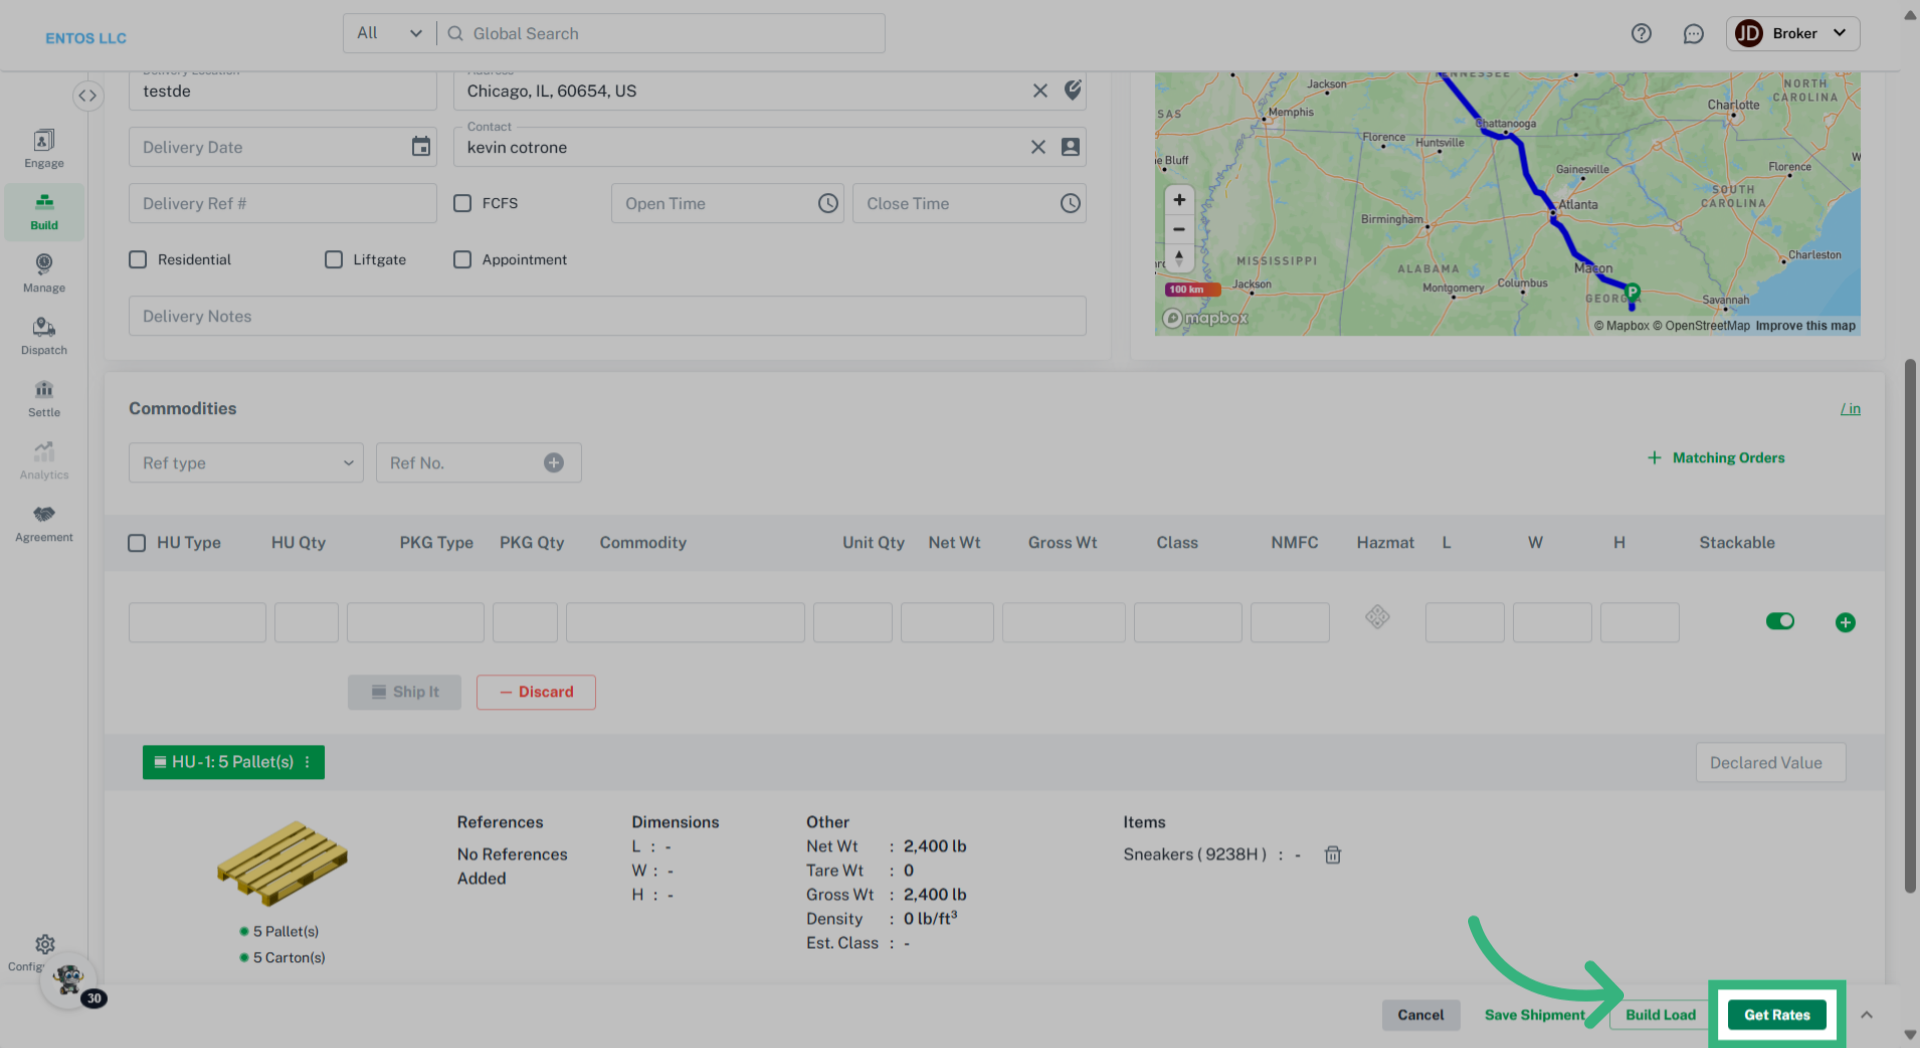
- The 'Shipment Declared Value' option in the Commodities section allows you to assign a monetary value to the goods being shipped. By saving this information in the quote, you'll be able to send it through our AI-powered rate engine to Carrier APIs and third-party APIs' insurance Plugins within our platform.
- The 'Accessorials' and 'Accessorials Summary' sections allow you to assign an accessorial input on the left side to a specific stop. To move the accessorial to the summary on the right side of the quote page, you must click the '+' sign. Unassigned accessorials do not display an icon, as they aren't tied to a specific stop. Note: If a frequently used accessorial is selected in either the 'Pickup' or 'Delivery' fields, it will automatically appear in the summary section along with its associated stop.
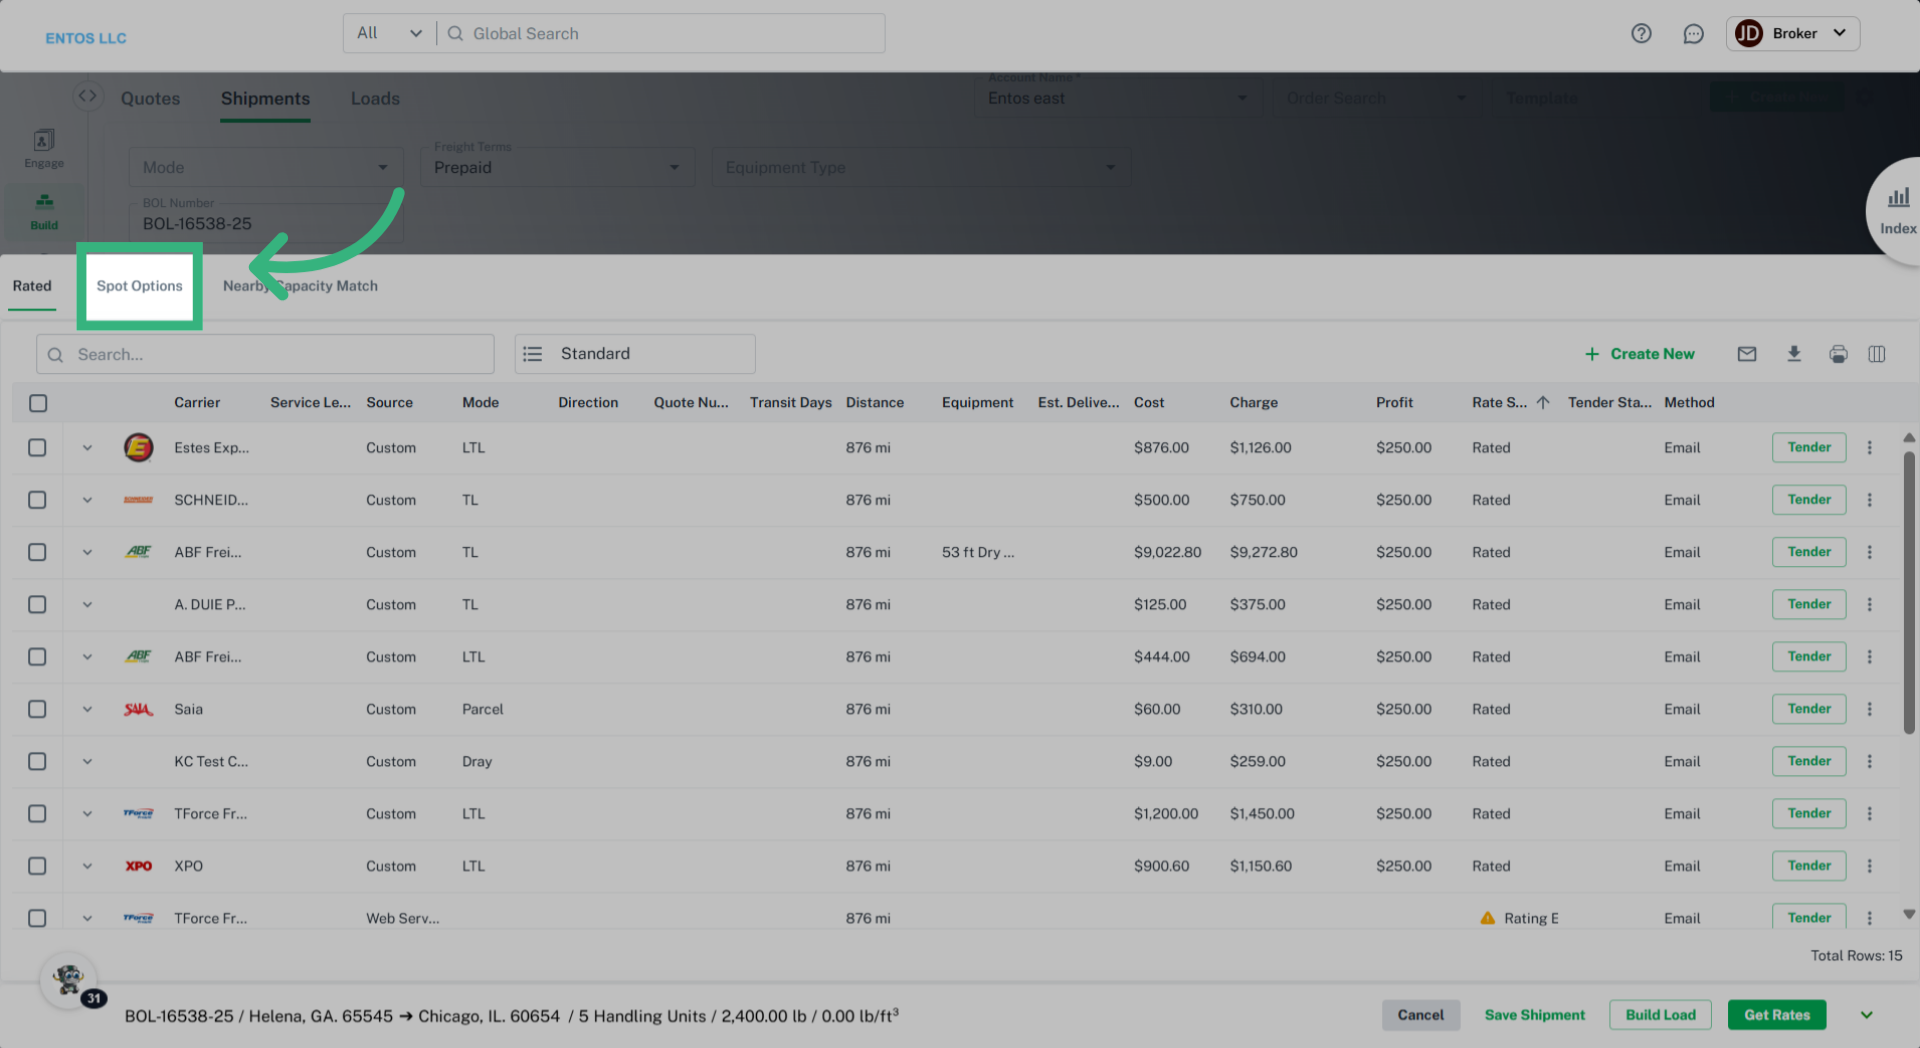
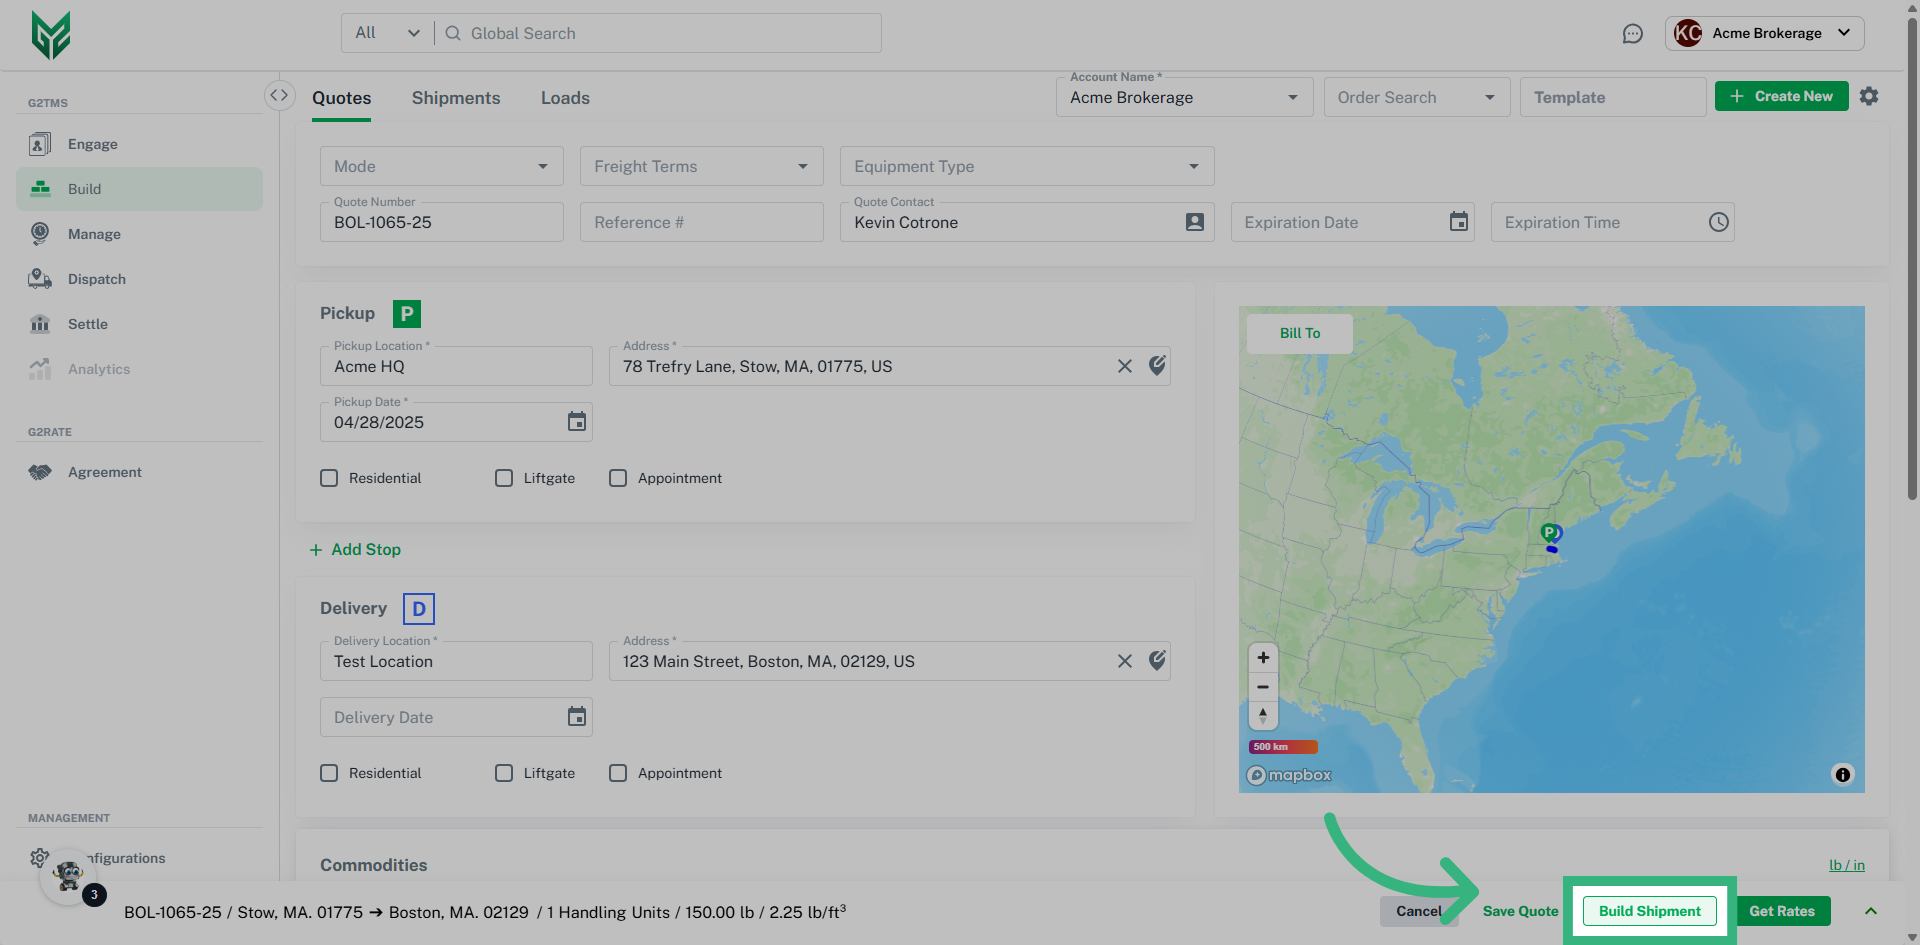
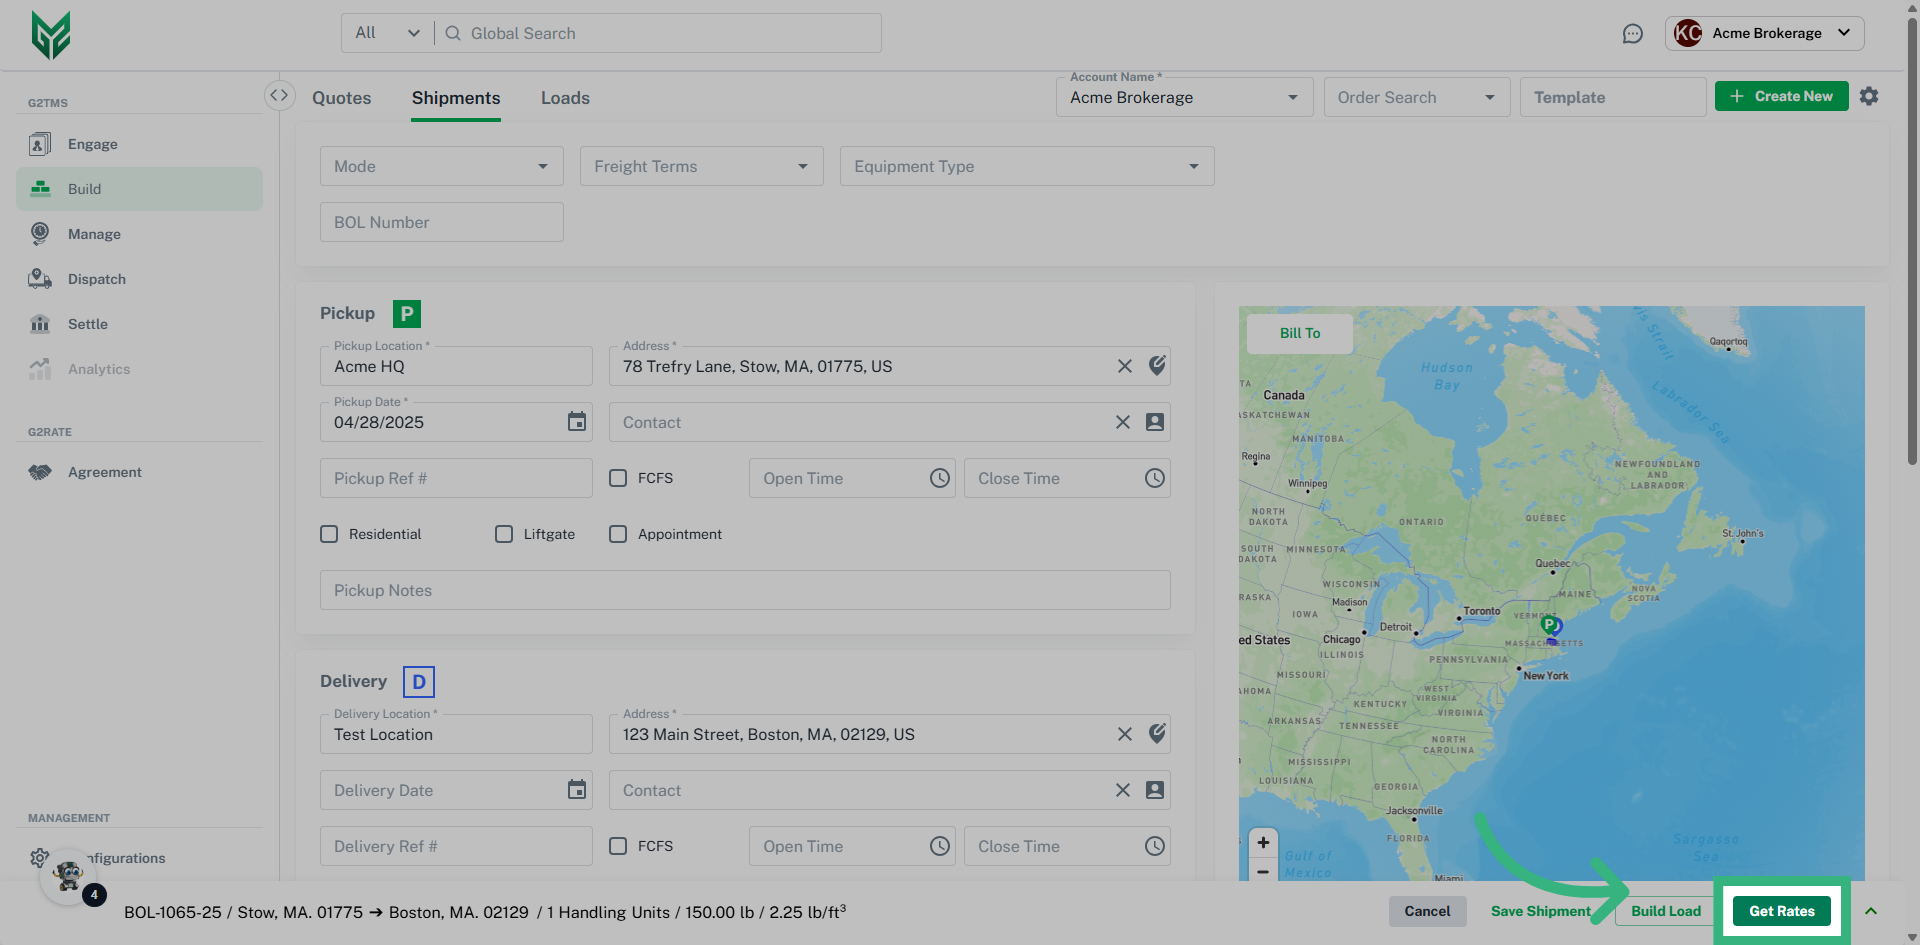
- After filling in all the required information for your Shipment, you can either ‘Cancel‘, ‘Save’, or create a shipment by clicking the 'Build Shipment' or ‘Get Rates’.