Last Updated: May 13, 2025
Applies to:
Shippers, Brokers, Carriers, and Partners
The "Load" feature allows you to input and manage a consolidated load with multiple shipments, each potentially having different origins and destinations, for transporting goods on a customer's (Shipper's) account.
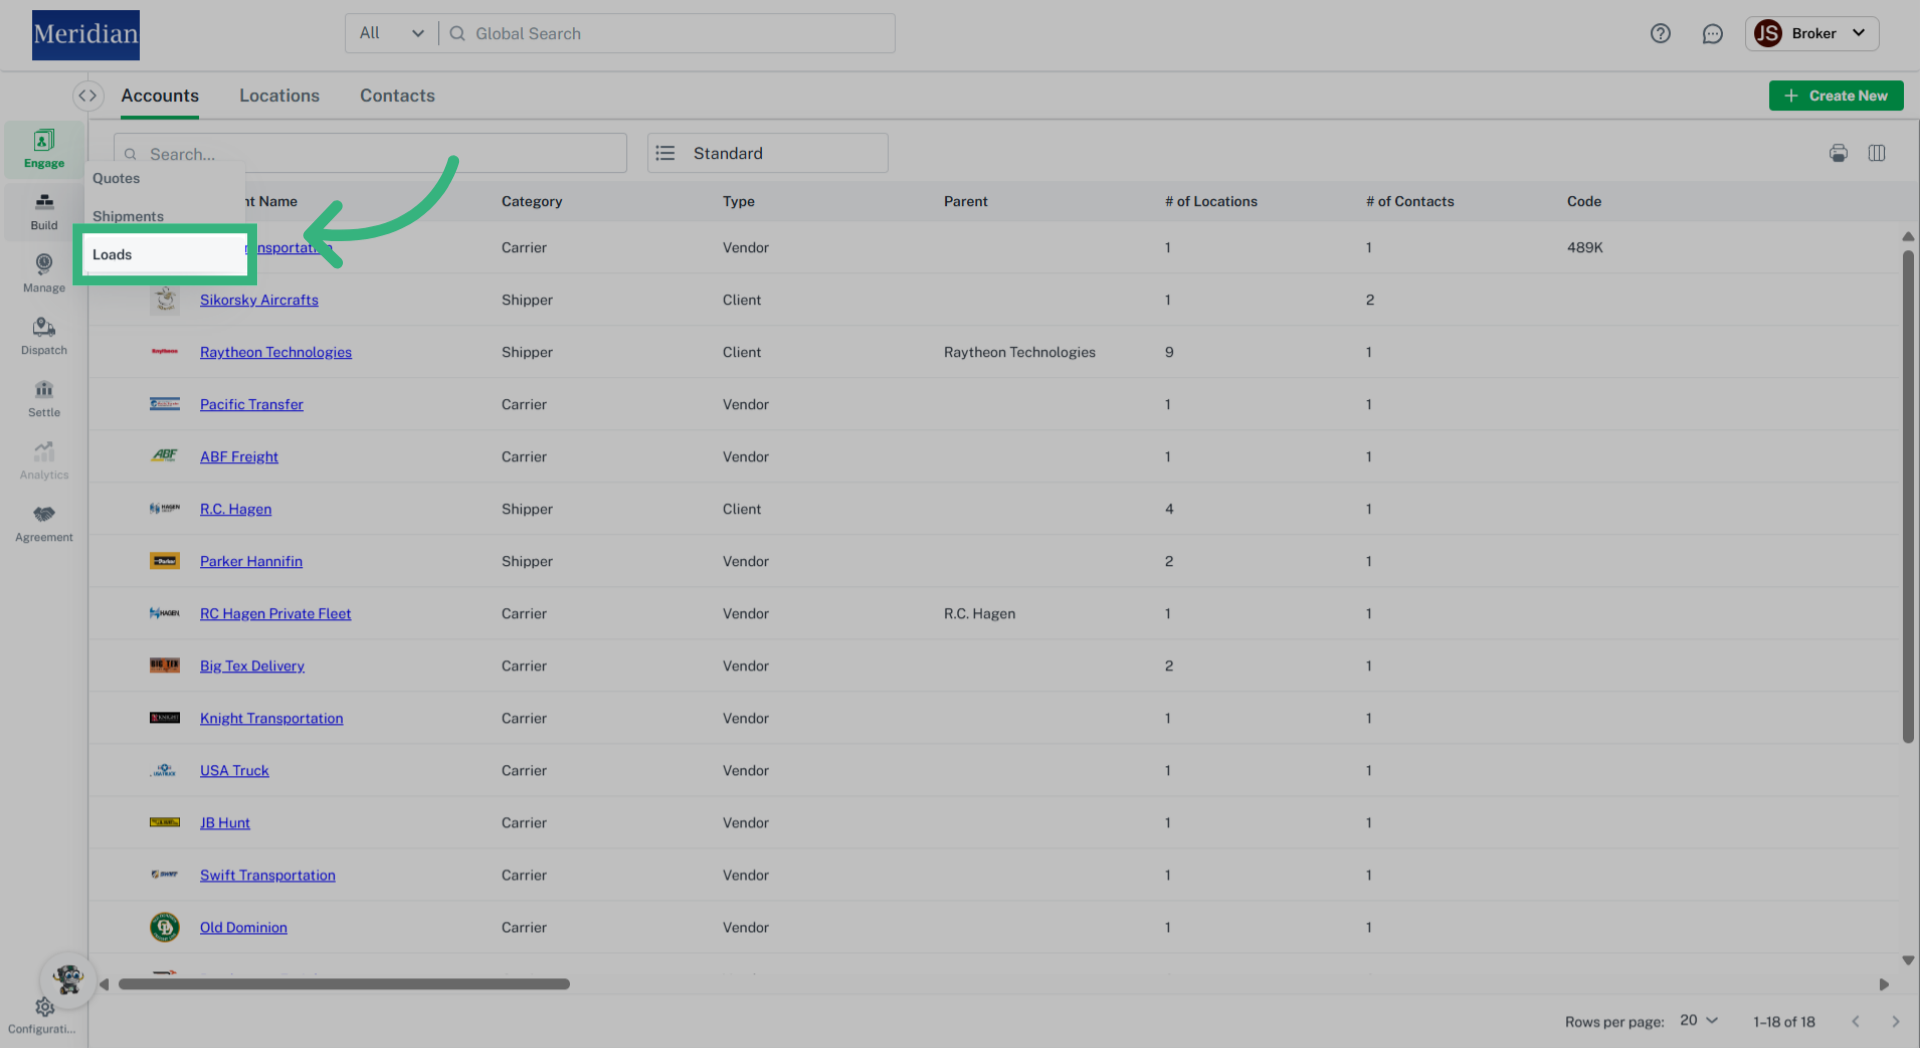

Load Information Input Fields:
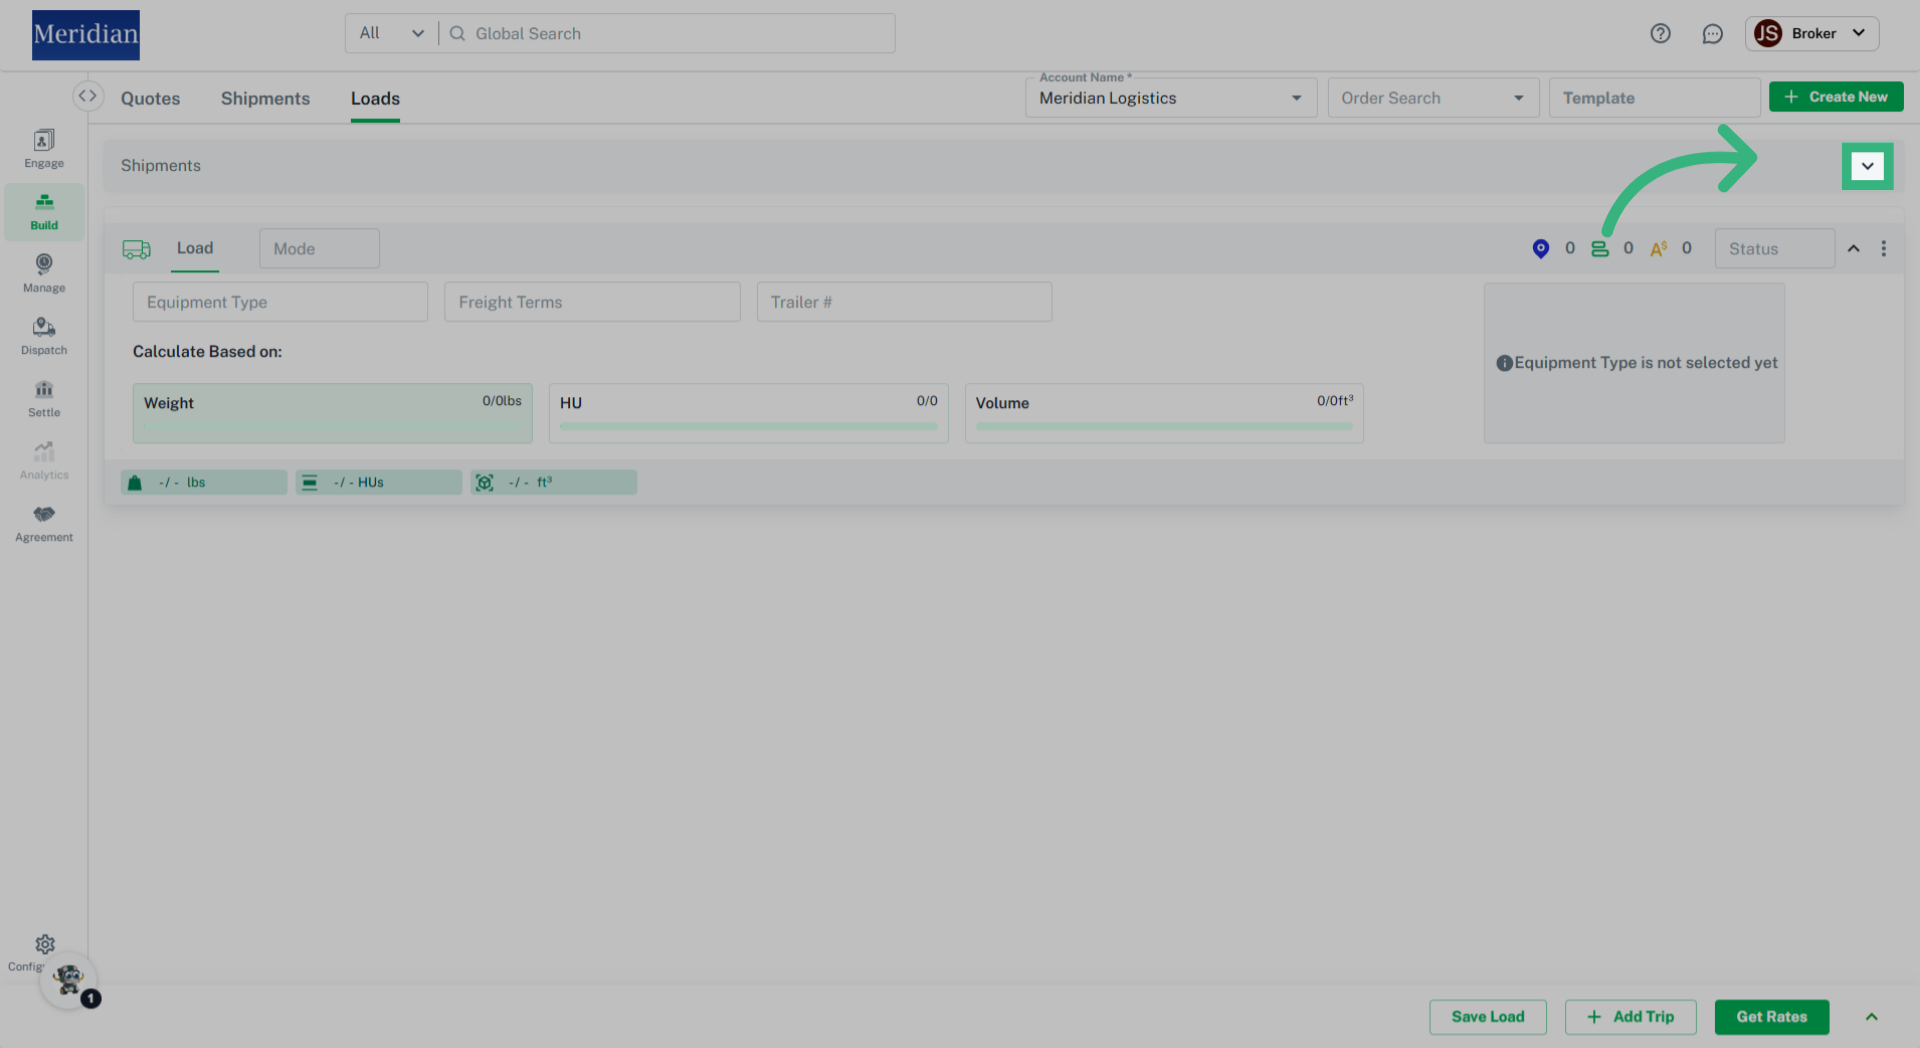
- The multi-select 'Account Name*' field in the load build section allows you to assign one of your customers' accounts to a load, or you can use your account if the load is for an unspecified customer.
- The “Order Search” field is where you can find orders in our application through an API integration of your customer’s order and assign it to a load.
- The "Template" field allows you to create Load templates for loads you use frequently to quickly load pre-filled information. You can select "+ Create New" to create a new template or "View All" to view existing templates that will autofill information on the load screen.
- Selecting “+ Create New” will allow you to create a new load.
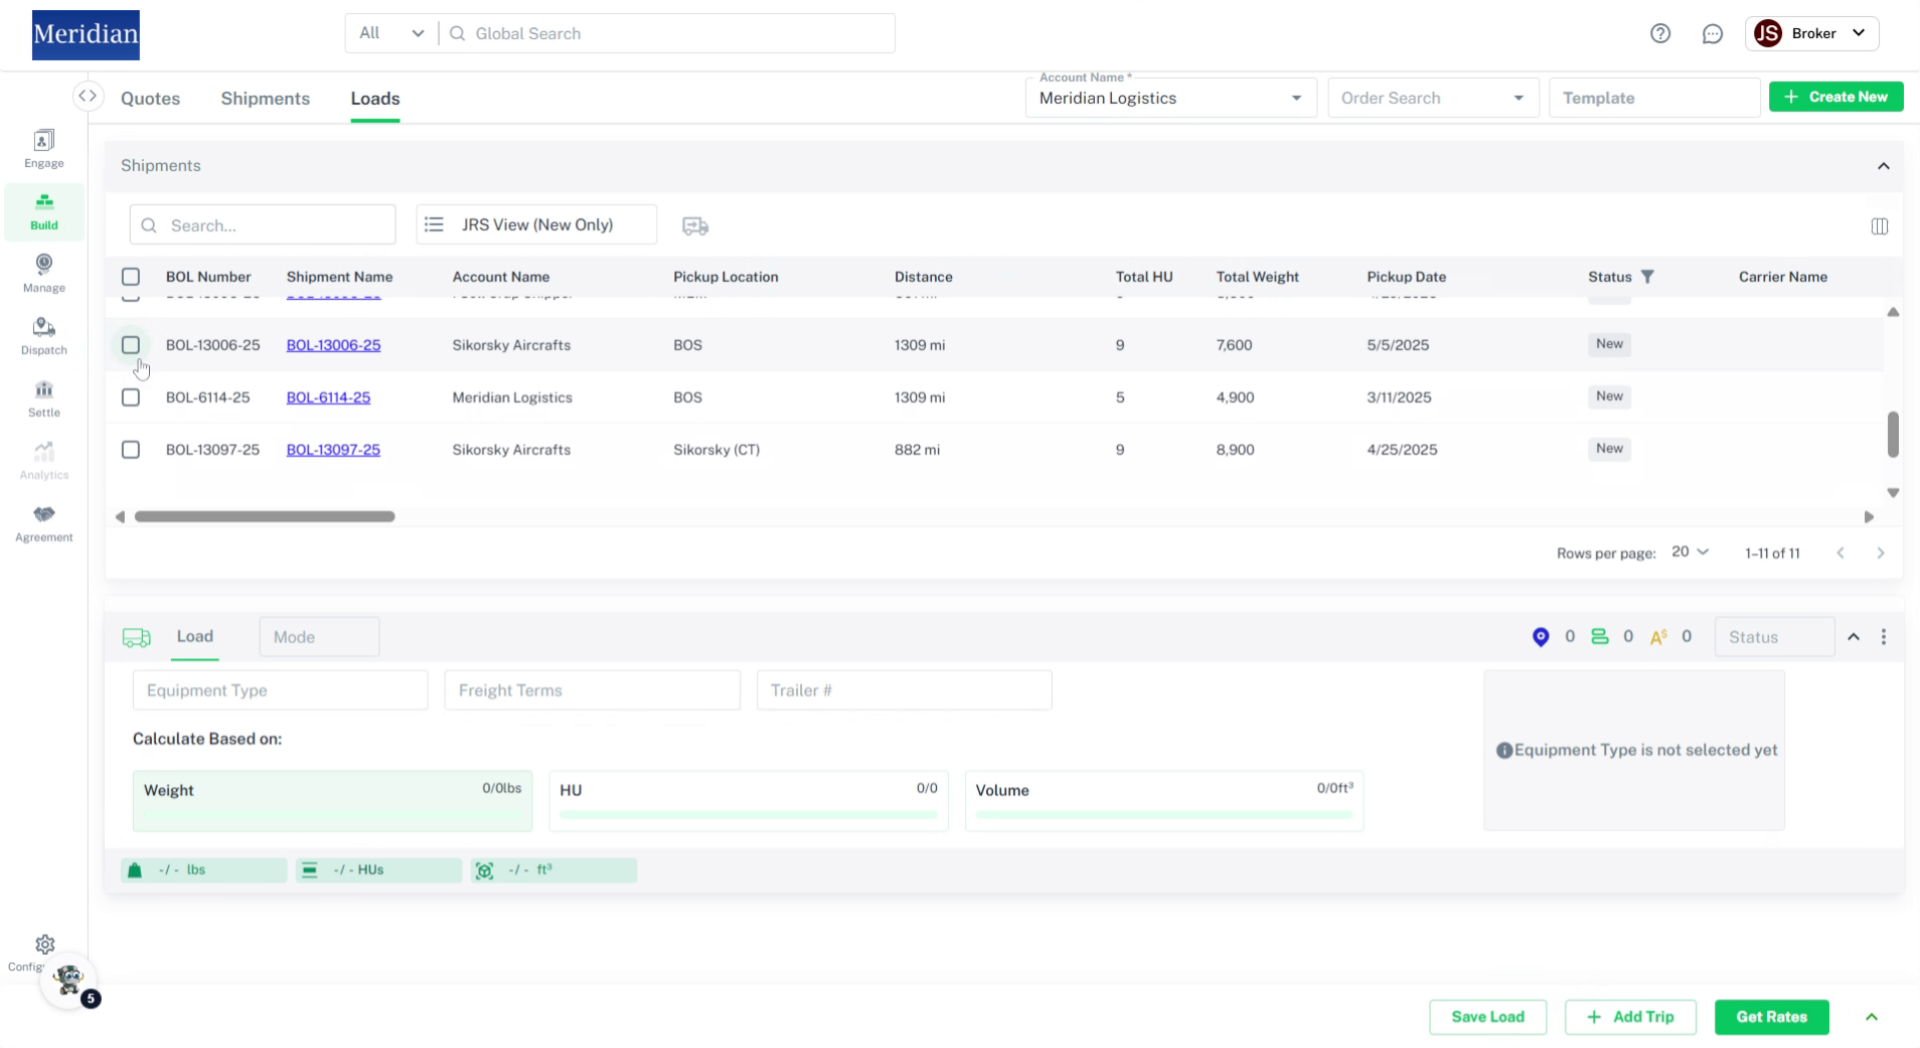
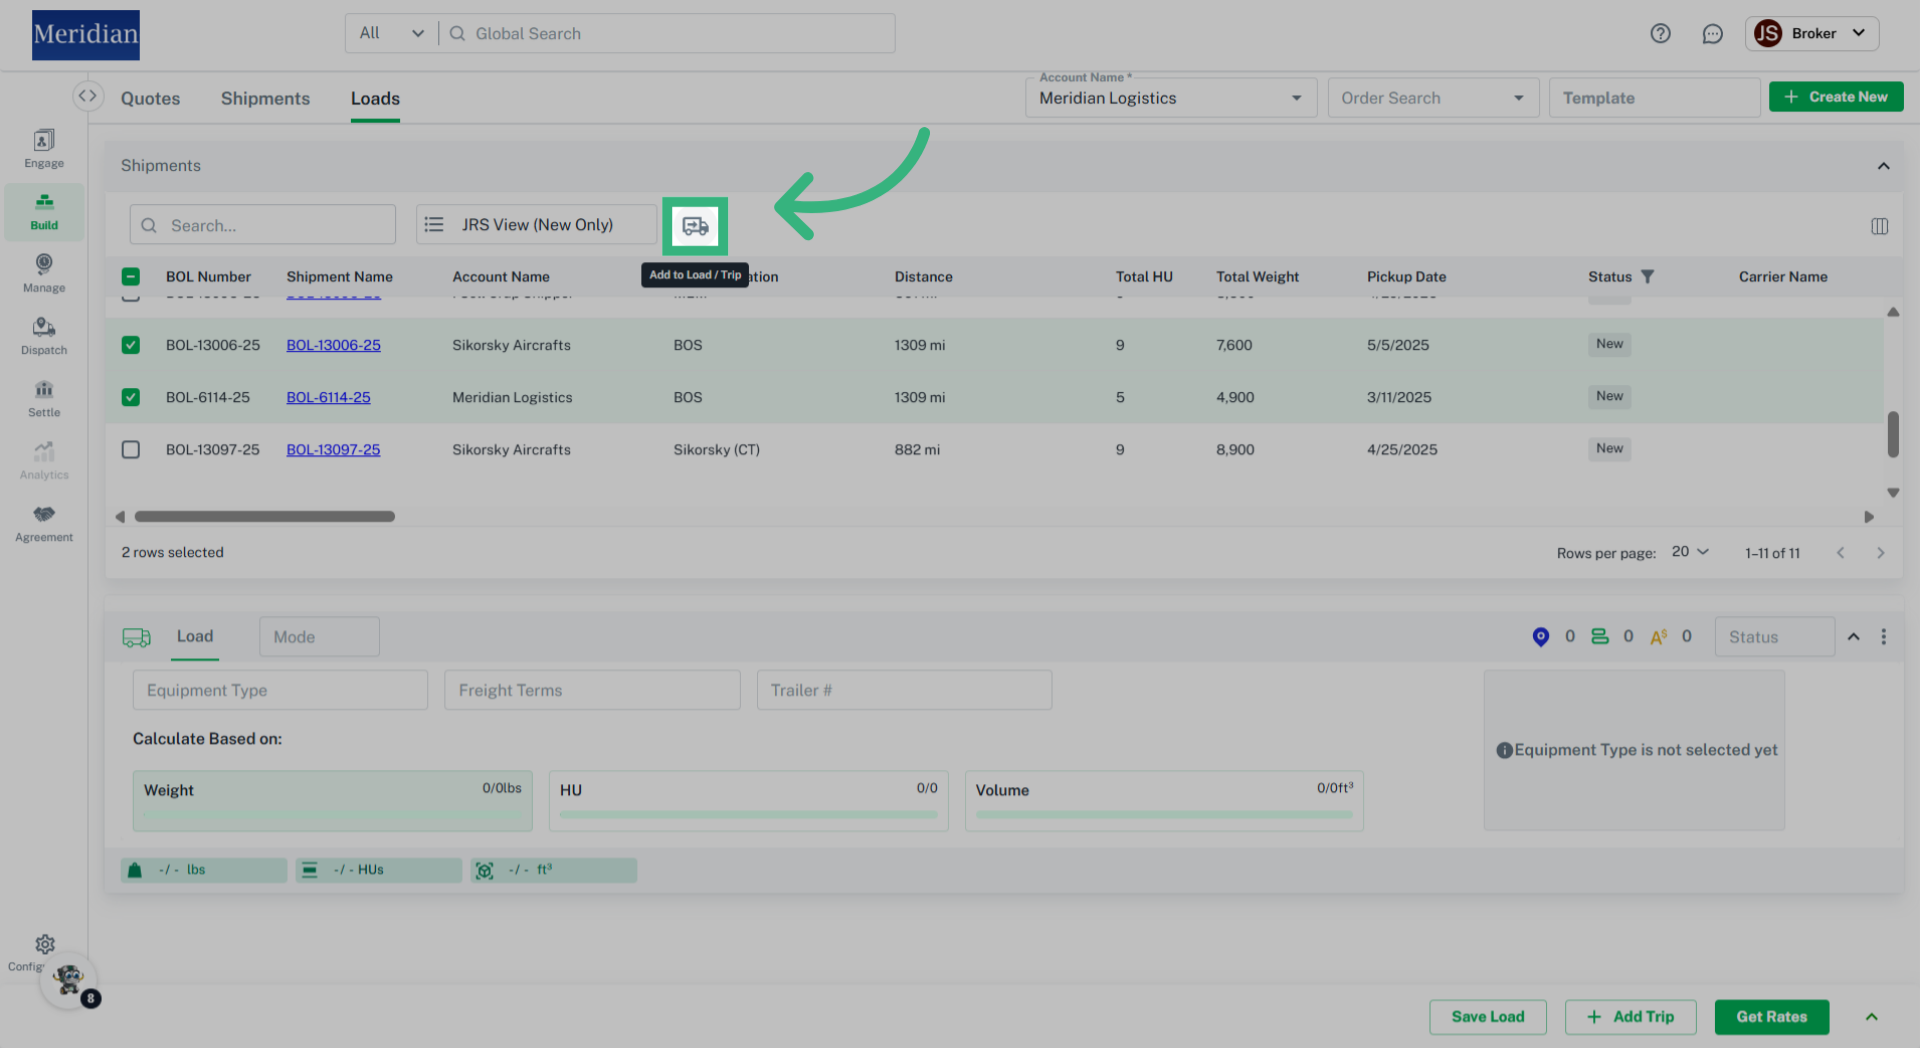
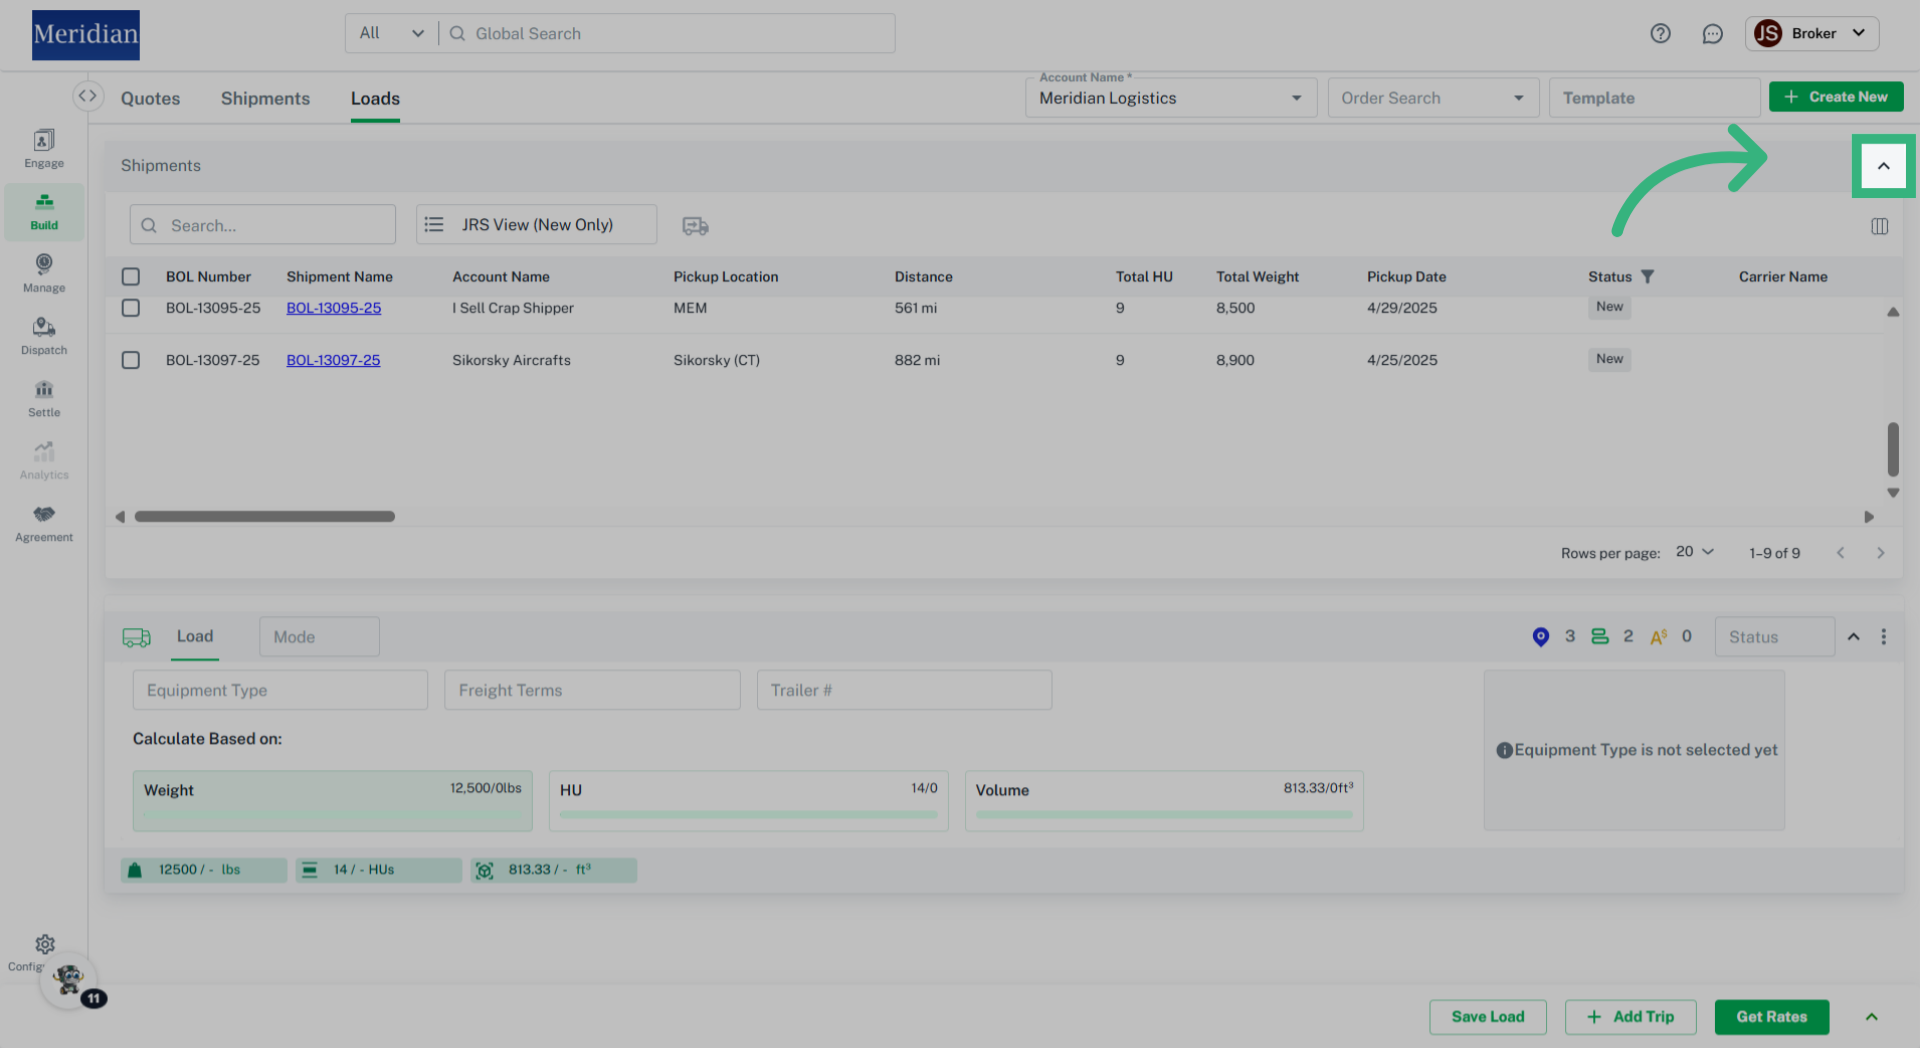
- The 'Search' field in the Load Build section allows you to quickly search for shipments in the sidebar to add to build the load.
- The 'Filter' field in the Load Build section allows you to open a filter form to apply a filter to quickly search for shipment(s) by either their Pickup or Delivery Postal Code or by Pickup Date to add a shipment(s) to build the load.
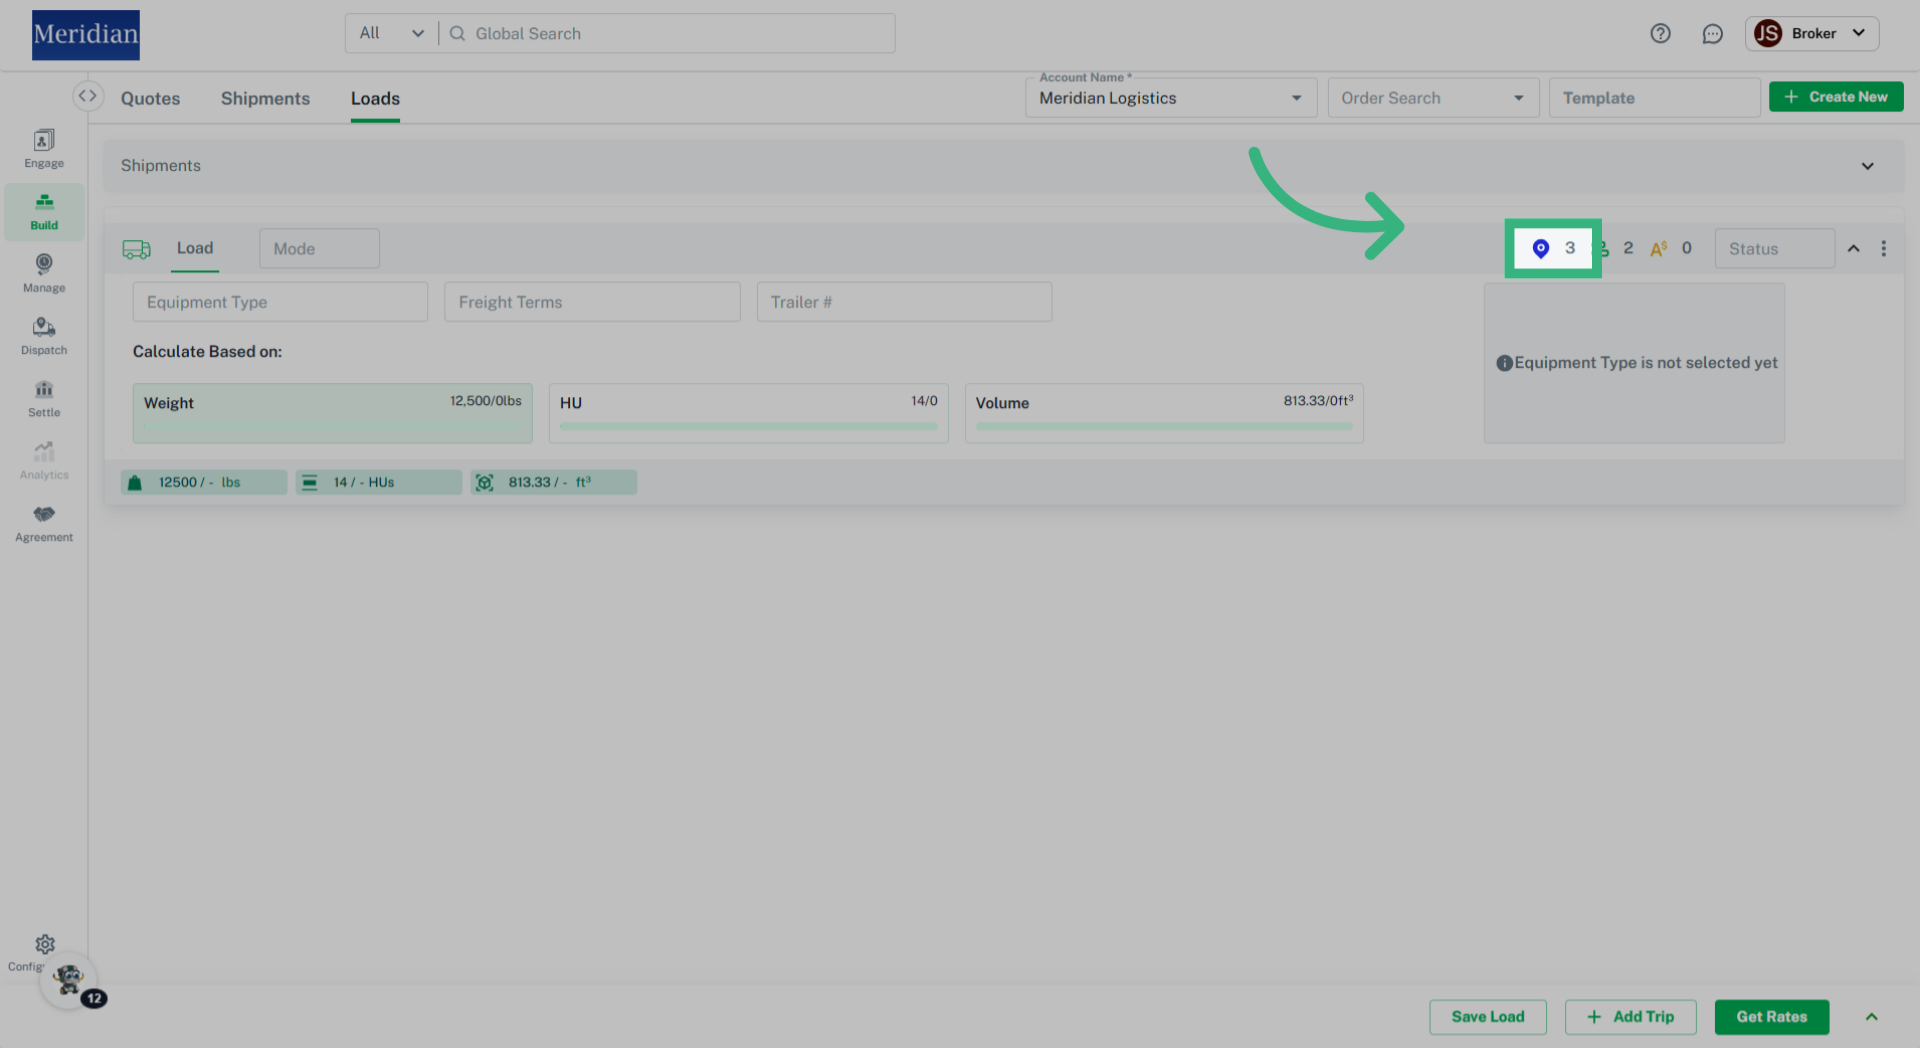
- The multi-select 'Equipment Type' field allows you to select an equipment type (if assigned in Configurations) to move your customer's commodity. Note: For Equipment Type created i.e., ‘Refrigerated’ additional input fields ‘Min Temp’ and ‘Max Temp’ will appear.
- The "Freight Terms" feature lets you assign payment terms to a shipment. If the freight bill is "Collect," the consignee/destination pays the shipping charges.
- The 'Trailer#' field in the Load Build section allows for alphanumeric input to identify the trailer.
- The Trip “Mode” field allows you to assign a transportation mode e.g., Truck Load (TL), Rail or Drayage (Dray) to the trip of a load.
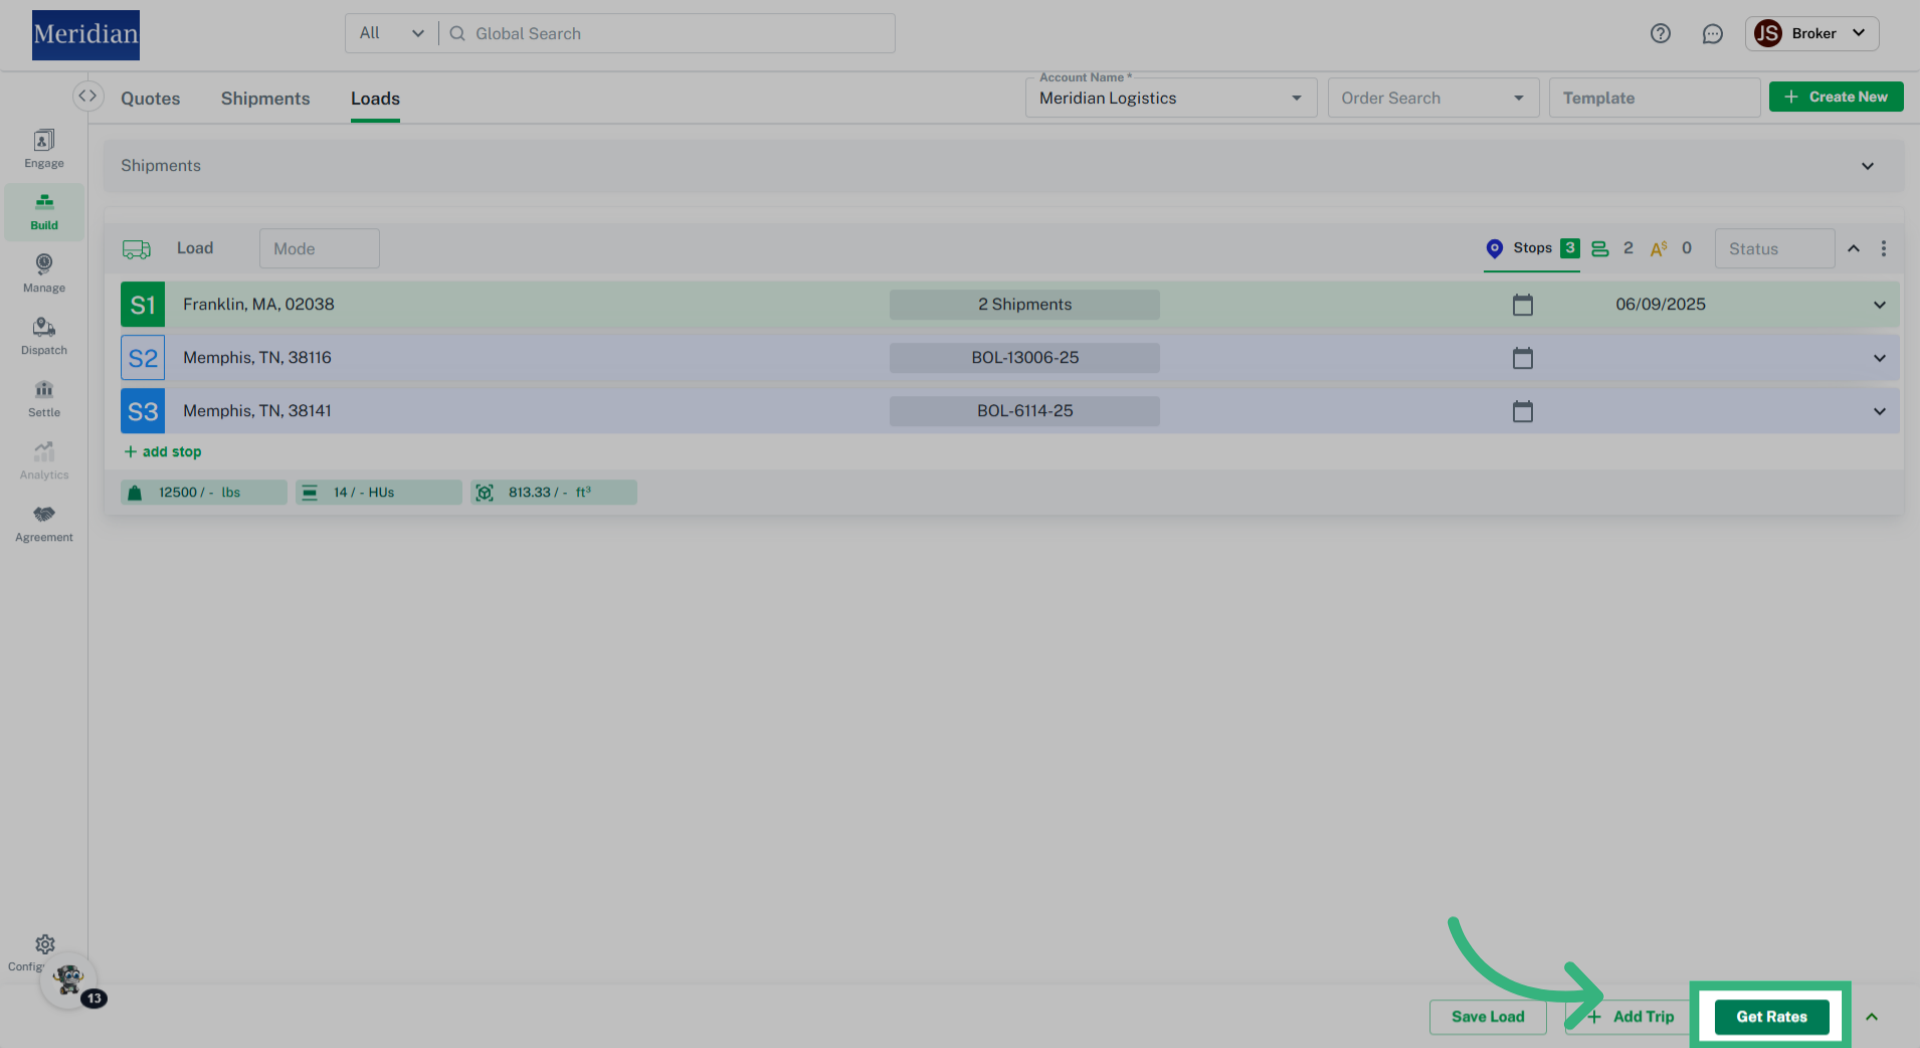
- The 'Stops' tab in the Load Build section displays the selected shipment(s) associated with the load.
- The “Shipment” tab provides a more detailed view of the selected shipment, showing the total number of handling units and the shipment's weight. (Note: additional work to be done i.e., ellipses, etc.)
- The “Accessorials” tab provides a detailed view of additional services or fees for the selected shipment(s). You can also add an accessorial by selecting the stop and choosing the accessorial associated with that stop.
- The "Status" field automatically defaults to "New" when shipments are assigned to a new load.
- The load Trip drawer can be expanded or collapsed at any time by using the carrot to the right of the 'Status' input field.
- When you select the ellipsis (three dots) on the right side of a trip, you have two options. The "Delete" option appears only if there are multiple trips and allows you to remove a specific trip. The "Bill To" option is available for all trips and opens a drawer showing the default Bill To address from the owning account, which can be changed or updated by the user.
- After filling in all the required information for your Load, you can either “Save Load”, “+ Add Trip”, or ‘Get Rates’.