Skip to content
English
  • There are no suggestions because the search field is empty.

Agreements- Freight: Rate Plans

The Rate Plan section of Freight Agreements sets the qualifiers and rates for a Custom Rate Agreement

Last Updated: April 25, 2025

Applies to:

Shippers, Brokers, Carriers

Common Scenario(s)/Challenge (s):

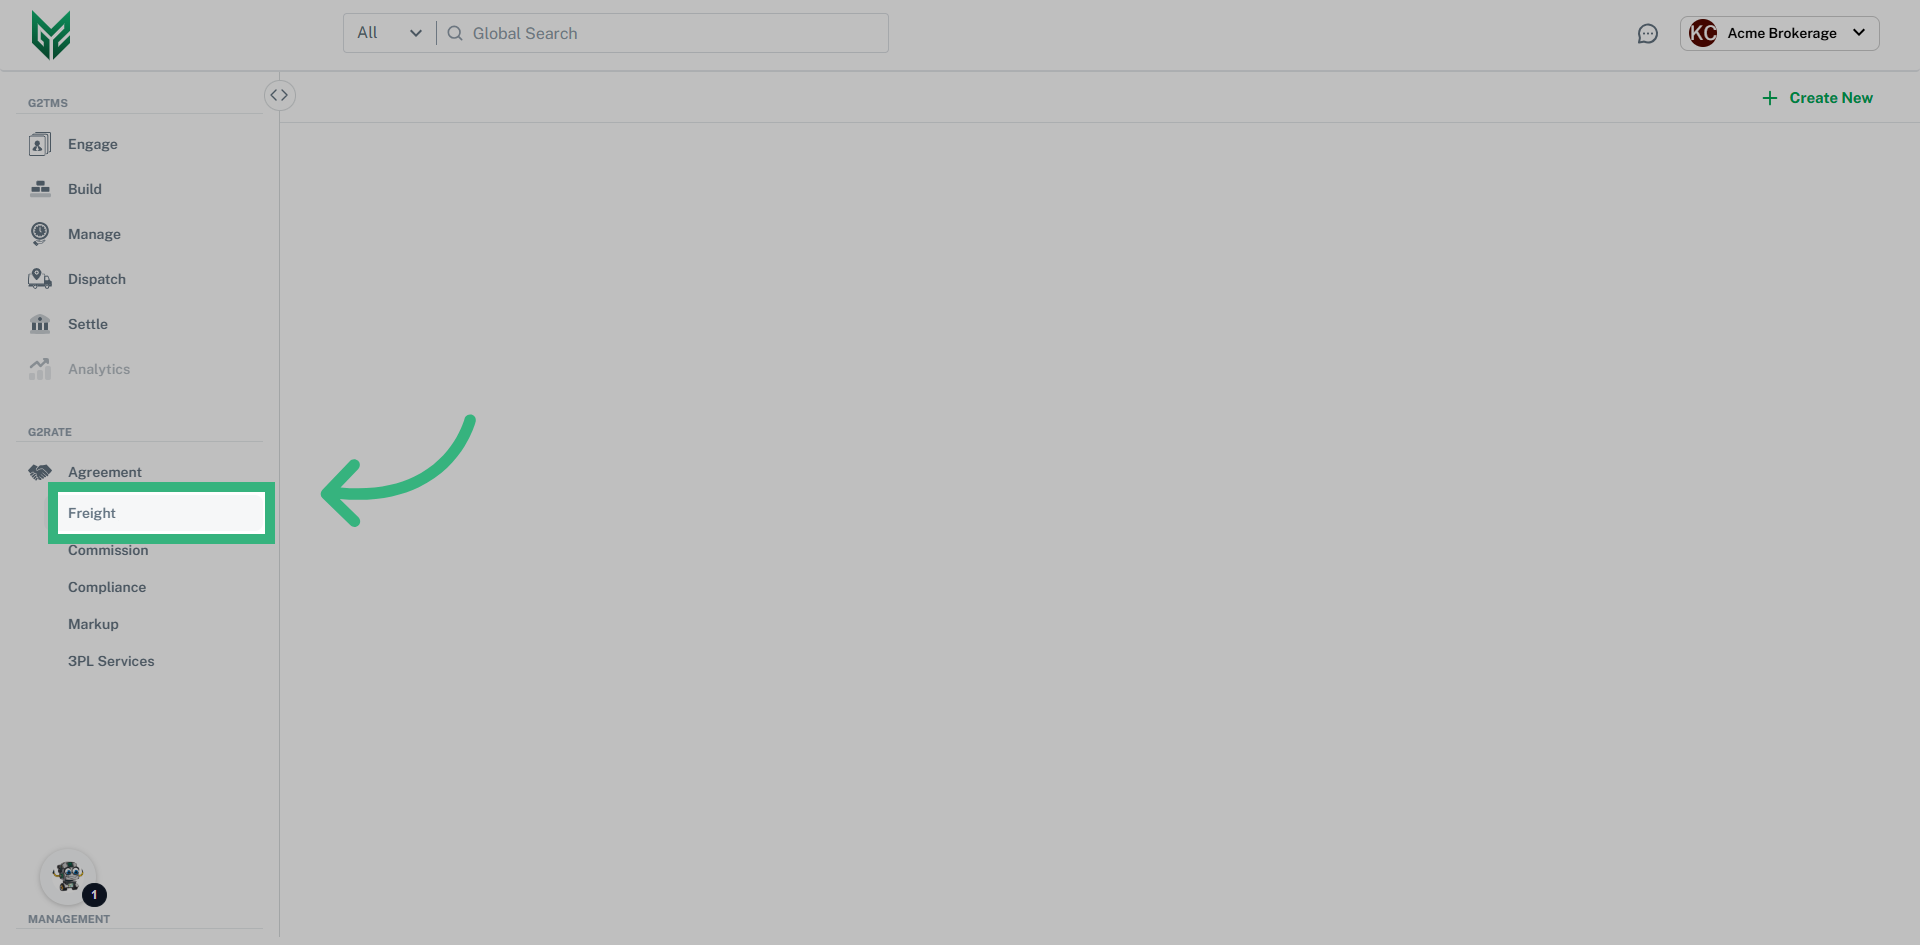
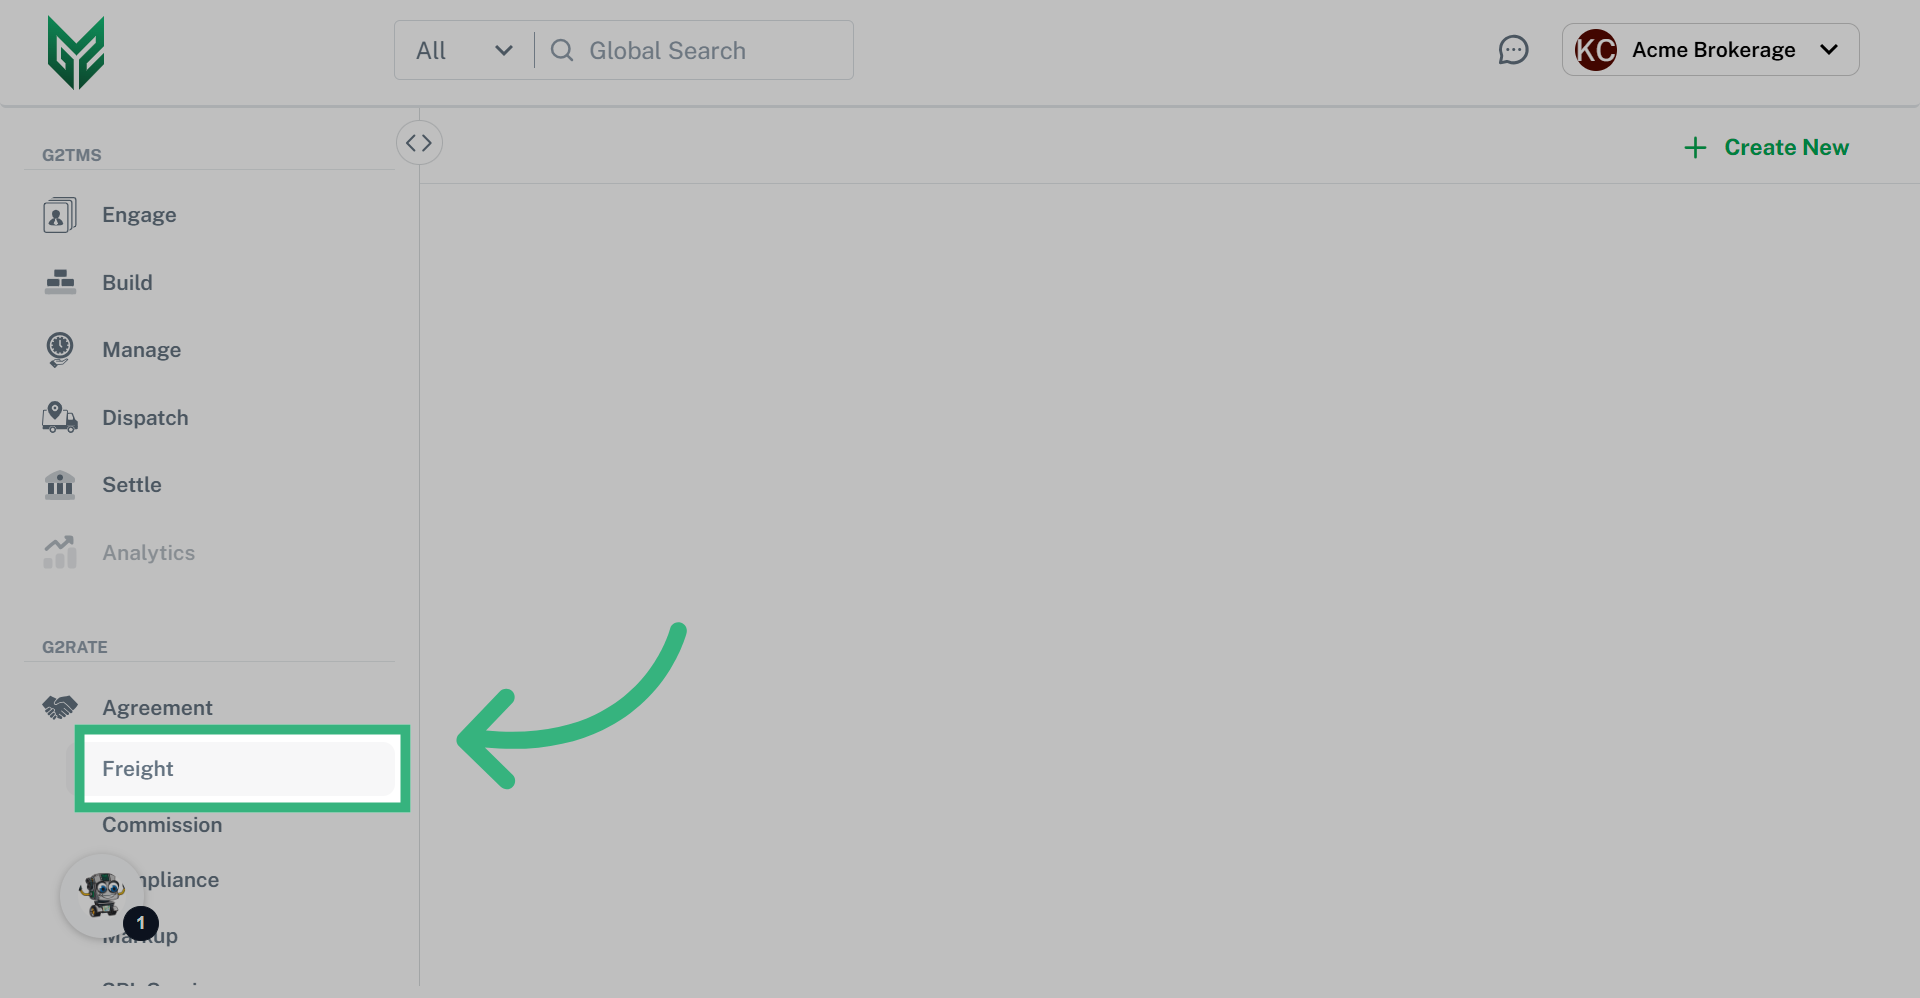
Freight Agreements serve as the essential foundation of the Rating Engine; without them, it is impossible to generate any rates. A Custom Freight Agreement (not API enabled) offers significant flexibility, allowing for the accommodation of various transportation modes, services, equipment types, geographical coverage, and packaging requirements. These Custom Agreements are not only utilized for formal contracts with carriers but can also be established to serve as benchmark or baseline pricing models.  Web Service agreements can communicate in real-time via API calls, providing immediate Rates, ensure real-time visibility, and automate daily tasks.

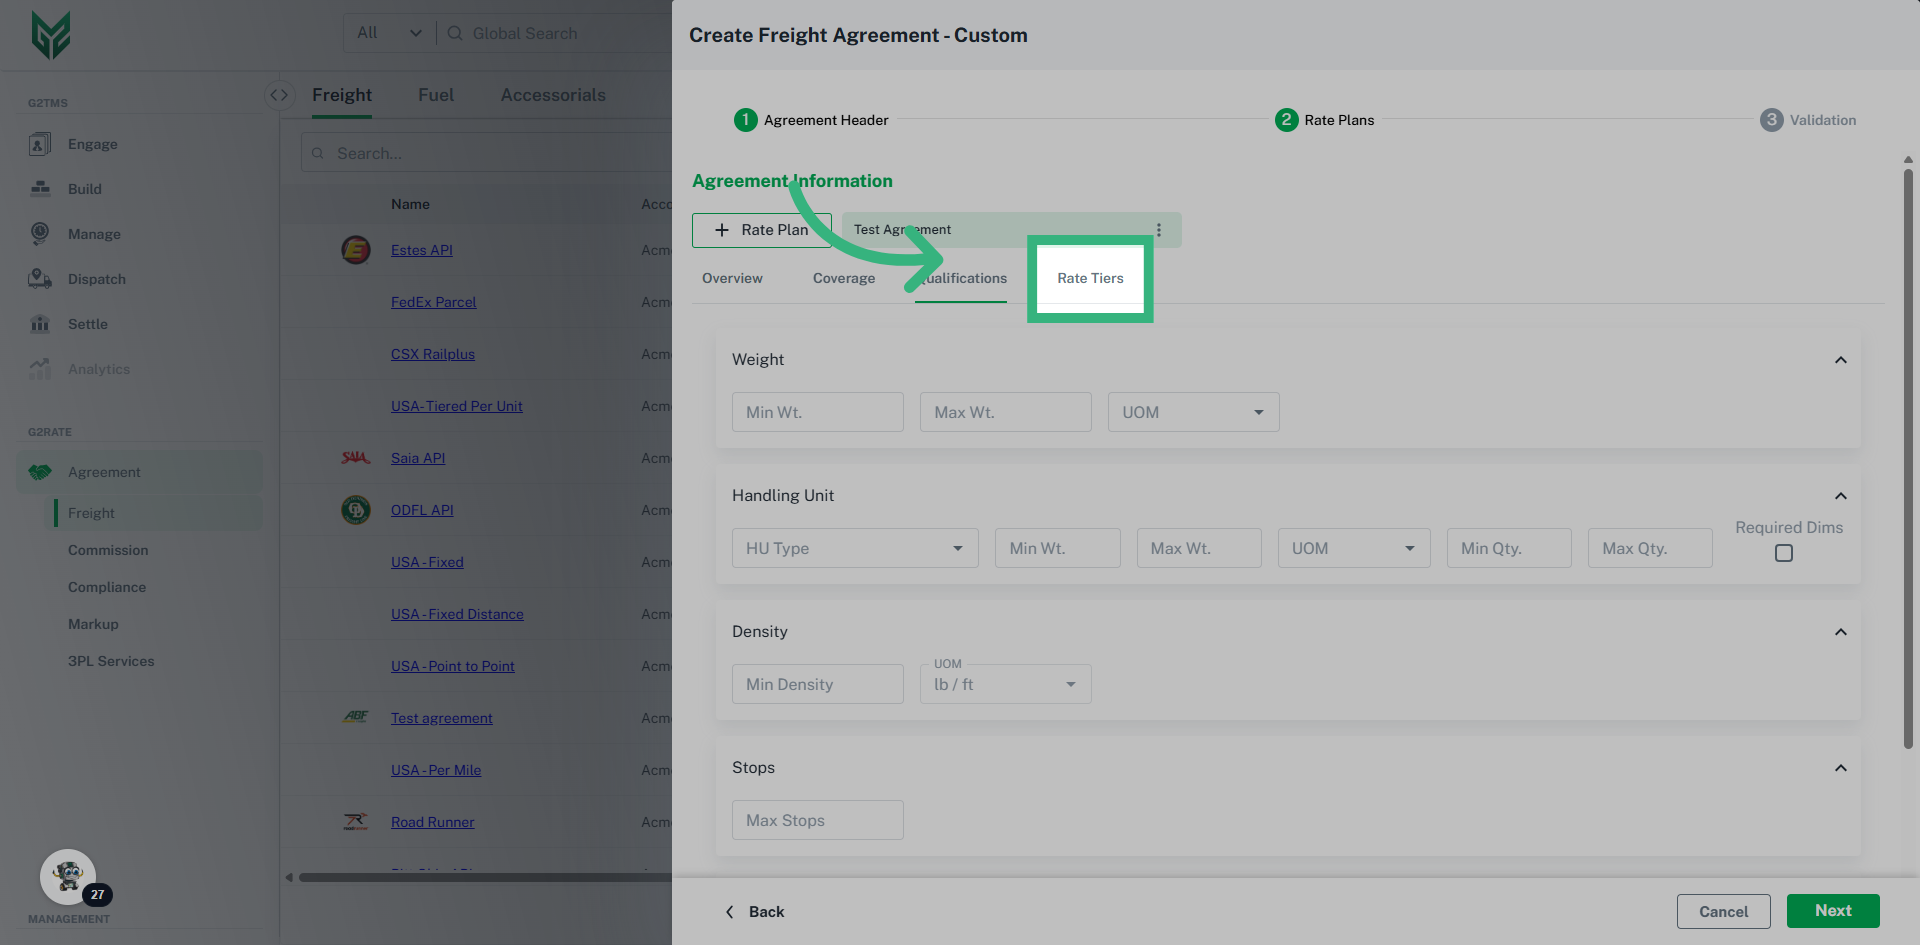
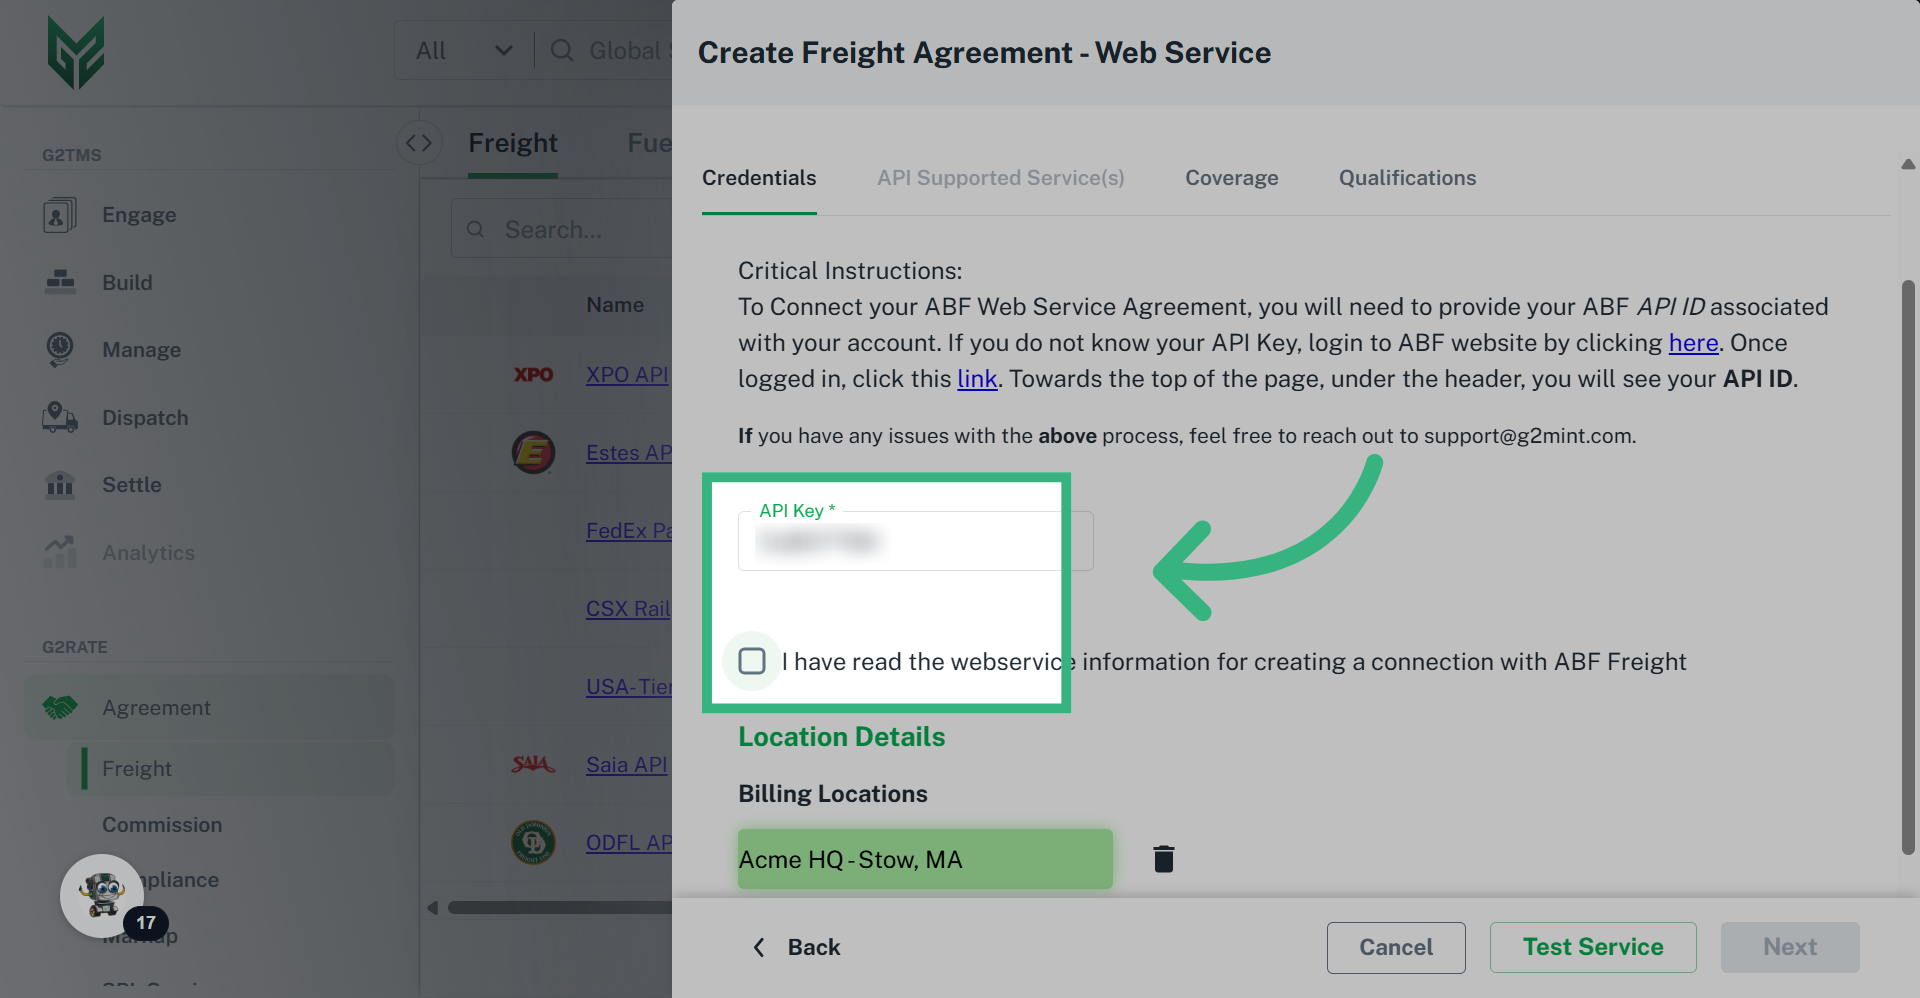
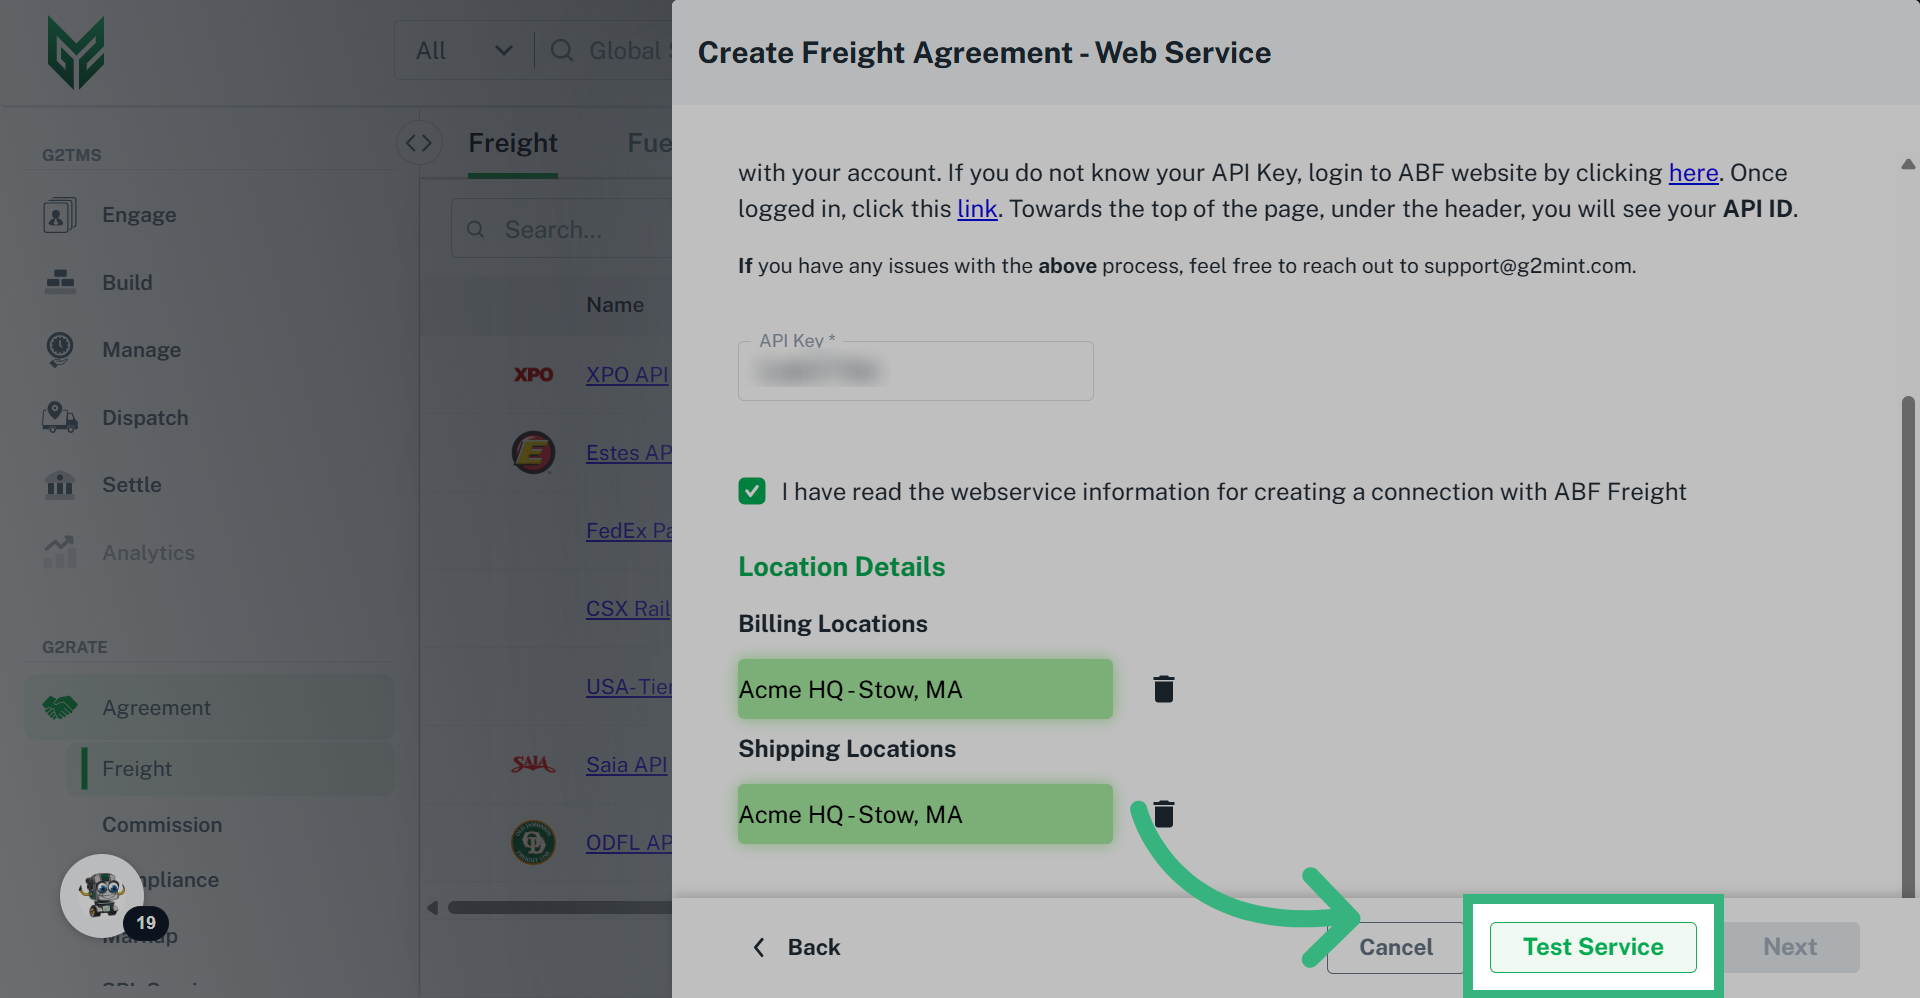
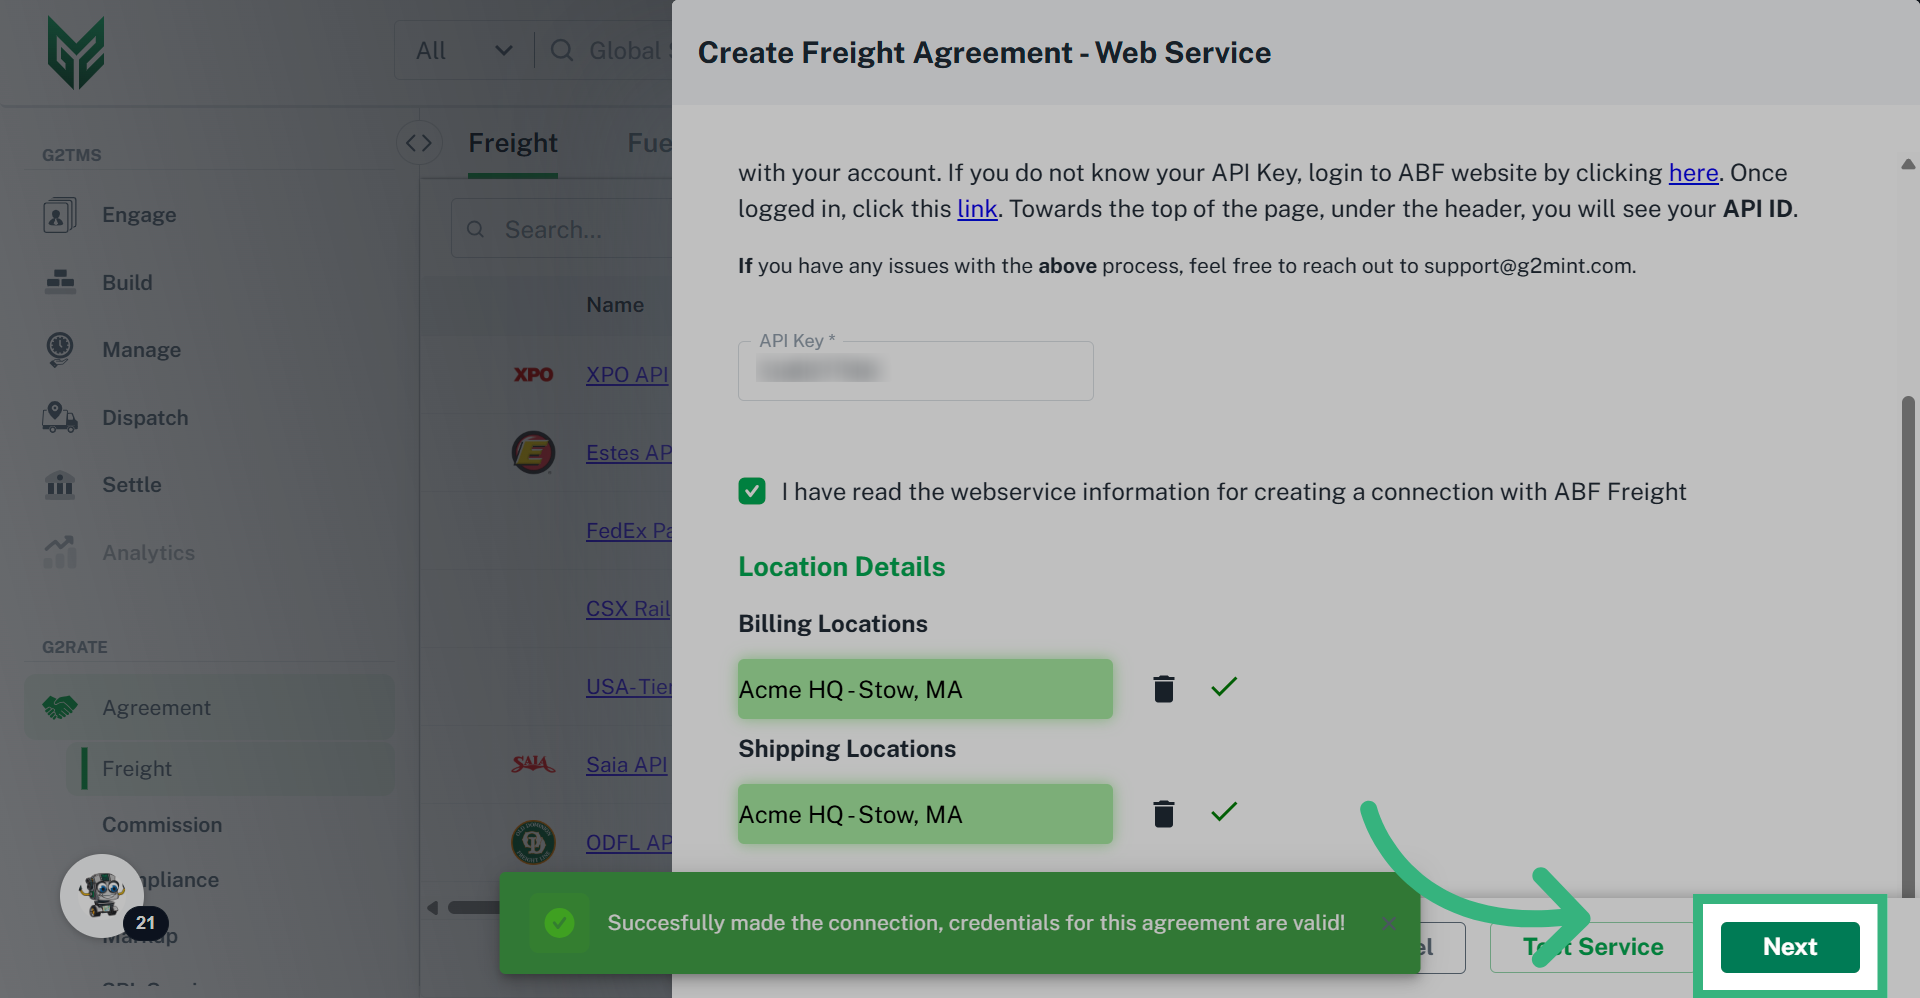
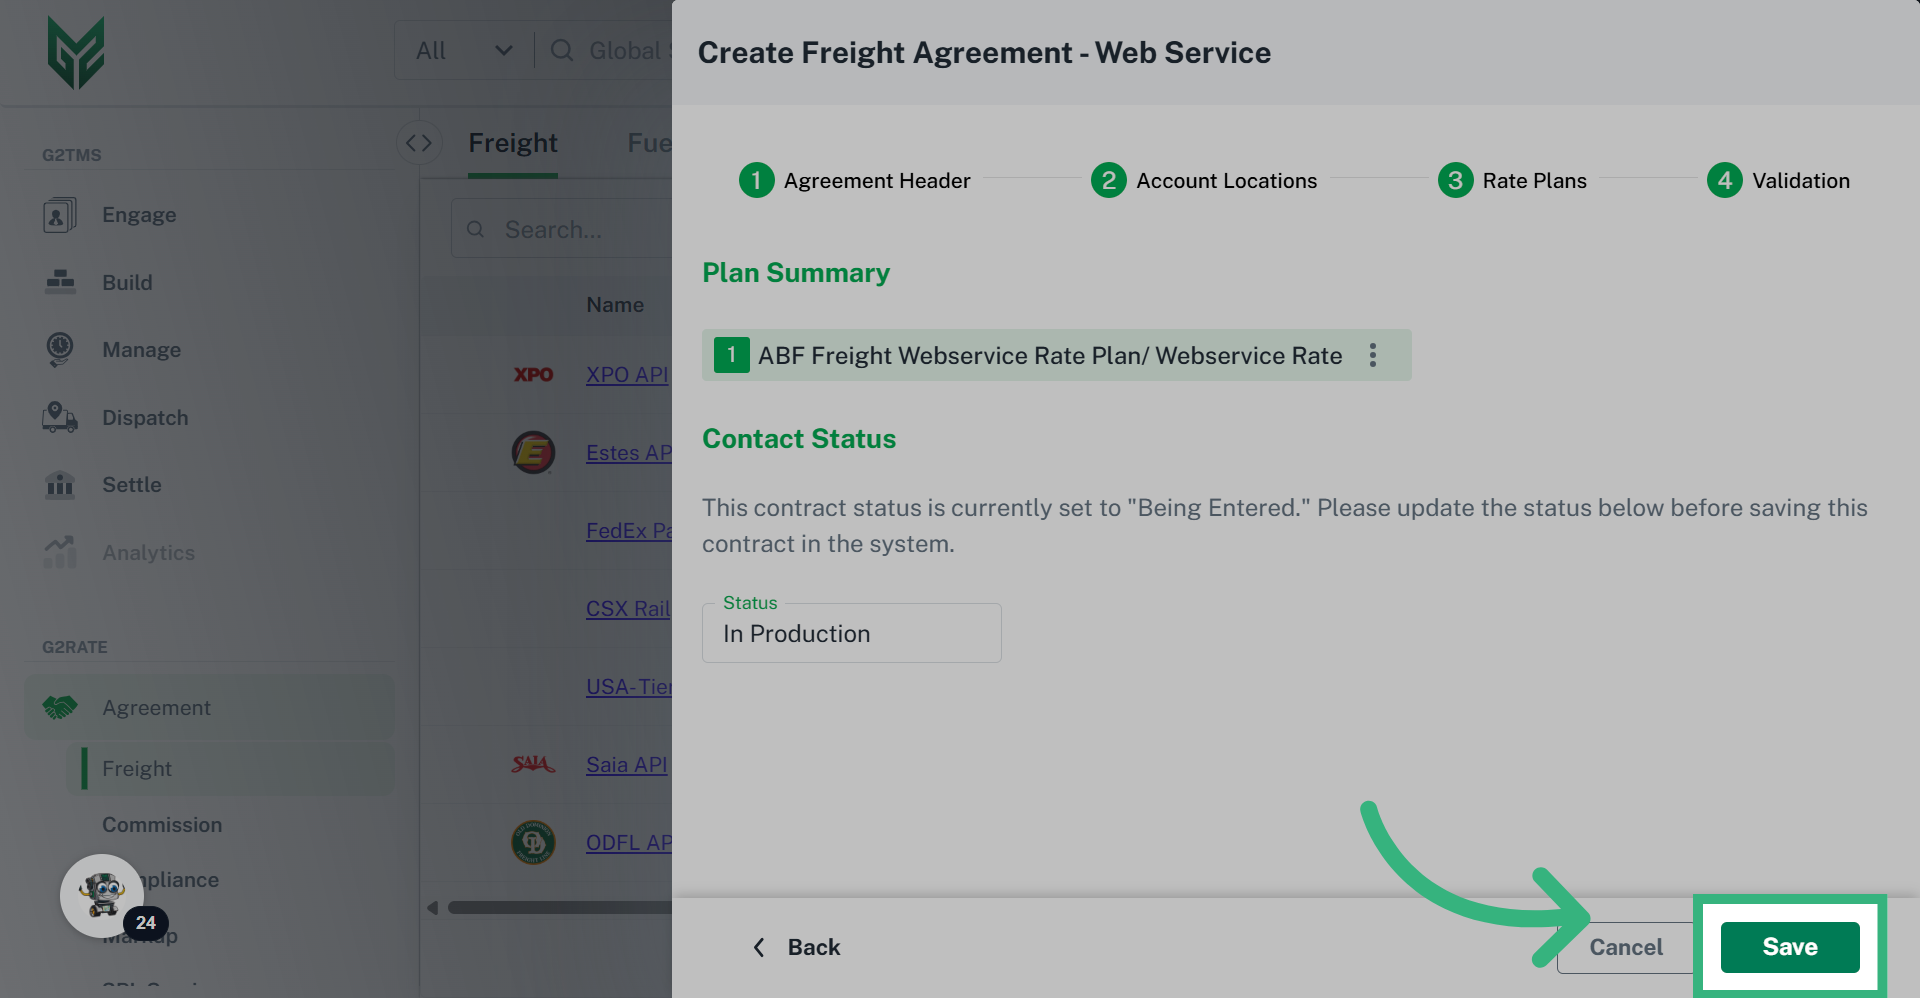
The Rate Plans section is where the User will follow Critical Instructions for adding/ updating Carrier credentials that are required for rating purposes.  Also, you see which API services are connected, as these options will vary by Carrier.  From the rate Plans section of a Freight Agreement, you can also add in Qualifiers, such as a specific Coverage Area or Other Qualification (weight, density, HU, etc).  

Solution Overview:

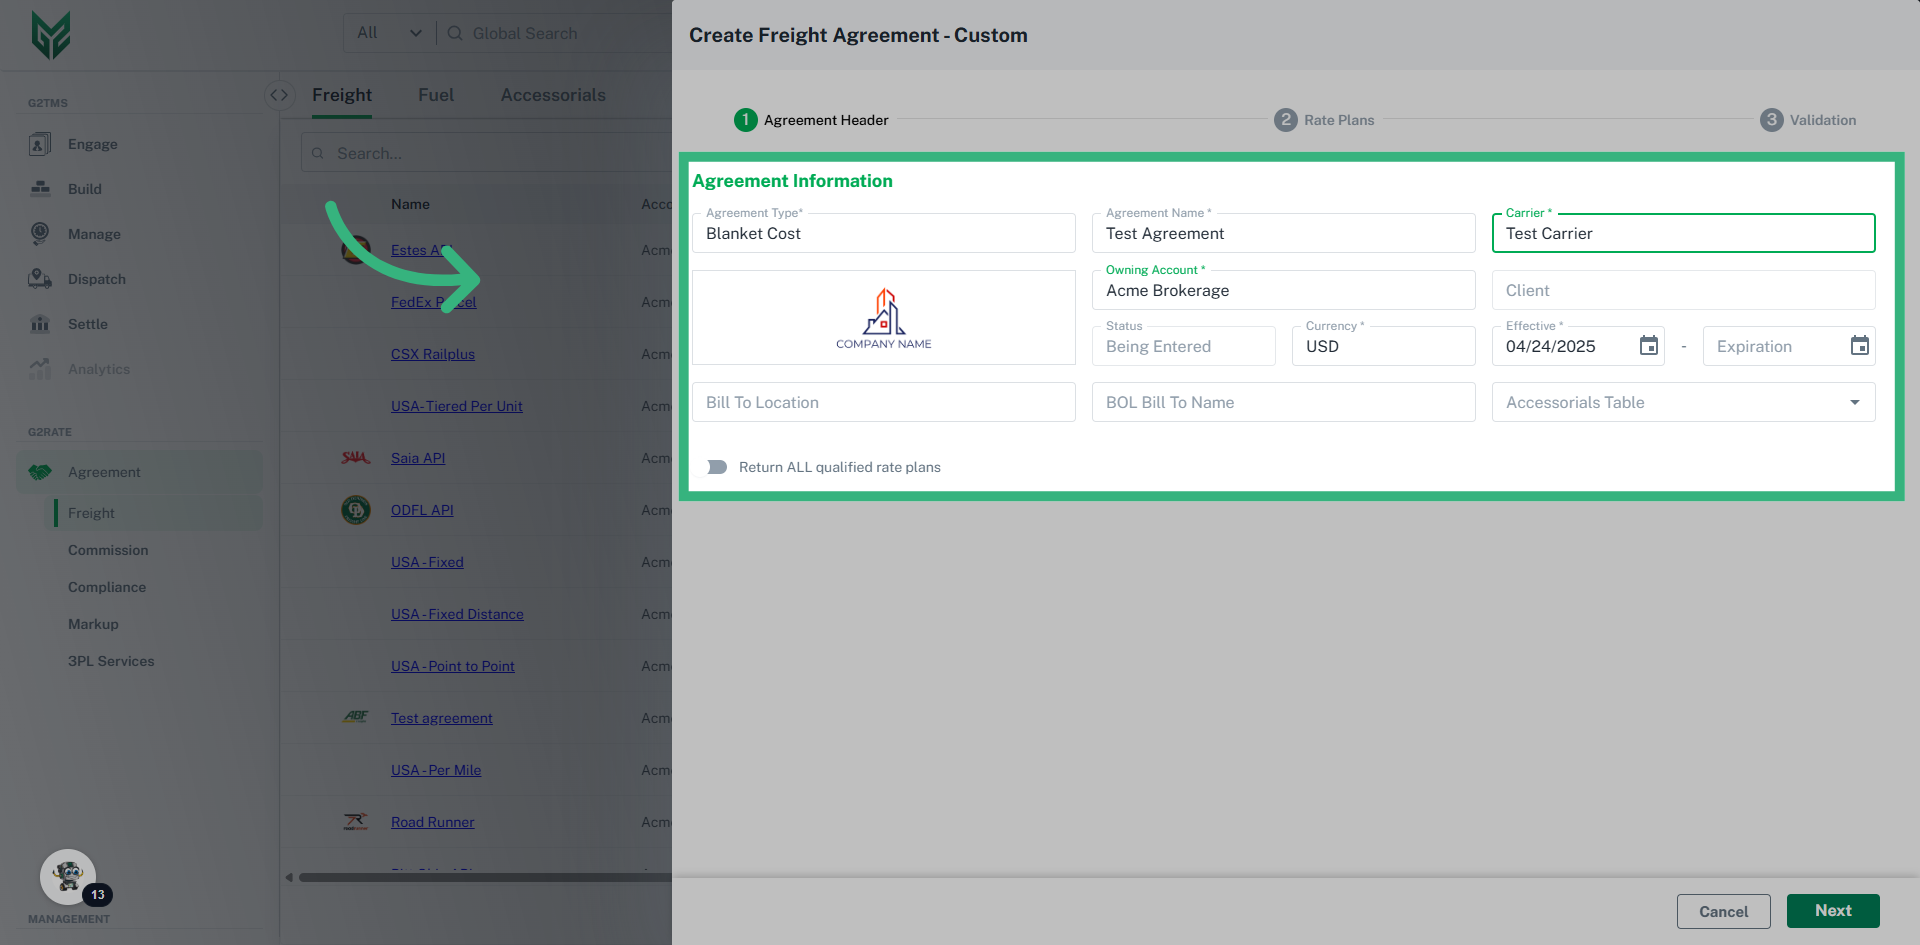
Custom Freight Agreements are the foundation of the rating engine and are used to accommodate the participants (Shipper, Broker, and Carrier) & the pricing for various services. Custom Agreements are not only used for actual contracts but can also be created to represent benchmark or baseline pricing, which can be used for analytics. Because agreements are made up of “modules” or components, our Custom Agreement allows a great deal of flexibility to accommodate various Modes, Services, Equipment, Geographical coverage, and Handling unit / Packaging types. 

Learn how to create a custom freight agreement in G2mint with this comprehensive guide

1. Click "Agreement" then "Freight"

Navigate to the freight tab by first clicking on the agreement header.
Click 'Agreement' then 'Freight'

2. Click "Create New" then "Custom"

Click "Create New" then select custom from the dropdown menu.
Click 'Create New' then 'Custom'

3. Enter "Agreement Information"

Enter the Agreement Type, Agreement Name, Carrier Name, and owning account then click "Next".
Enter 'Agreement Information'

4. Create Plan

In this example, we will use fixed amount to represent a contract full truckload lane with a static price.
Create Plan

5. Click "Coverage"

Click "Coverage"

Click 'Coverage'

6. Enter coverage information if needed, then click "Qualifications"

Enter your coverage information. Coverage information can be used to filter your agreements further, but are not required. Areas can be created in the Areas configuration. Next, click on the qualifications tab.
Enter coverage information if needed, then click 'Qualifications'

7. Enter any additional qualifications then click "Rate Tiers"

Enter any additional information such as weight, handling unit, or stops in the qualifications tab then click "Rate Tiers".
Enter any additional qualifications then click 'Rate Tiers'

8. Enter the agreement amount

Enter the agreement amount. In this case, we will enter $2100 for this lane.
Enter the agreement amount

9. Click "Next"

Proceed to the next step.
Click 'Next'

10. Update the contract status.

Update the contract status to "In Production". This will activate the agreement, if you want to deactivate this agreement later, you can update the status to "On Hold".
Update the contract status.

11. Click "Save"

Save the custom freight agreement.
Click 'Save'

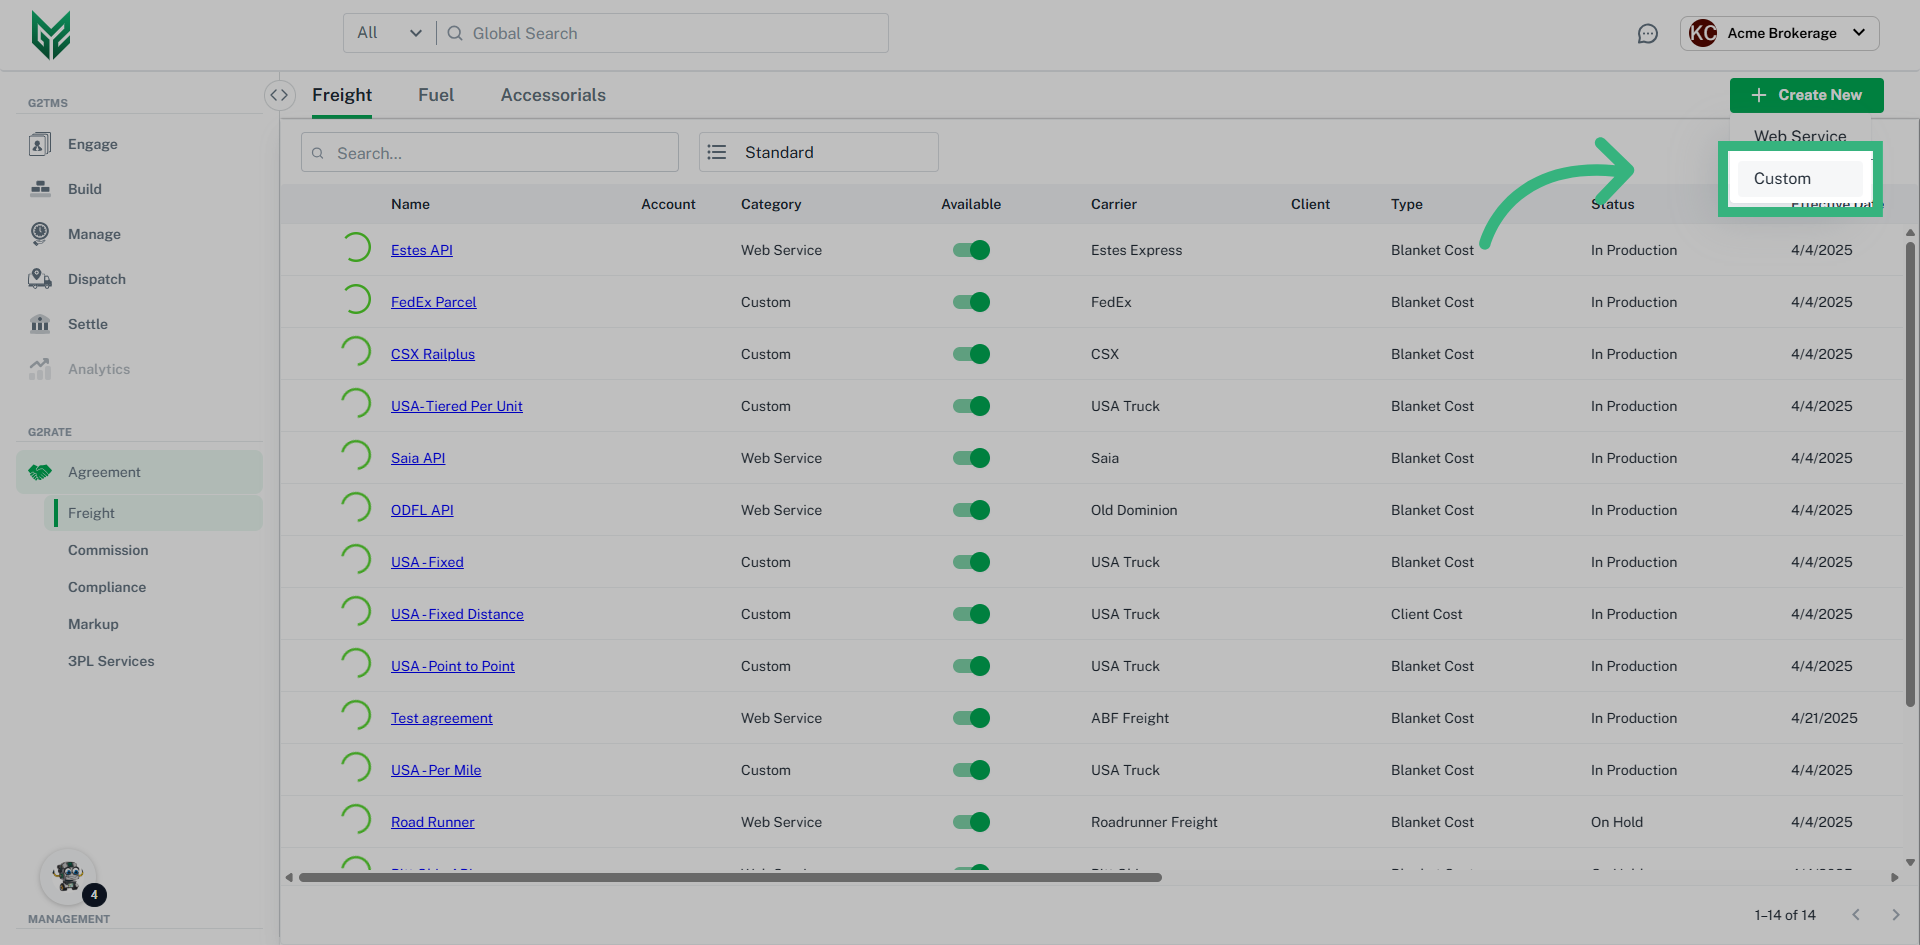
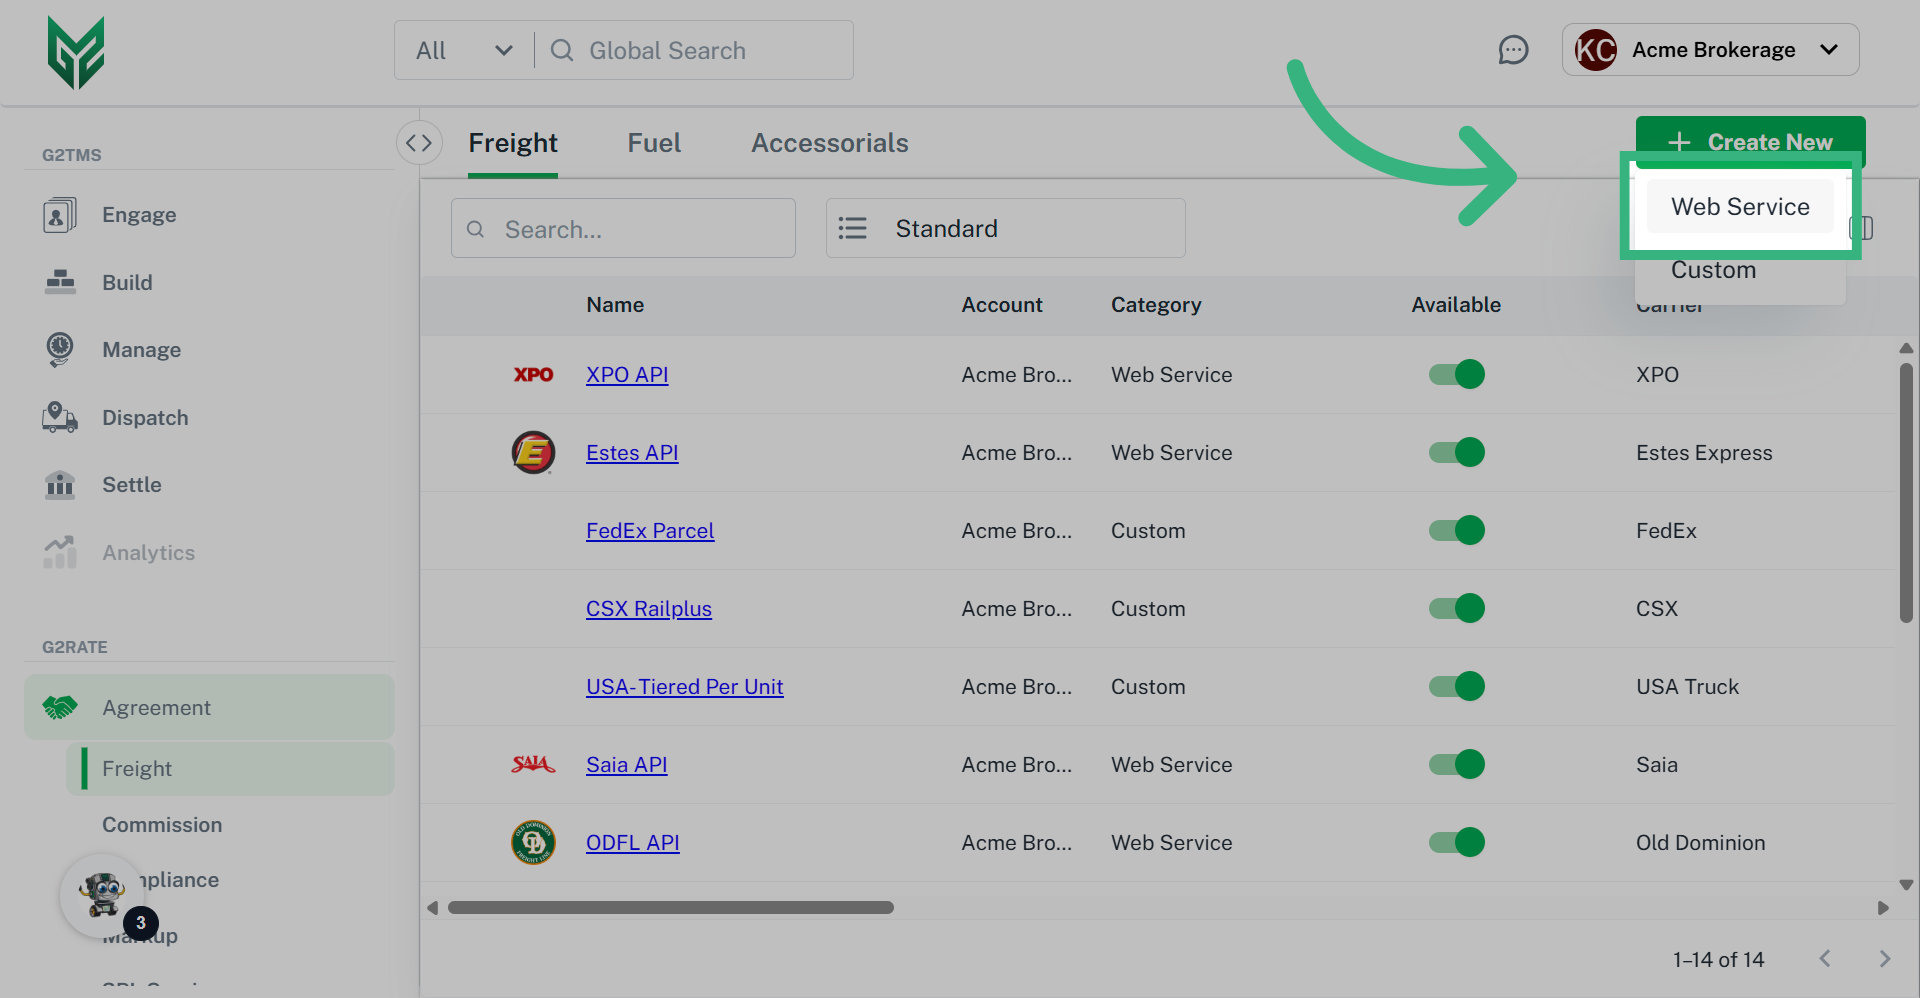
Web Service Agreements are utilized through API access and can be created in minutes due to G2Mint's pre-established connections with several LTL and TL Carriers.  All that is required is account credentials with a carrier to establish the agreement.  Once a web service agreement is created, additional functionality such as Tender/ Pickup request, Document management, Status updates and Freight Bill acceptance (API or EDI 210) will be enabled. 
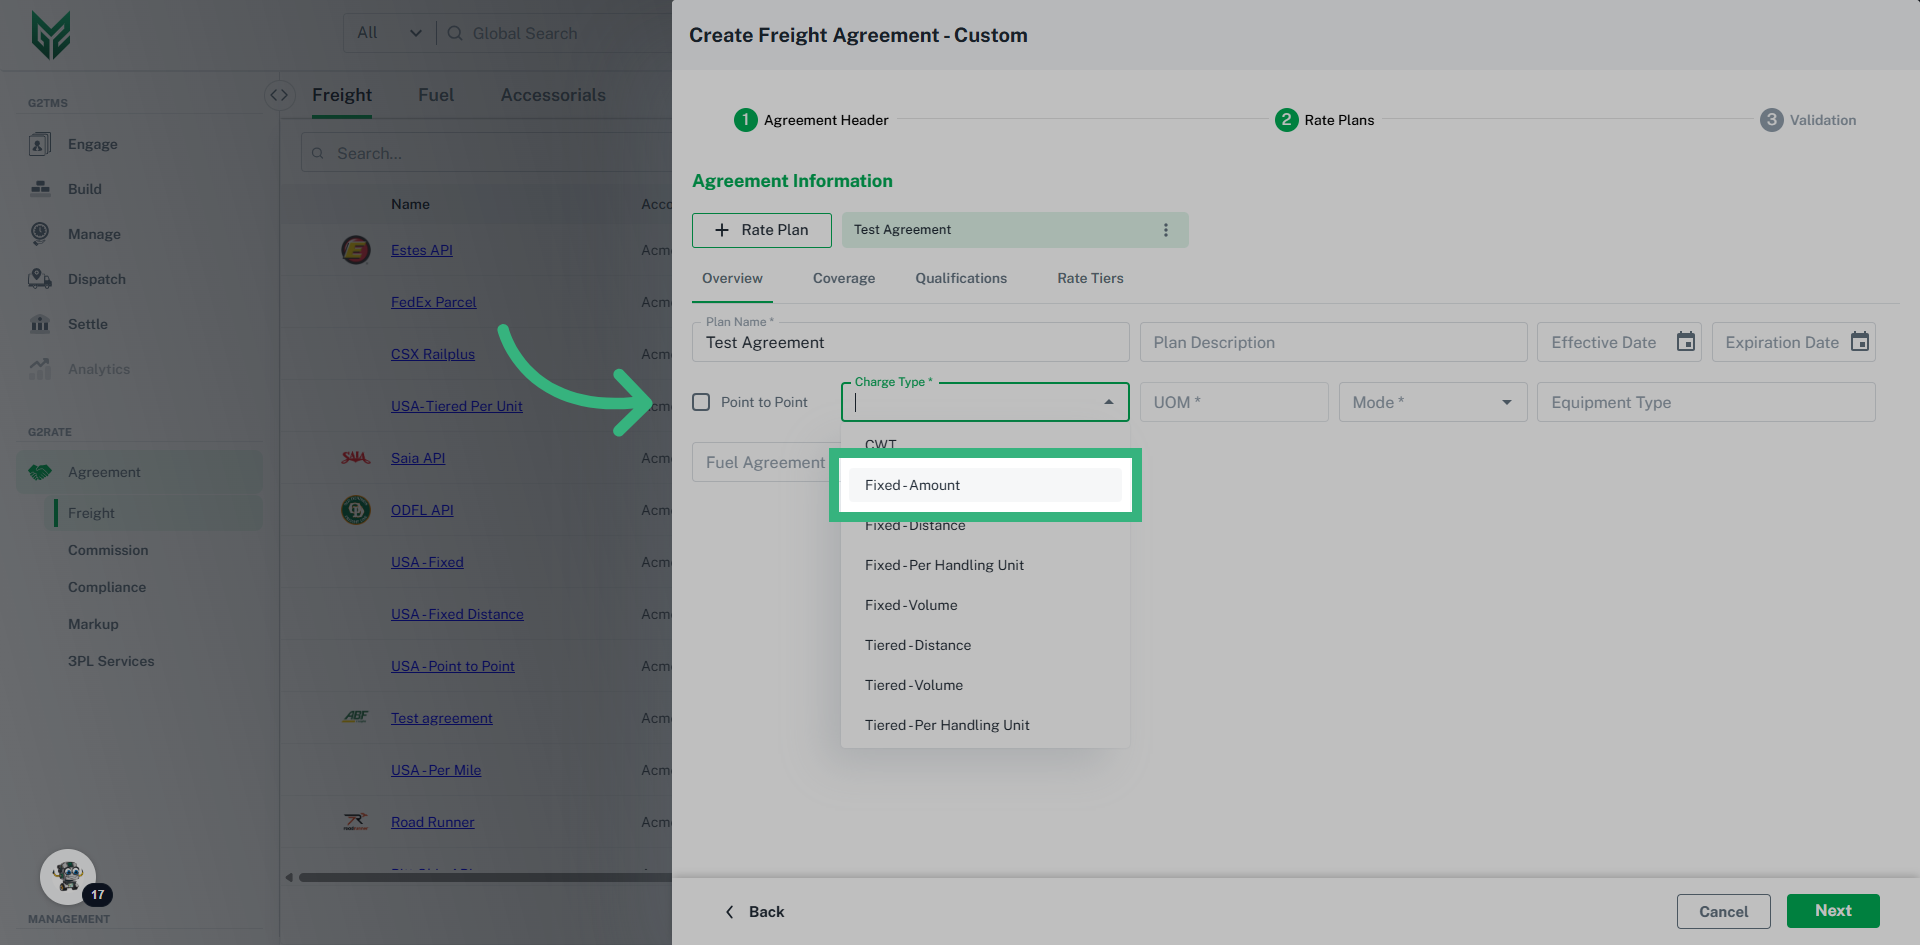
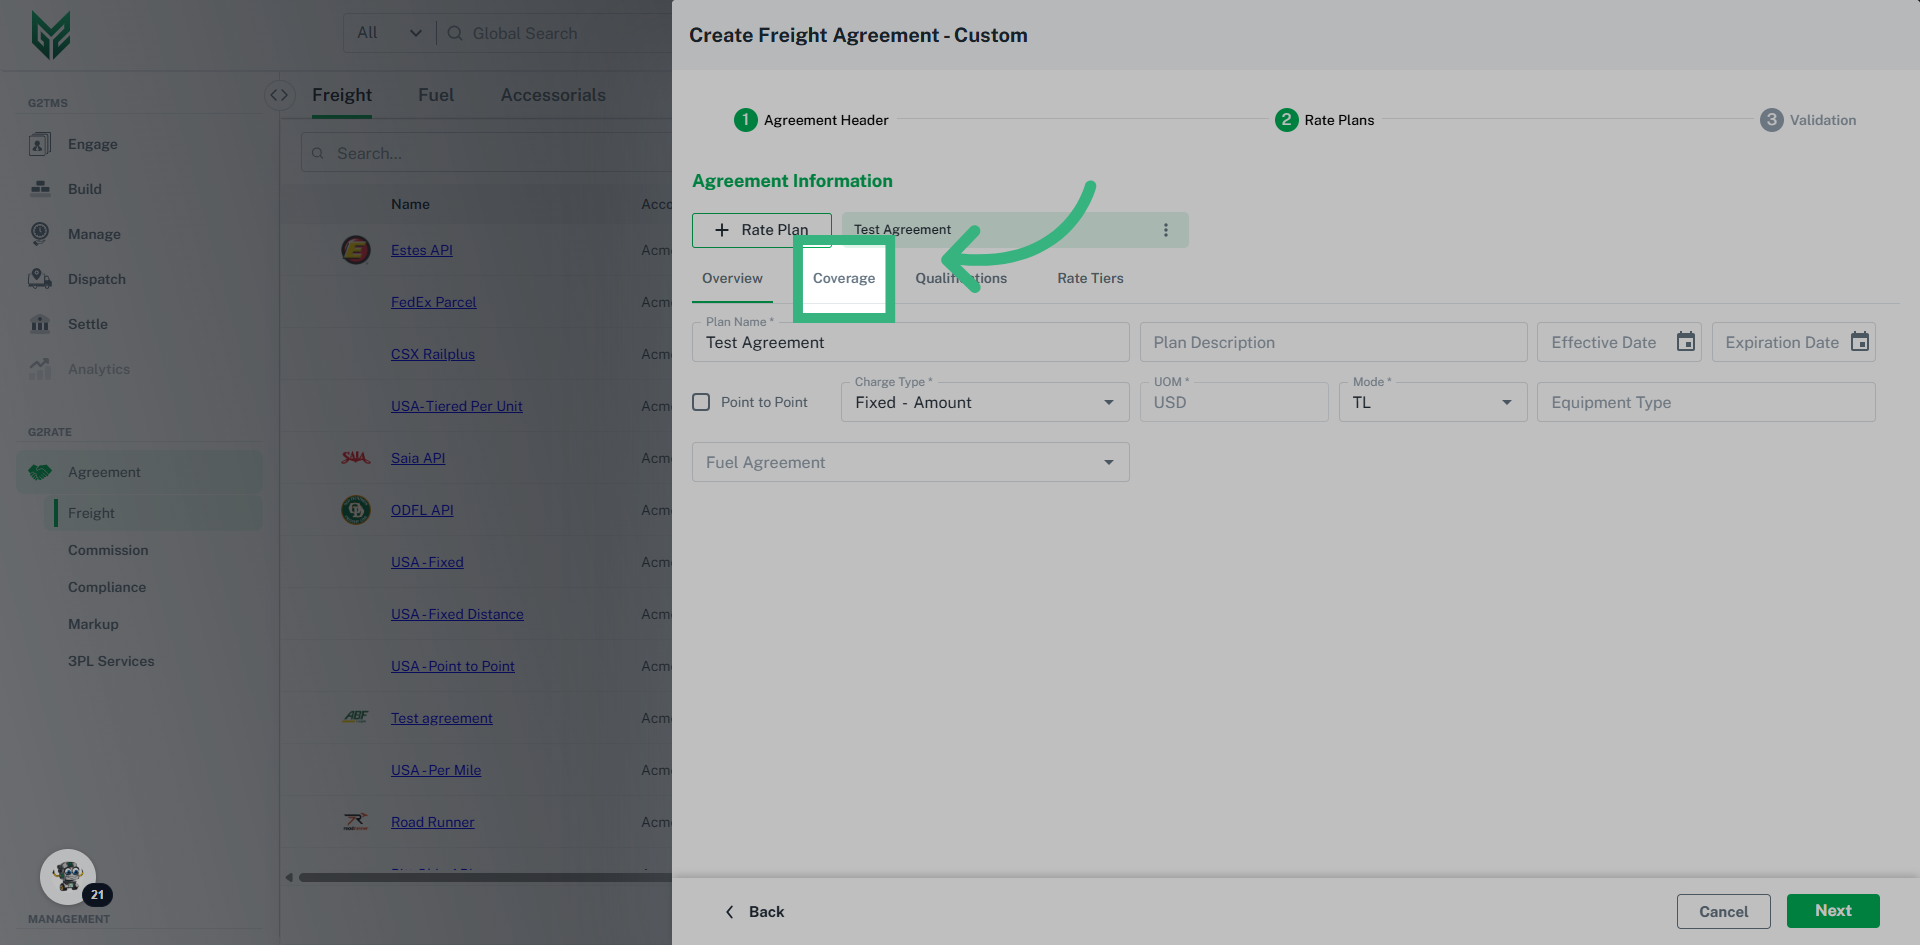
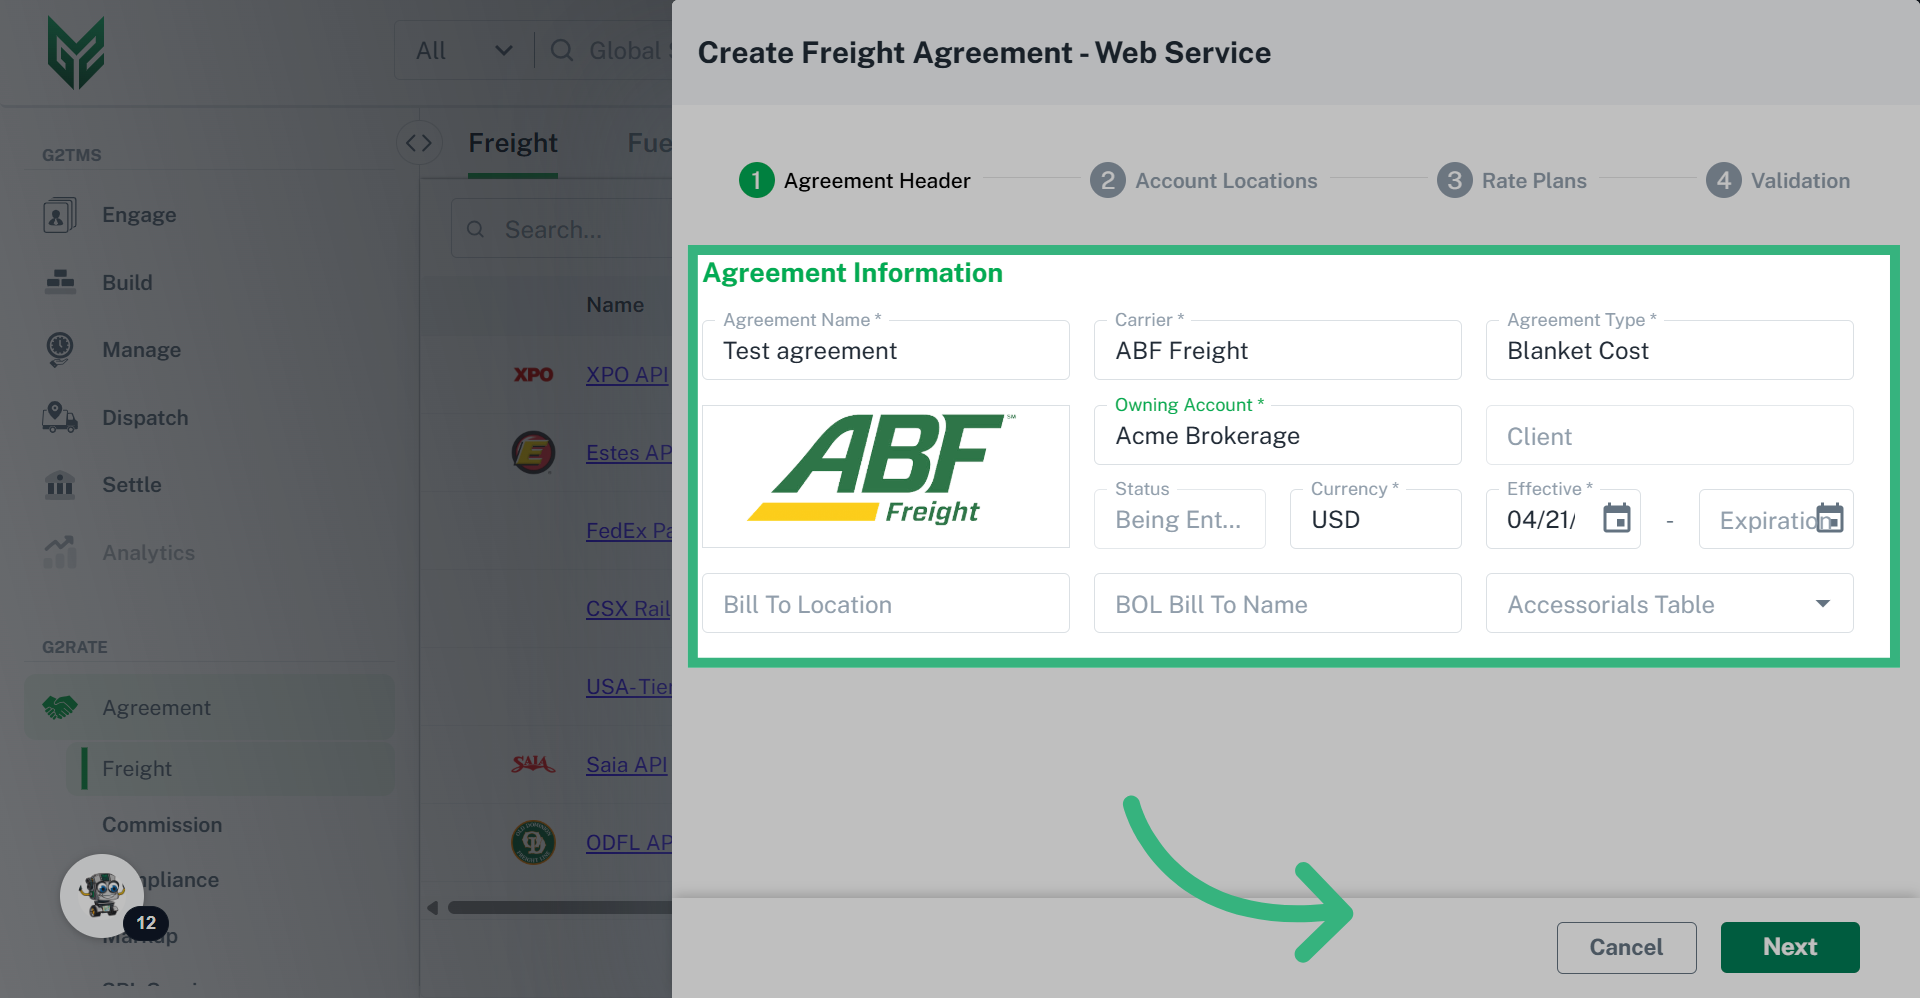
Learn how to add a new web service carrier agreement in G2mint

1. Introduction

This guide will walk you through each essential action to successfully set up your carrier agreement.
Introduction

2. Click "Agreement" then "Freight"

Navigate to the Freight option under the Agreement header.
Click 'Agreement' then 'Freight'

3. Click "Create new" then "Web Service"

Select the Web Service option from the drop down.
Click 'Create new' then 'Web Service'

4. Enter Required Information, then Click "Next"

Enter all required information including an agreement name, carrier, agreement type, and owning account, then click next.
Enter Required Information, then Click 'Next'

5. Select your available billing & shipping locations, then click "Next"

On this step, you will be able to select the locations you would like to apply these rates to. Once you have selected the locations, click next.
Select your available billing & shipping locations, then click 'Next'

6. Review critical instructions to obtain any required information, then click the check box to confirm.

Reference the critical instructions, as the requirements are unique to each carrier. Once you have obtained and entered the required information, click on the check box to confirm you have read the critical instructions.
Review critical instructions to obtain any required information, then click the check box to confirm.

7. Click "Test Service"

Click on the Test Service button which will send a test to the carrier.
Click 'Test Service'

8. Click "Next"

Once the test is complete, click next.
Click 'Next'

9. Move the shipment to "In Production" status, then click "Save"

Click on the status dropdown, and set the status to "In Production", then click "Save". The agreement is now active in the system and rates will be returned for the selected locations. If you would like to hide the rates from being displayed, you can update the status to "On Hold".
Move the shipment to 'In Production' status, then click 'Save'
This guide covered the process of adding a new web service carrier agreement in G2mint.


In the Overview section, define Plan details, such as:
    • Plan Name
    • An optional Plan Description
    • Plan dates (effective and expiration)
    • Designate whether or not the Freight Agreement is Point to Point (select checkbox if Yes). Selecting Point to Point will eliminate all “Tiered” Charge Type options.
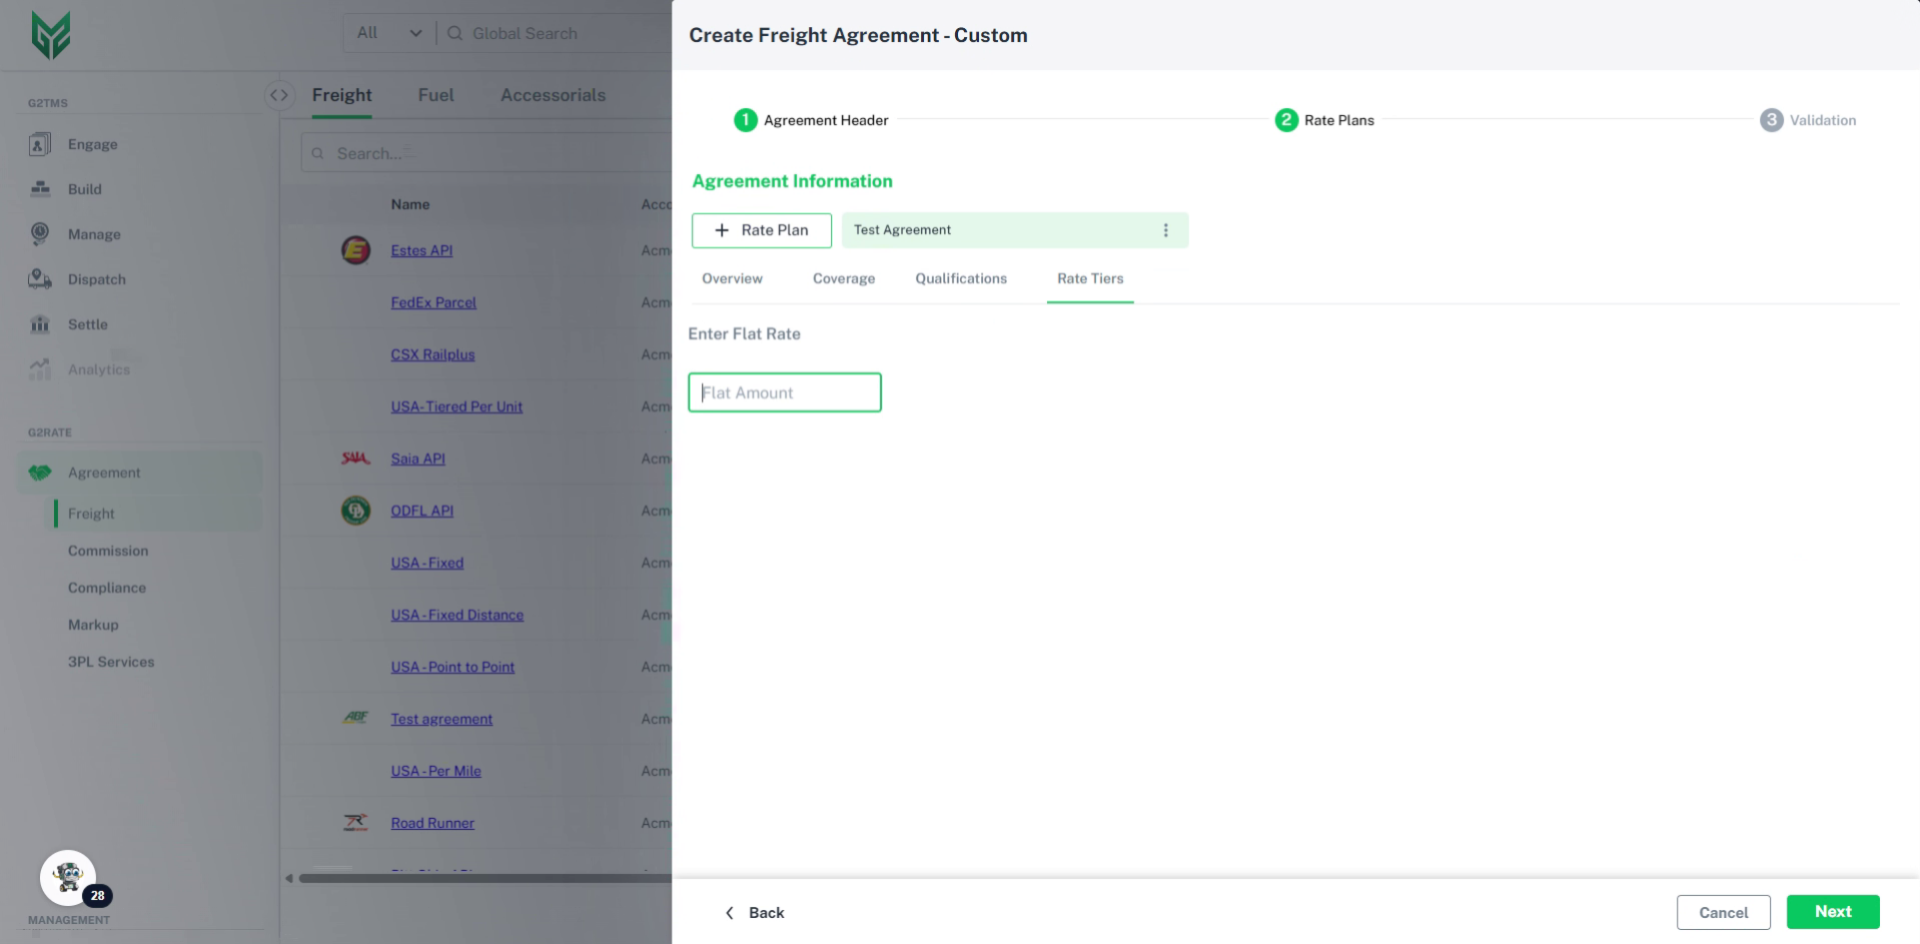
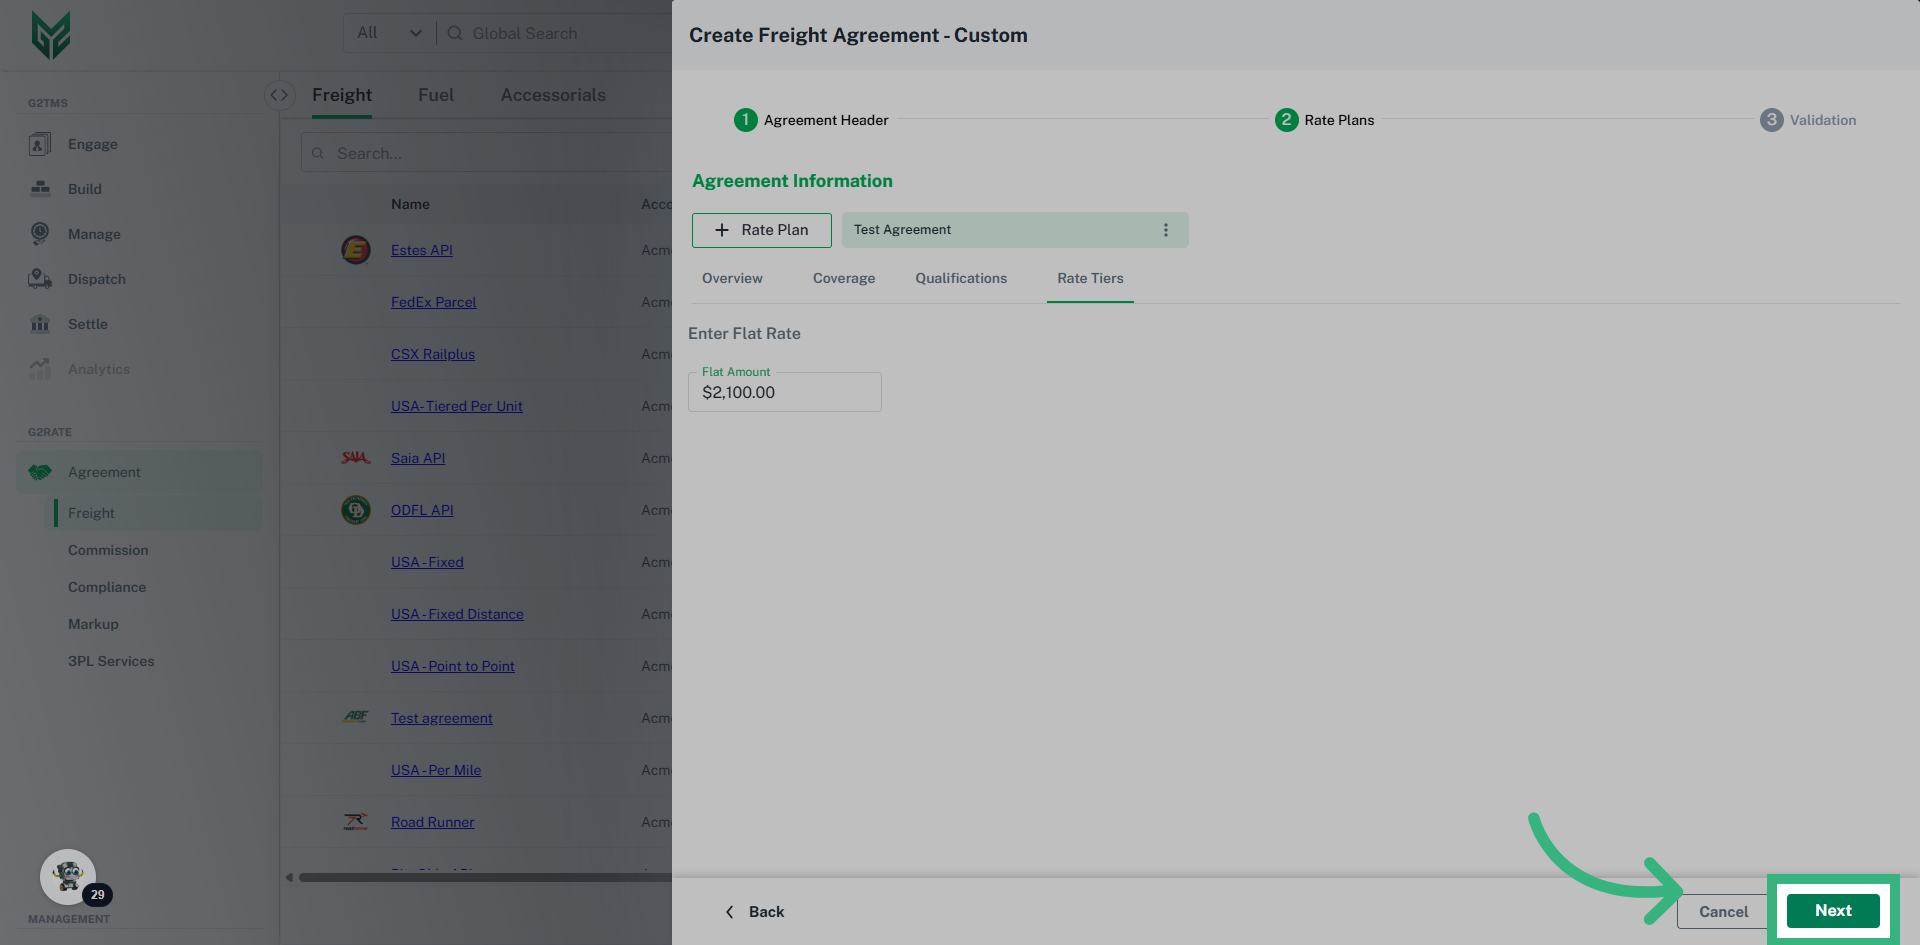
    • Determine Charge Type (fixed, tiered or by hundredth weight)
    • Unit of Measure is linked to Charge Type, and will auto populate.  If Charge Type is Handling Units, a selection must be made.
    • Determine a specific Mode for agreement (if left blank, all Modes will return rates)
    • Add specified equipment if required (created in Configuration section). If no equipment is specified in an agreement, all equipment rates will be returned
    • Add Fuel Agreements if desired (must be created in advance, or can be assigned to an existing agreement)

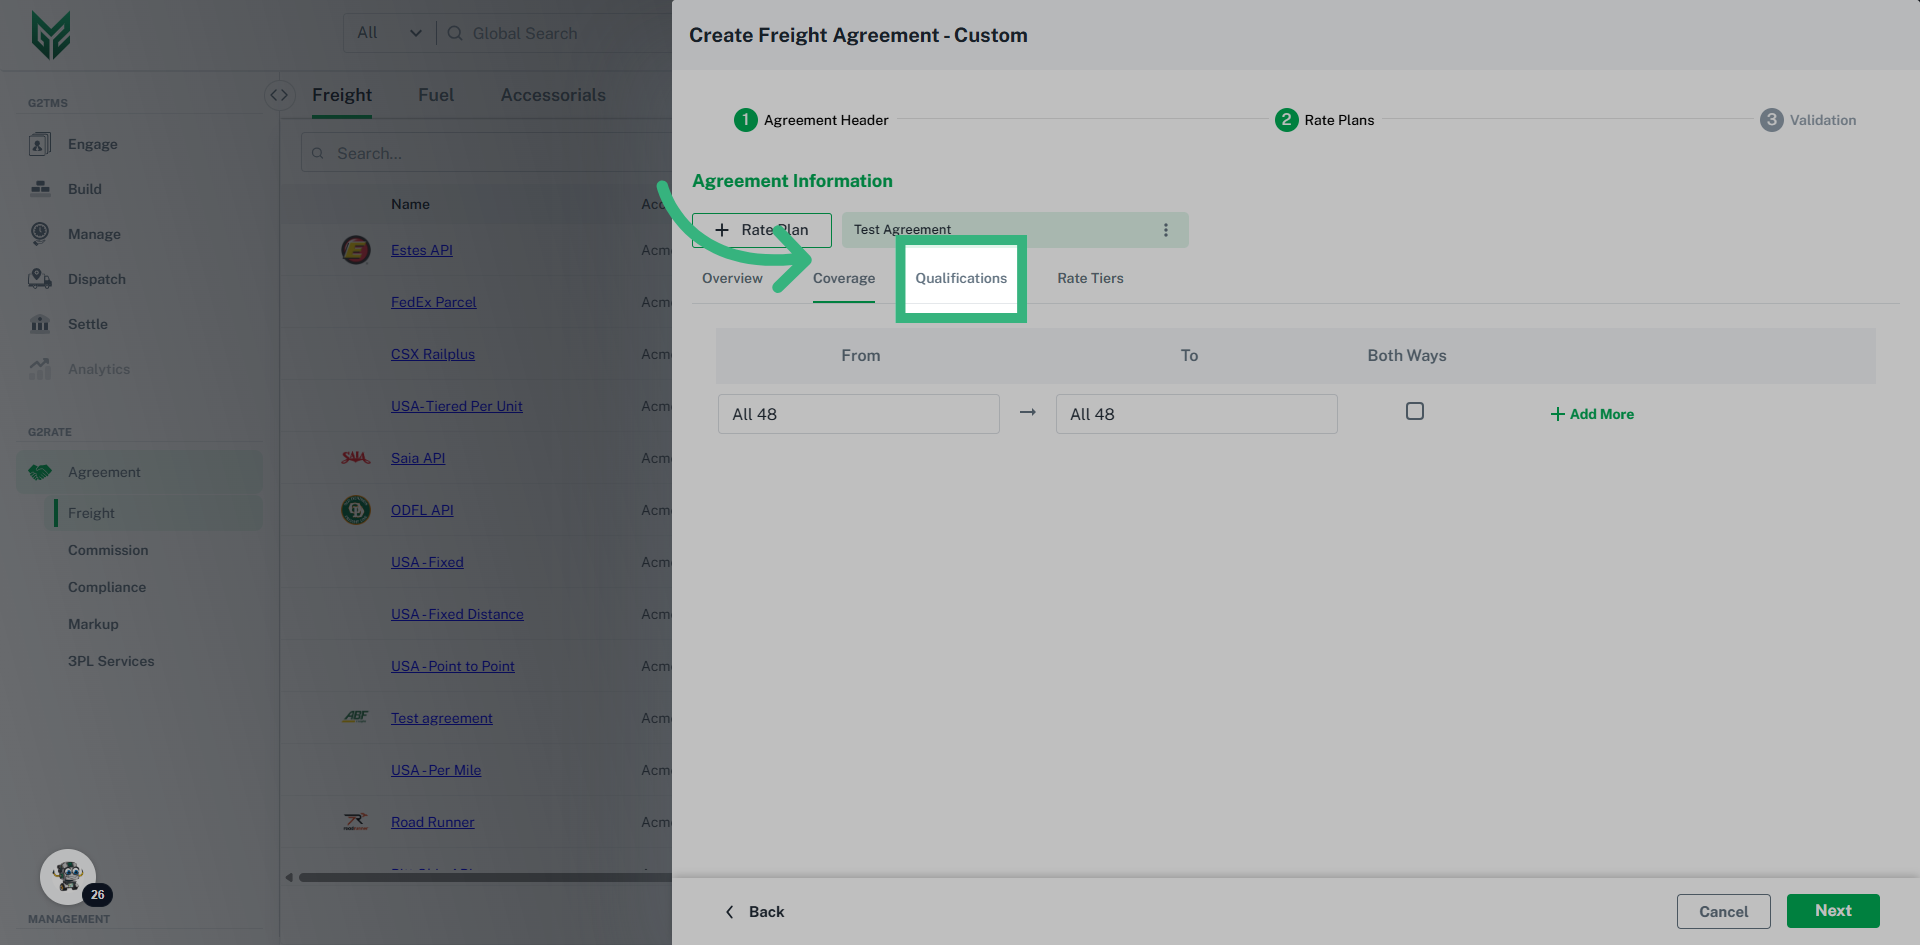
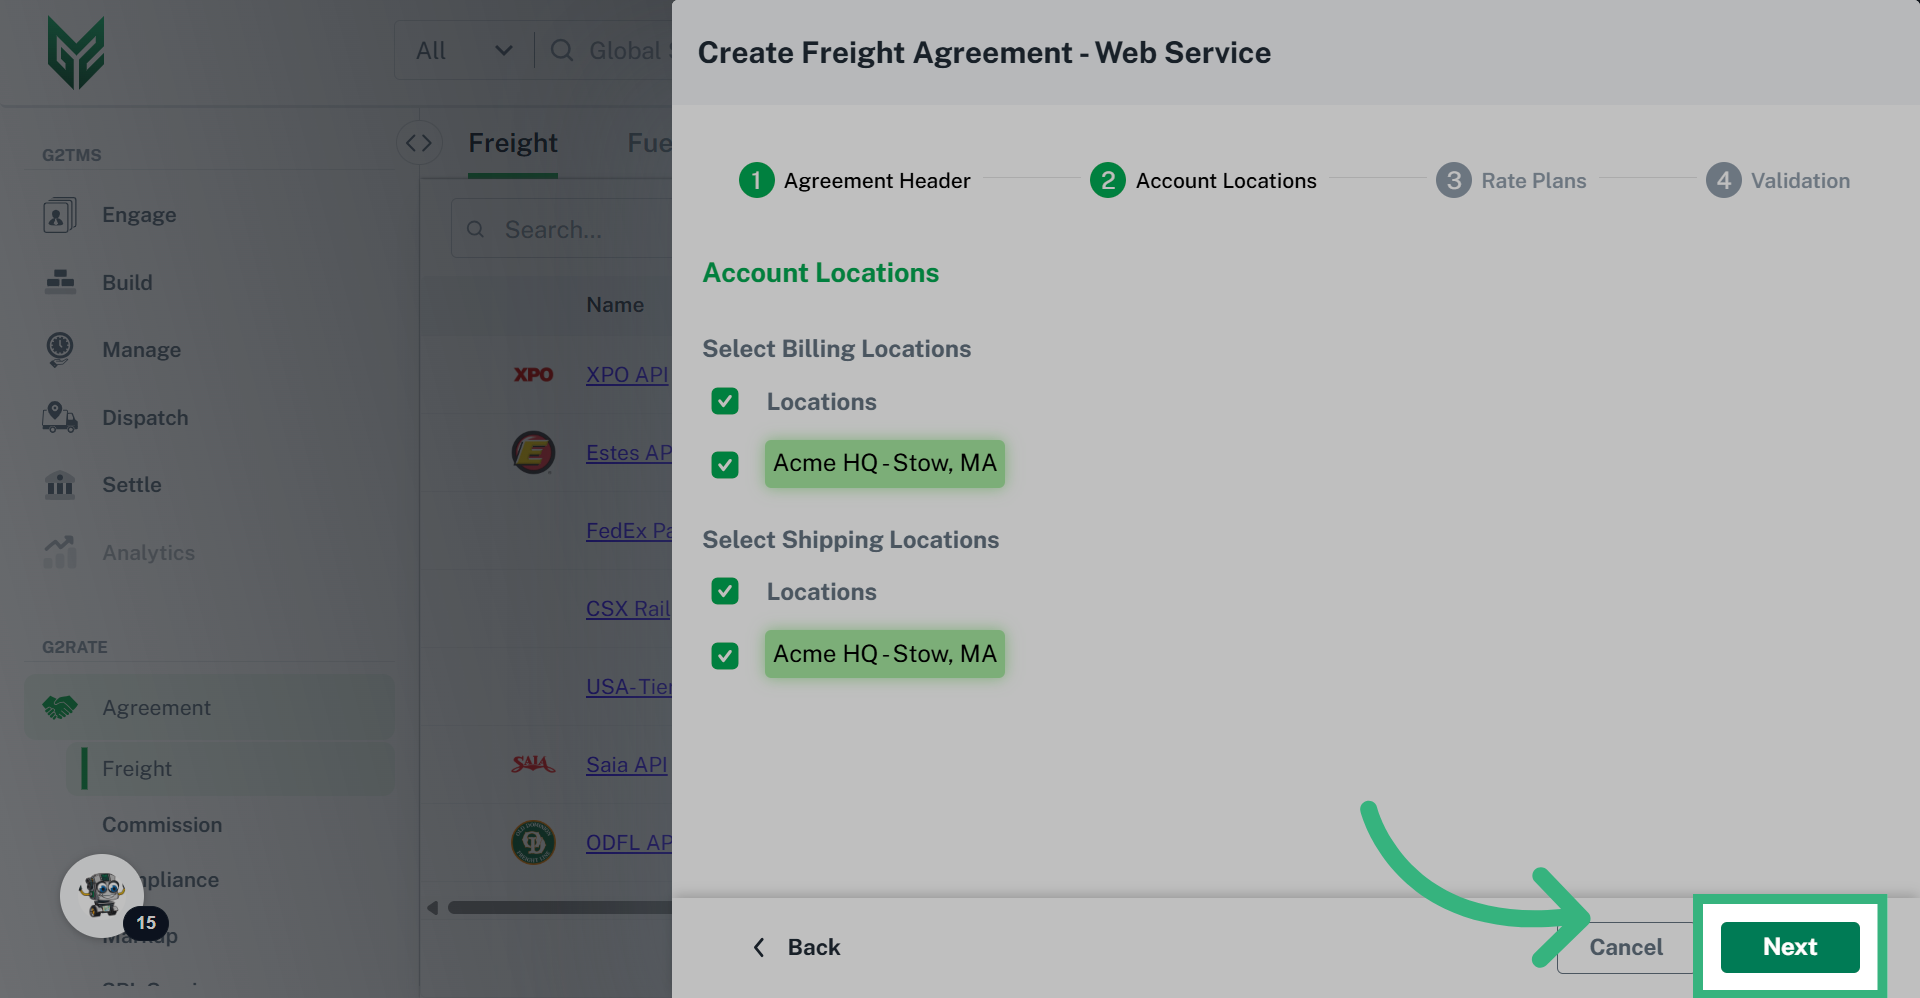
Assign necessary Coverage Area (leaving Coverage Area blank will eliminate Coverage Area as a qualifier, and return a Rate for all addresses)

Qualifications allow the User to create Min/Max limits in Weight, Handling Units Density and Stops (for example, a Rate Plan can created for 1-10 pallets, and then another created for 11-20)

Rate Tiers options will vary depending upon Charge Type selected in Overview (Fixed vs Tiered).