Last Updated: April 18, 2025
Applies to:
Shippers, Brokers, Carriers, and Partners
Common Scenario(s)/Challenge (s):
Build your company profile. Provide information about your company that will save time by removing manual entry.
Solution Overview:
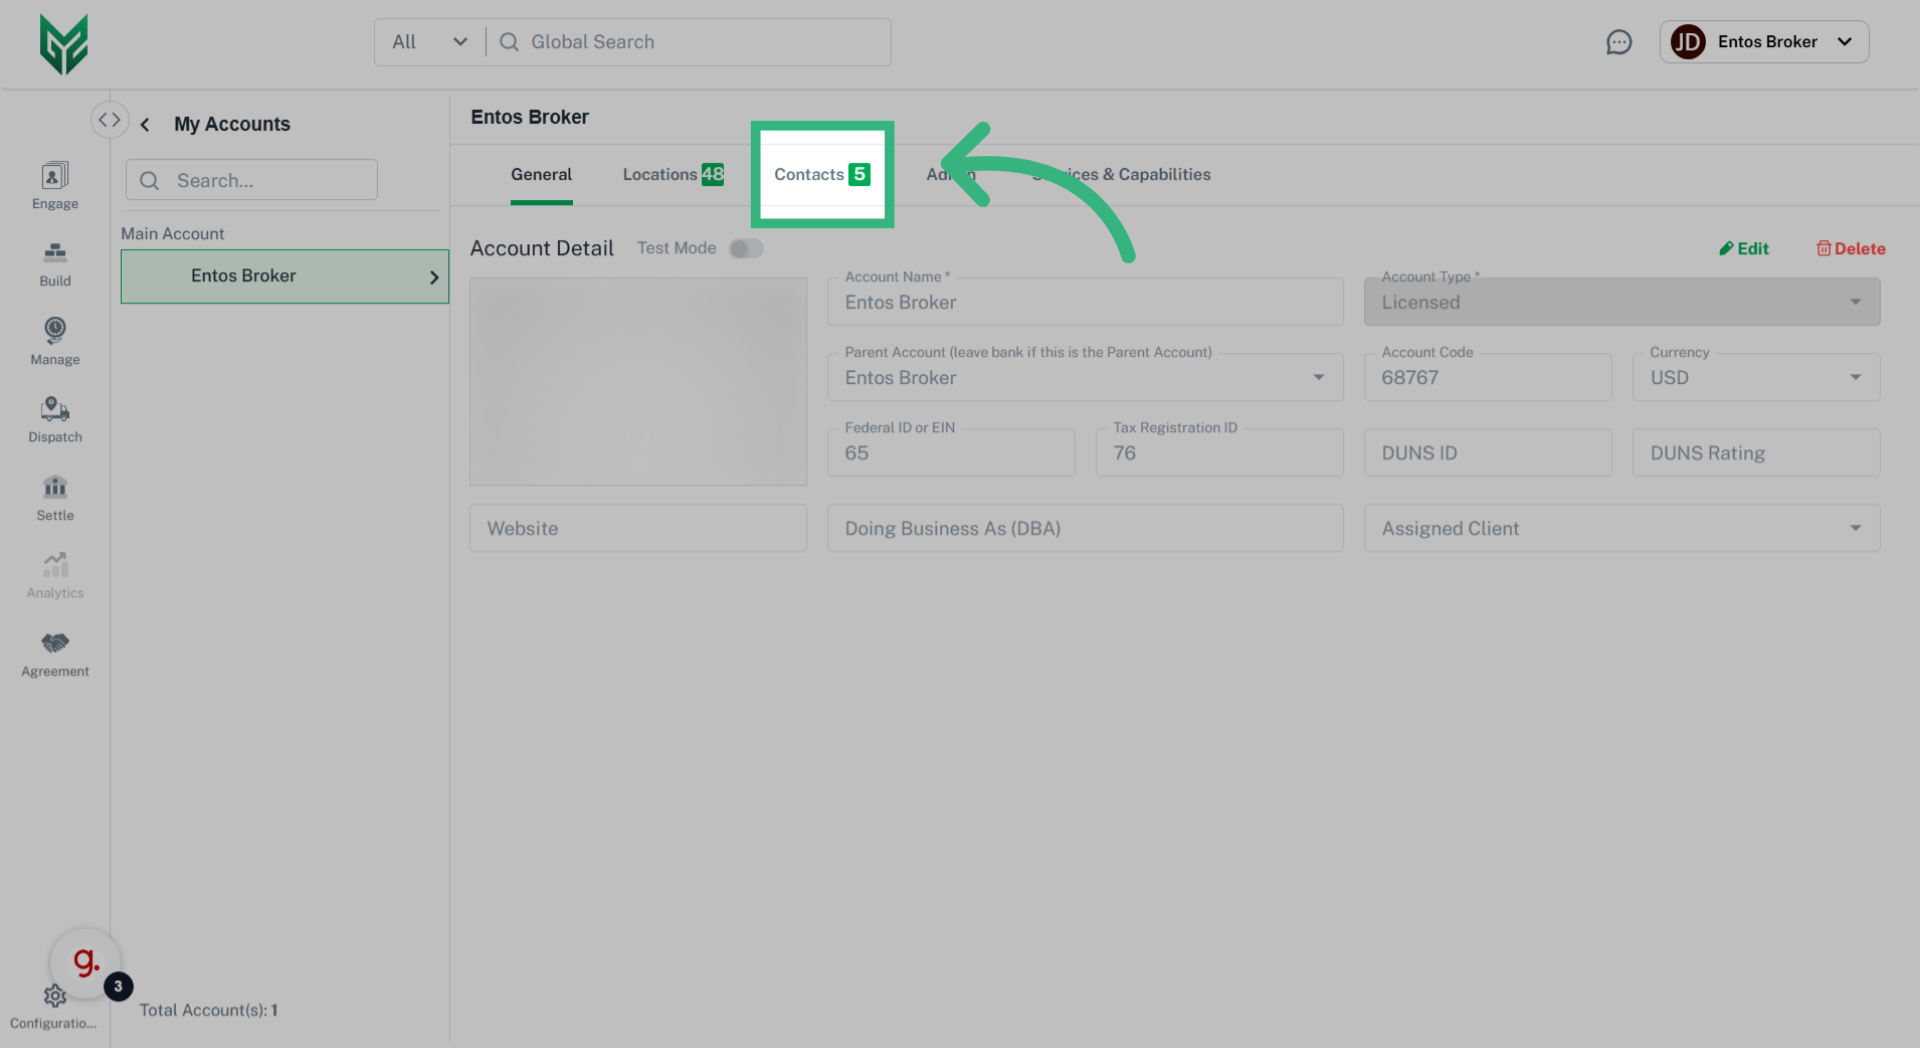
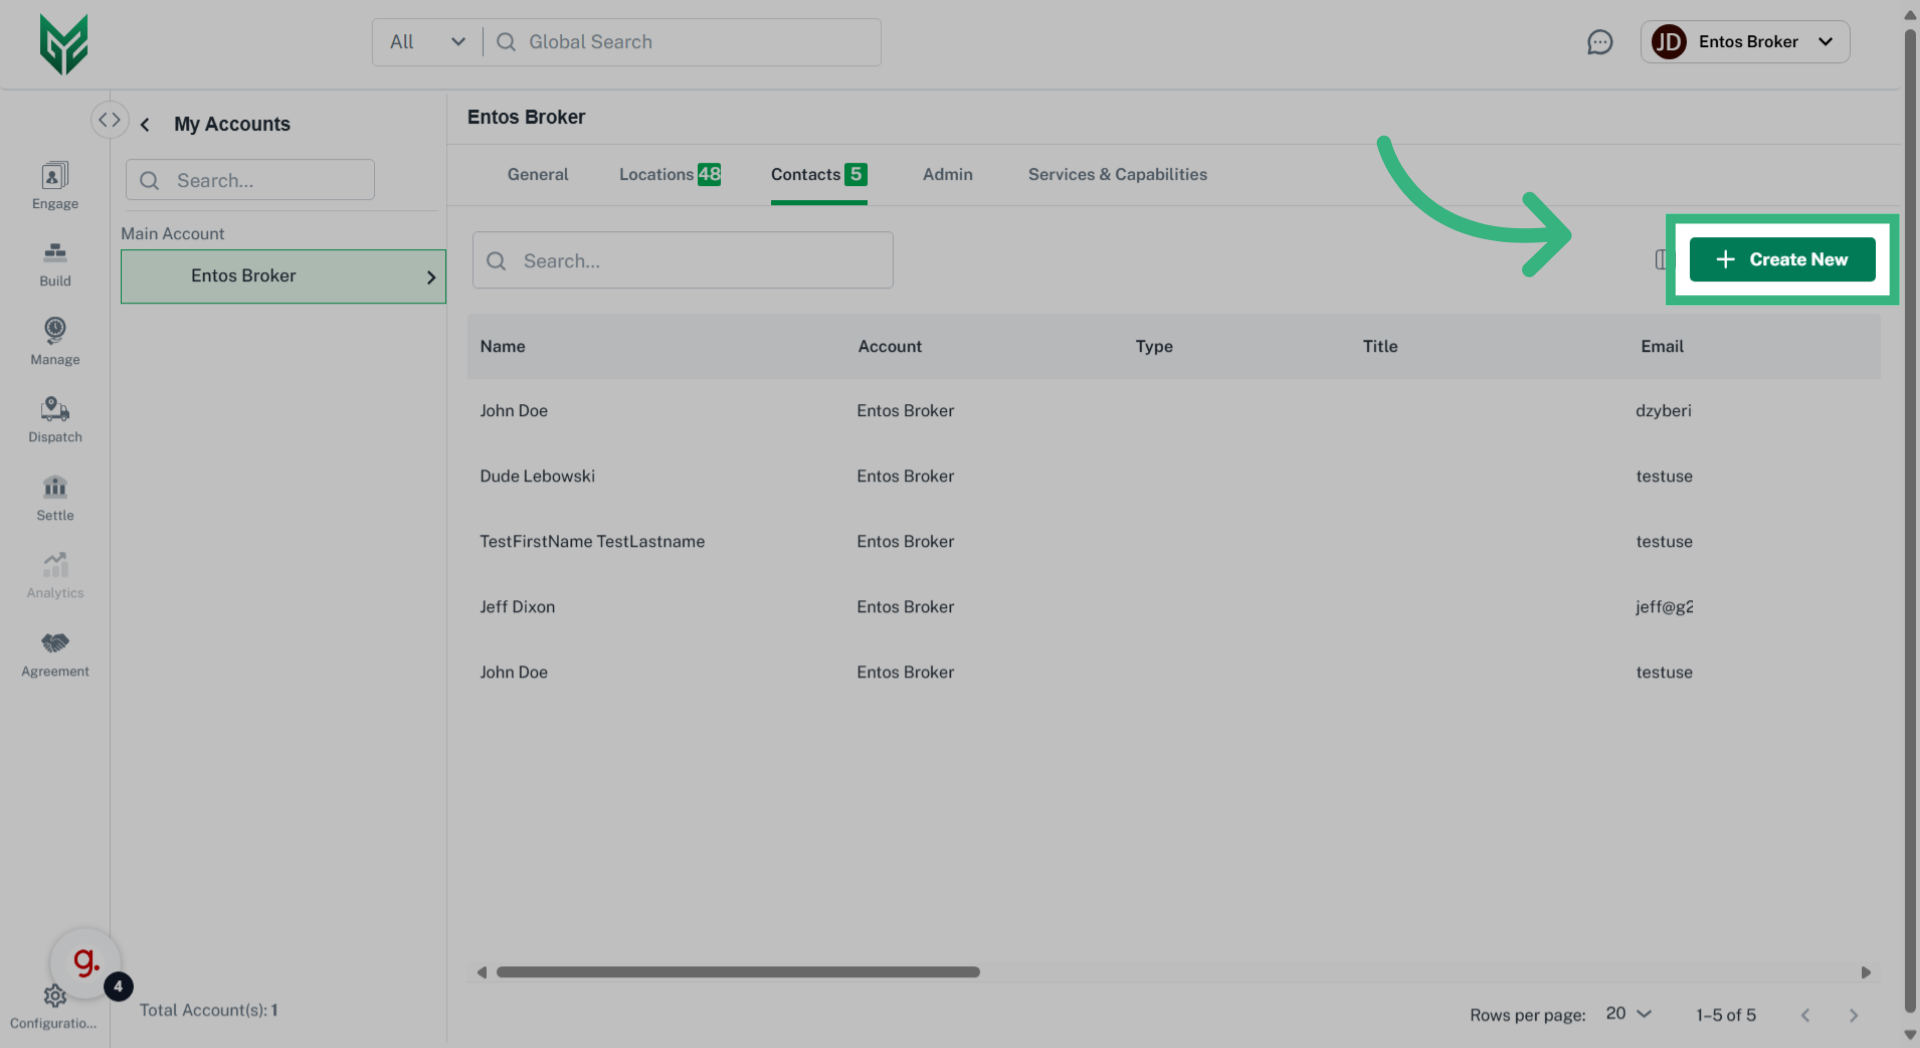
Contacts in My Account are associated with the licensed account, while external Contacts are stored as Contacts in the Engage section. Each Account will have at least one Default Contact, as assigned in this section (the initial Contact created upon login will be automatically assigned as the Default). A default Contact will appear on spot requests, tender/dispatch requests, as well as the contact that appears in the "contact" section of the Pick Up/Delivery location in Builder. An Account may have multiple assigned Contacts. Certain fields will auto-populate based on the selected action within the application. For example, if a contact is associated with a location, it will auto-populate when that location is selected for pick-up or delivery when creating a shipment. Reminder: Contacts within the My Account section are those associated with the licensed account.
Step by Step:
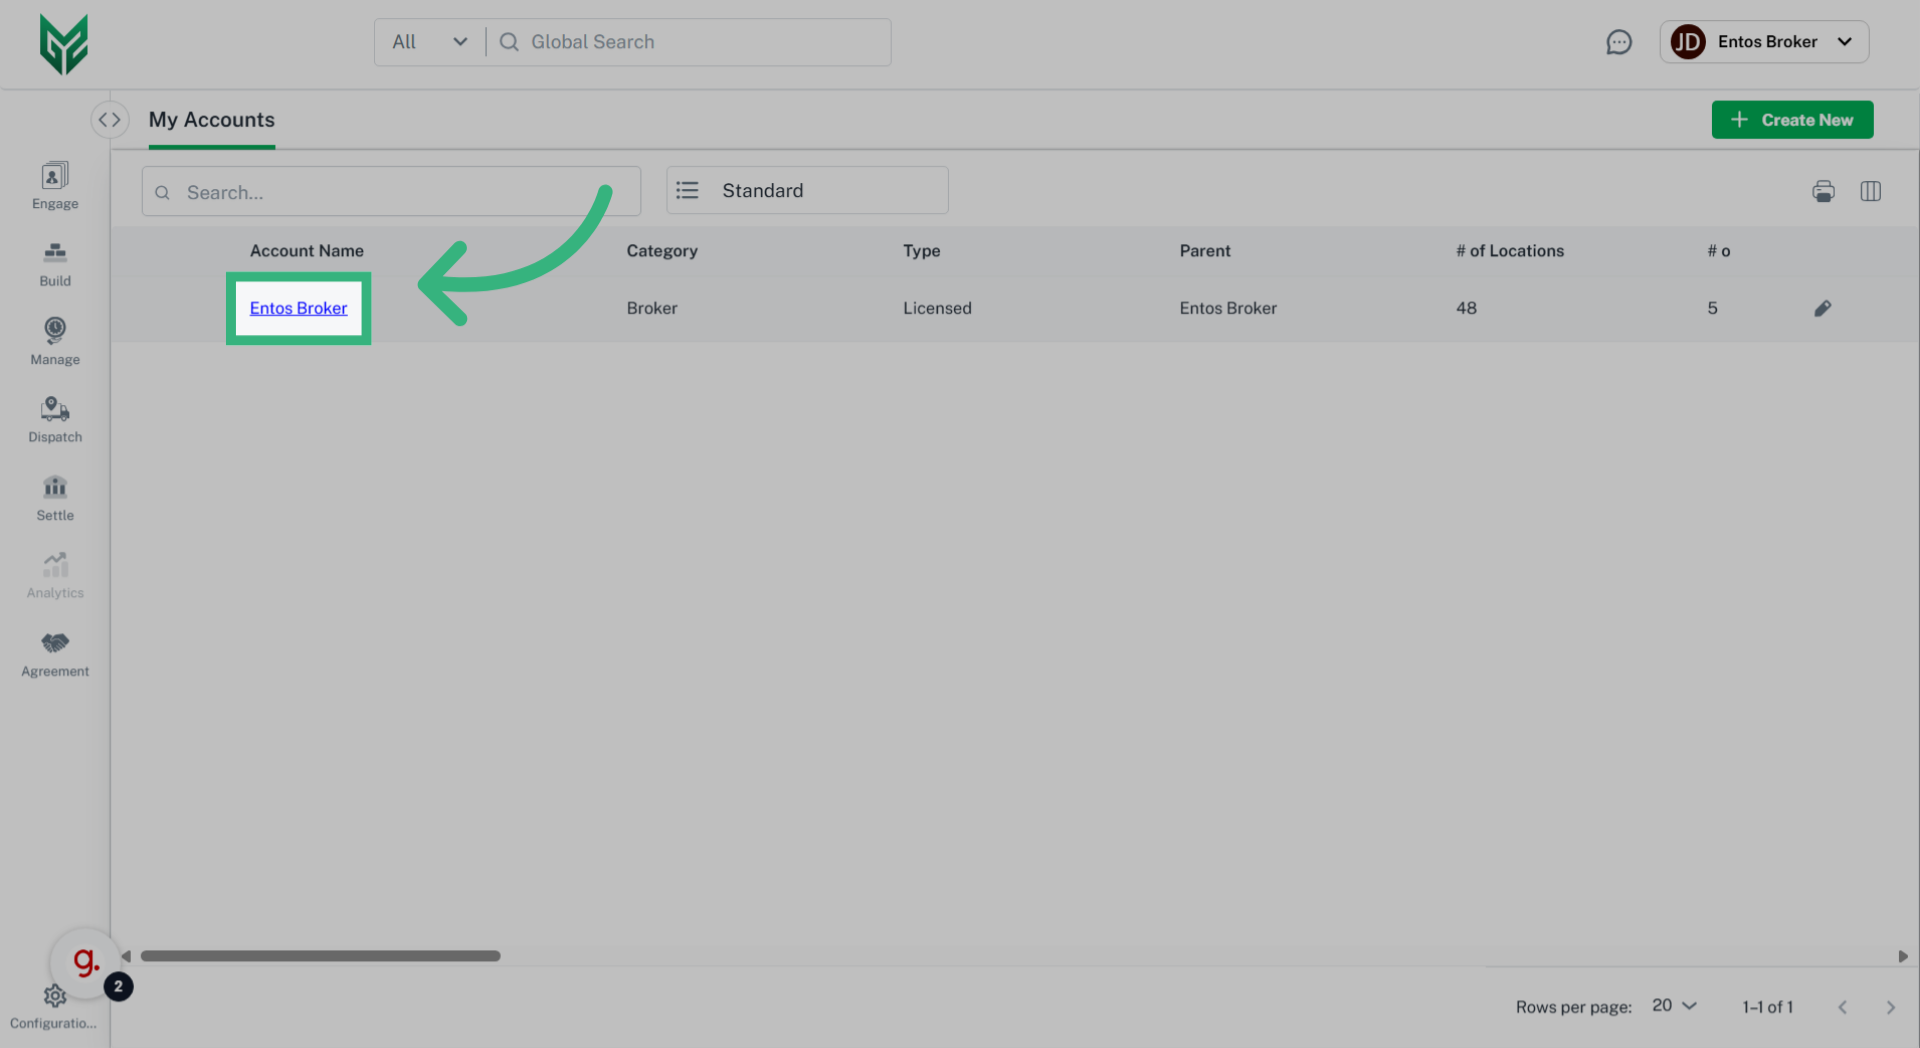
The Account setup is created with your initial login through a provided link. This will create the initial account Contact, who will automatically be the Default Contact. Additional Contacts can be added through these steps. 

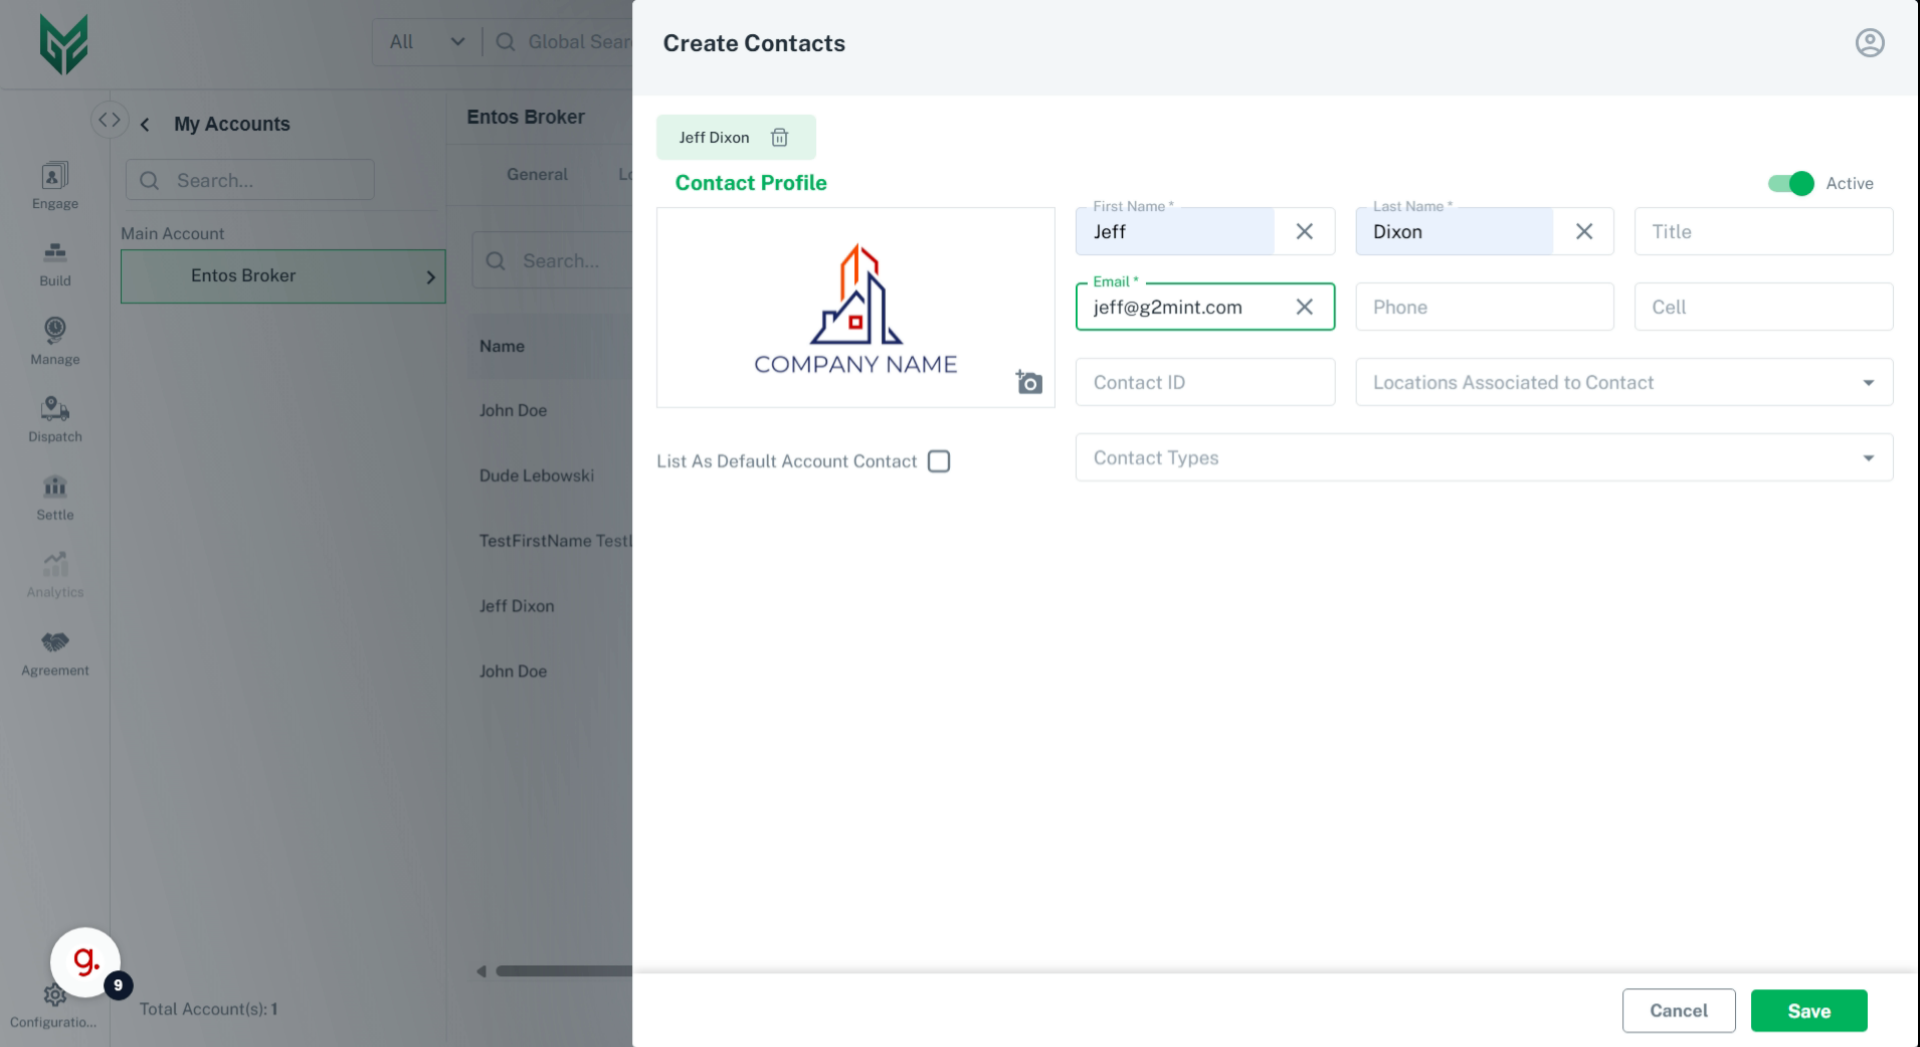
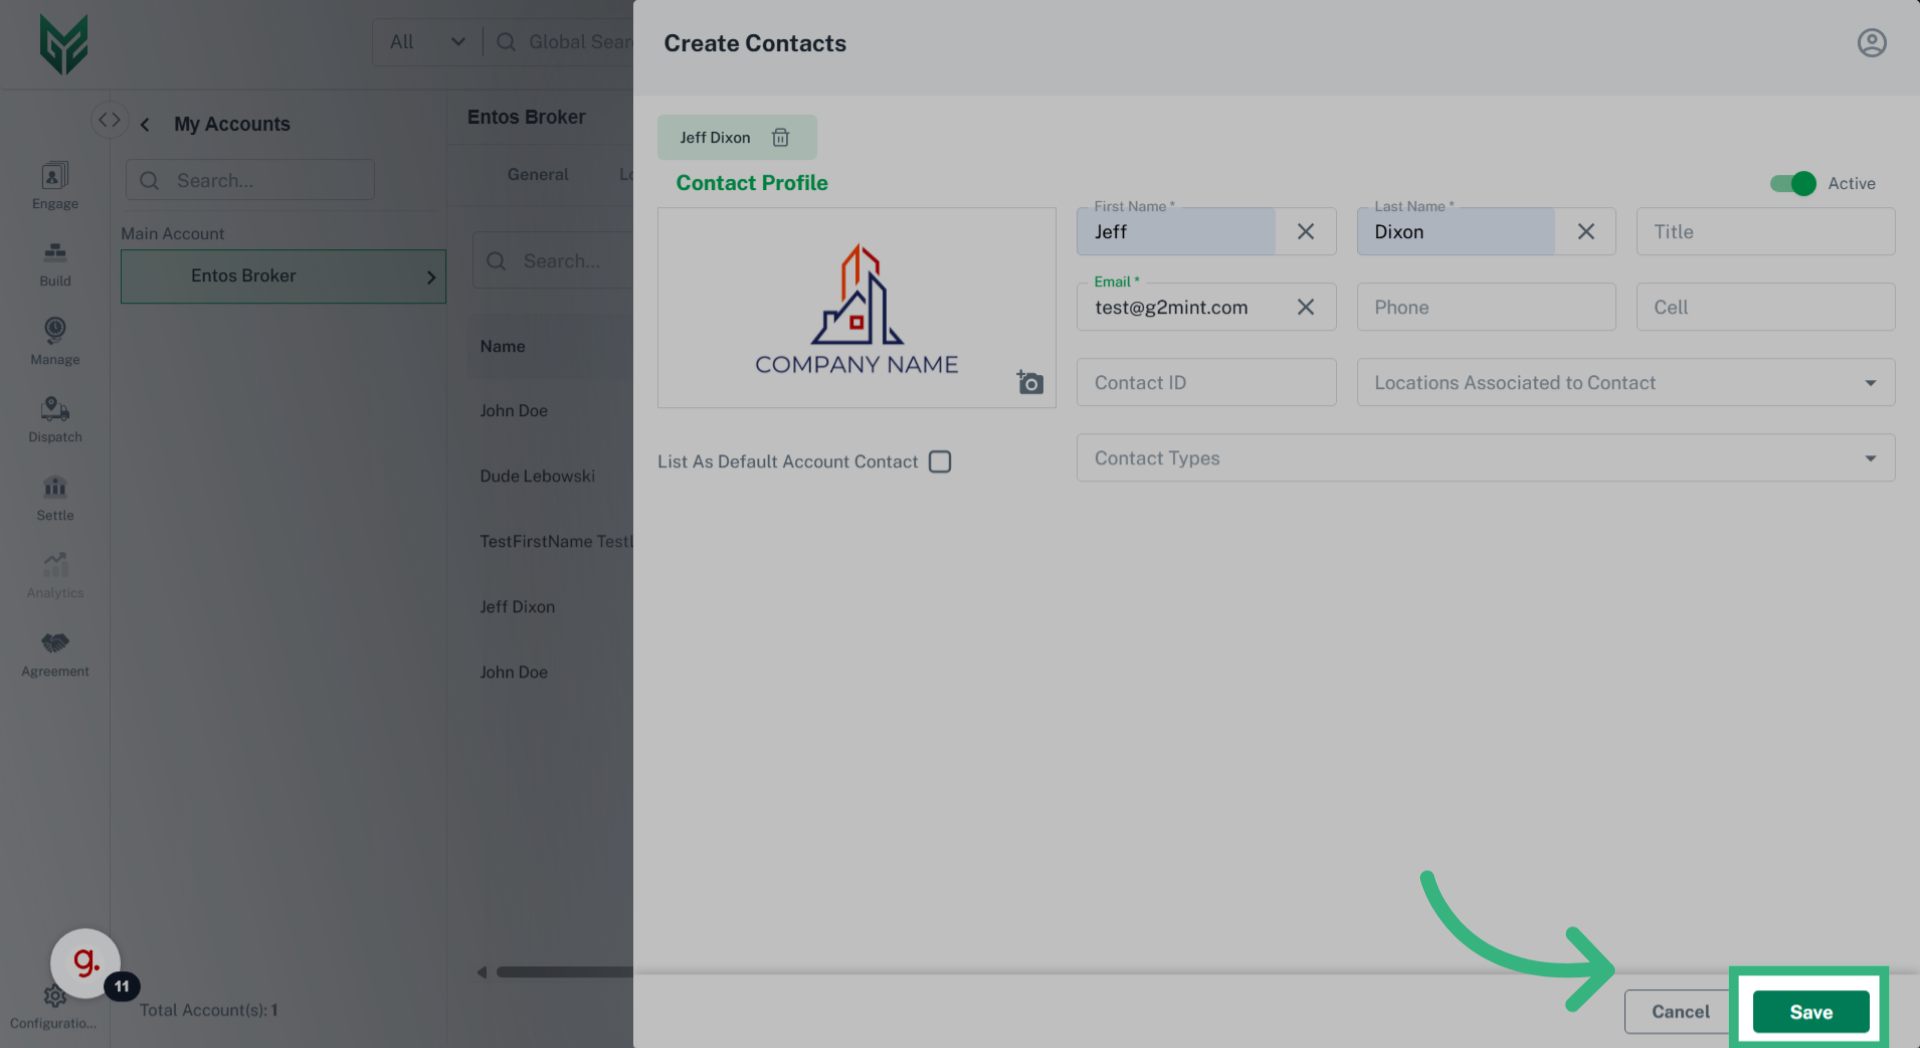
Contact Fields
Name*: Provide First and Last Name of Contact (required)
Title: Assign a specific Title to a name that will show up on Documents assigned to this Contact
Email*: Ensure the best email is utilized to receive necessary correspondence, particularly important for spot/tender requests, as well as other correspondences.
Phone/Cell: Provide best method of contact and will populate on documents utilizing this Contact
Contact ID: Record any internal Contact IDs here
Locations Associated to Contact: A contact can be assigned to a specific Location within your Account (or multiple). For example, if a Contact is an Admin for 1 Location, select the Location here, then select Admin in Contact Types
List as Default Account Contact: The Default Account Contact is notified when no other Contact is assigned to that correspondence. For example, if there is no Tender/Dispatch Contact assigned, the Default Contact would be notified. The first created Contact for an account is automatically the Default Contact, unless otherwise edited.
Contact Types: Contact Types determines workflows, not permissions. For example, if a Contact is assigned Spot Contact, they would receive all Spot notifications. If no Spot Contact is assigned, the Default Contact would receive the notification.