Last Updated: 9/1/2025
Applies to: Shippers
Step by Step:
- Add Users within your organization
- Note: This feature is not available for free trial customers. Contact sales@G2mint.com for more information.
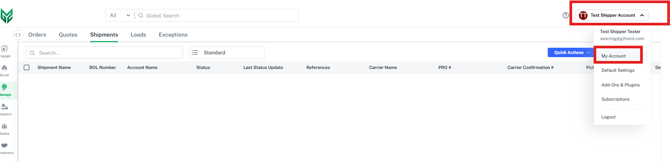
- Add your shipping locations by going to the My Account section of the application in the top right. Select Account Name>Locations>+ Create New.
- If you only have 1 location and it was entered in at the time of registration then you've already completed this step!
- If you only have 1 location and it was entered in at the time of registration then you've already completed this step!
- Connect your Carrier Agreements. This will enable you to rate shop all of your carriers in one place and send tender/pick up requests to your desired carriers.
- Freight Agreements- Webservice is where you would connect your web enabled LTL and Parcel carrier accounts within G2Mint to pull in your contracted rates.
- Freight Agreements- Custom is where you would enter a customized agreement that you have that is not an API connection
- Engage Accounts is where you can add any carriers you wish to send spot quotes (typically TL Carriers).
- Create your Address book to simplify shipment creation
- Add specialized configurations (Handling Units, Equipment, Commodities, etc.) to save time and decrease potential errors when building quotes or shipments. Standard HUs, Equipment and Commodities are pre-loaded into the system.
- Build your first Quote to compare rates or build/rate your first Shipment and simply select Tender/pick up.
Click here or email sales@g2mint.com if you are a Free Trial customer looking to upgrade or discuss additional features G2Mint can provide.